Why AI will never replace Interior Designers

Let's talk about AI. AI has taken the world by storm in so many areas of our life, including our homes with AI mood boards, AI floorplans, AI shopping lists, even AI “designers". While these tools can be helpful to visualize what your home could look like, there’s a growing misconception that AI might eventually replace interior designers altogether. But here’s the truth: AI can assist, but it cannot replace the human touch, creativity, knowledge and expertise that Interior Designers bring to a space. AI can generate a beautiful picture, but it has no understanding of how a space is used or how people move through it, structural limitations, correct & safe material applications, lighting conditions, building code & city bylaws, or plumbing & electrical requirements.

What AI does not know

The list goes on and on. One of the most important parts of an Interior Designer’s role is working with contractors, trades, and vendors. We ensure contractors execute the vision correctly, solve on-site challenges in real time, & keep projects on schedule and budget. AI cannot go on site, coordinate teams, or make judgment calls when things inevitably go off plan, and let's be honest they almost always do, it is the nature of construction.

Let me be clear, I am not completely anti AI. It can absolutely be a helpful tool. It can help with a simple decorating or furnishing project to get you excited, but then you are still left to your own devices to source these items, ensure the furniture layout & flow is correct for your space, find the best pricing, coordinate the deliveries, check for damages, unpack & place the items and decorate. Also it is important to note that this is the role of an Interior Decorator, although Designers also decorate, but decorators do not design. AI can show you a nice idea, but Interior Designers create real solutions, on the fly changes and well thought out designs curated to you and your family.

I will admit that I am protective of the design community. We have worked hard with our training, degrees and industry knowledge to provide not only a service, but a personalized experience for our clients. Interior Design offers a luxury experience by combining expert guidance, curated selections, and flawless execution to create a home that is uniquely yours

Want to know more about how an Interior Designer can help? We would love to chat !

Modern vs Contemporary Design Style

While modern and contemporary are two styles of interior design with similarities, they have significant variations. Having this distinction, it is possible to better navigate the process of choosing what exactly to do in home decoration.

Defining Modern Design

It has existed since the early to mid-20th century when the world tended to depart from Victorian decorative styles. The hallmarks of modern style are sleek, plain, subdued, practical, and generally low on adornment.

Some essential qualities of modern design include:

Defining Contemporary Design

Modern style Desingn

Contemporary styles emerged alongside modern designs but with more emphasis on eclectic styles. Like the modern style of architecture, contemporary is characterized by clean, minimalist aesthetics, primary importance on neutral colors, and a focus on function – but deviates significantly from modernism in the way it treats form, shape, and uniqueness.

Critical qualities of contemporary design:

The Similarities of Both Styles

Modern and contemporary share an emphasis on:

Minimalism

Both styles include using vast public area, oversized windows, lack of decoration and graphic simplicity. Plain and bare is what the aesthetic of your home should be and they don’t possess anything that is not significant and practical.

Neutral Schemes

It looks best for those who prefer bright accessories as whites, grays and black are versatile in any of the presented styles. They arrange beautiful, quiet spaces.

Furniture Functionality

Essential features of both styles are that they are practical and mobile furniture for flexible use. Disc converts over time as do sectional sofas, ottomans and other convertible pieces.

Contrasting Characteristics Inherent between both Styles

While modern and contemporary share some significant picture values, divergences emerge in: 

Openness to Color

Modern percusses colors, contemporary embraces vivid and bright notes even if everything is monochromic.

The modern favors rectilinear, -box like shapes; the contemporary has the geometrical lines with irregular shapes, angles.

Individualistic Expression

Modern style therefore desires generic, open, and accessible objects; while contemporaries enjoy singular, individually produced objects with personality.

Interior Design

Interiors combine these styles depending on owner’s preferences, specific spaces and vision of designers in practice. An example of an integrated design concept based on the current principles might include using some pieces of modern-style furniture or paintings.

Applying the Modern or Contemporary Style

Modern Materials

Some essential materials that align with modern and contemporary aesthetics include:

Contemporary Textures

Mixing sleek and soft textures creates depth in contemporary interiors through:

- Shearling throws

- Velvet pillows

- Natural fiber rugs

- Brushed metals

Modern Color Choices

Color schemes adhere to a simplified, neutral modern palette:

- Black

- White 

- Gray

- Tan

- Off-white

Contemporary design

Contemporary design welcomes vibrant accent colors like:

- Chartreuse

- Sapphire blue

- Emerald green

- Crimson red

No matter the style, well-designed spaces share common principles:

- Consistent color flows

- Cohesive material mixes

- Repeated design motifs

- Combined sizes of furnishings proportional to the sizes of the rooms they furnish.

These design and create comprehensive element, integration, and cohesiveness, which are home-like and adaptable to a homeowner’s daily schedule.

How to refinish an MCM dresser


In recent years, Mid-Century Modern (MCM) furniture trends have continued to evolve, blending the timeless appeal of classic designs with contemporary twists. Characterized by clean lines, organic forms, and a blend of both natural and industrial materials, MCM furniture evokes a sense of sophistication and simplicity. MCM furniture trends remain at the forefront of interior design, offering a perfect balance of style, functionality, and sustainability. Lucky for us DIY'ers and lovers of classic, quality furniture, MCM furniture is often found at thrift stores, estate sales and on Facebook Marketplace for cheap and often free.

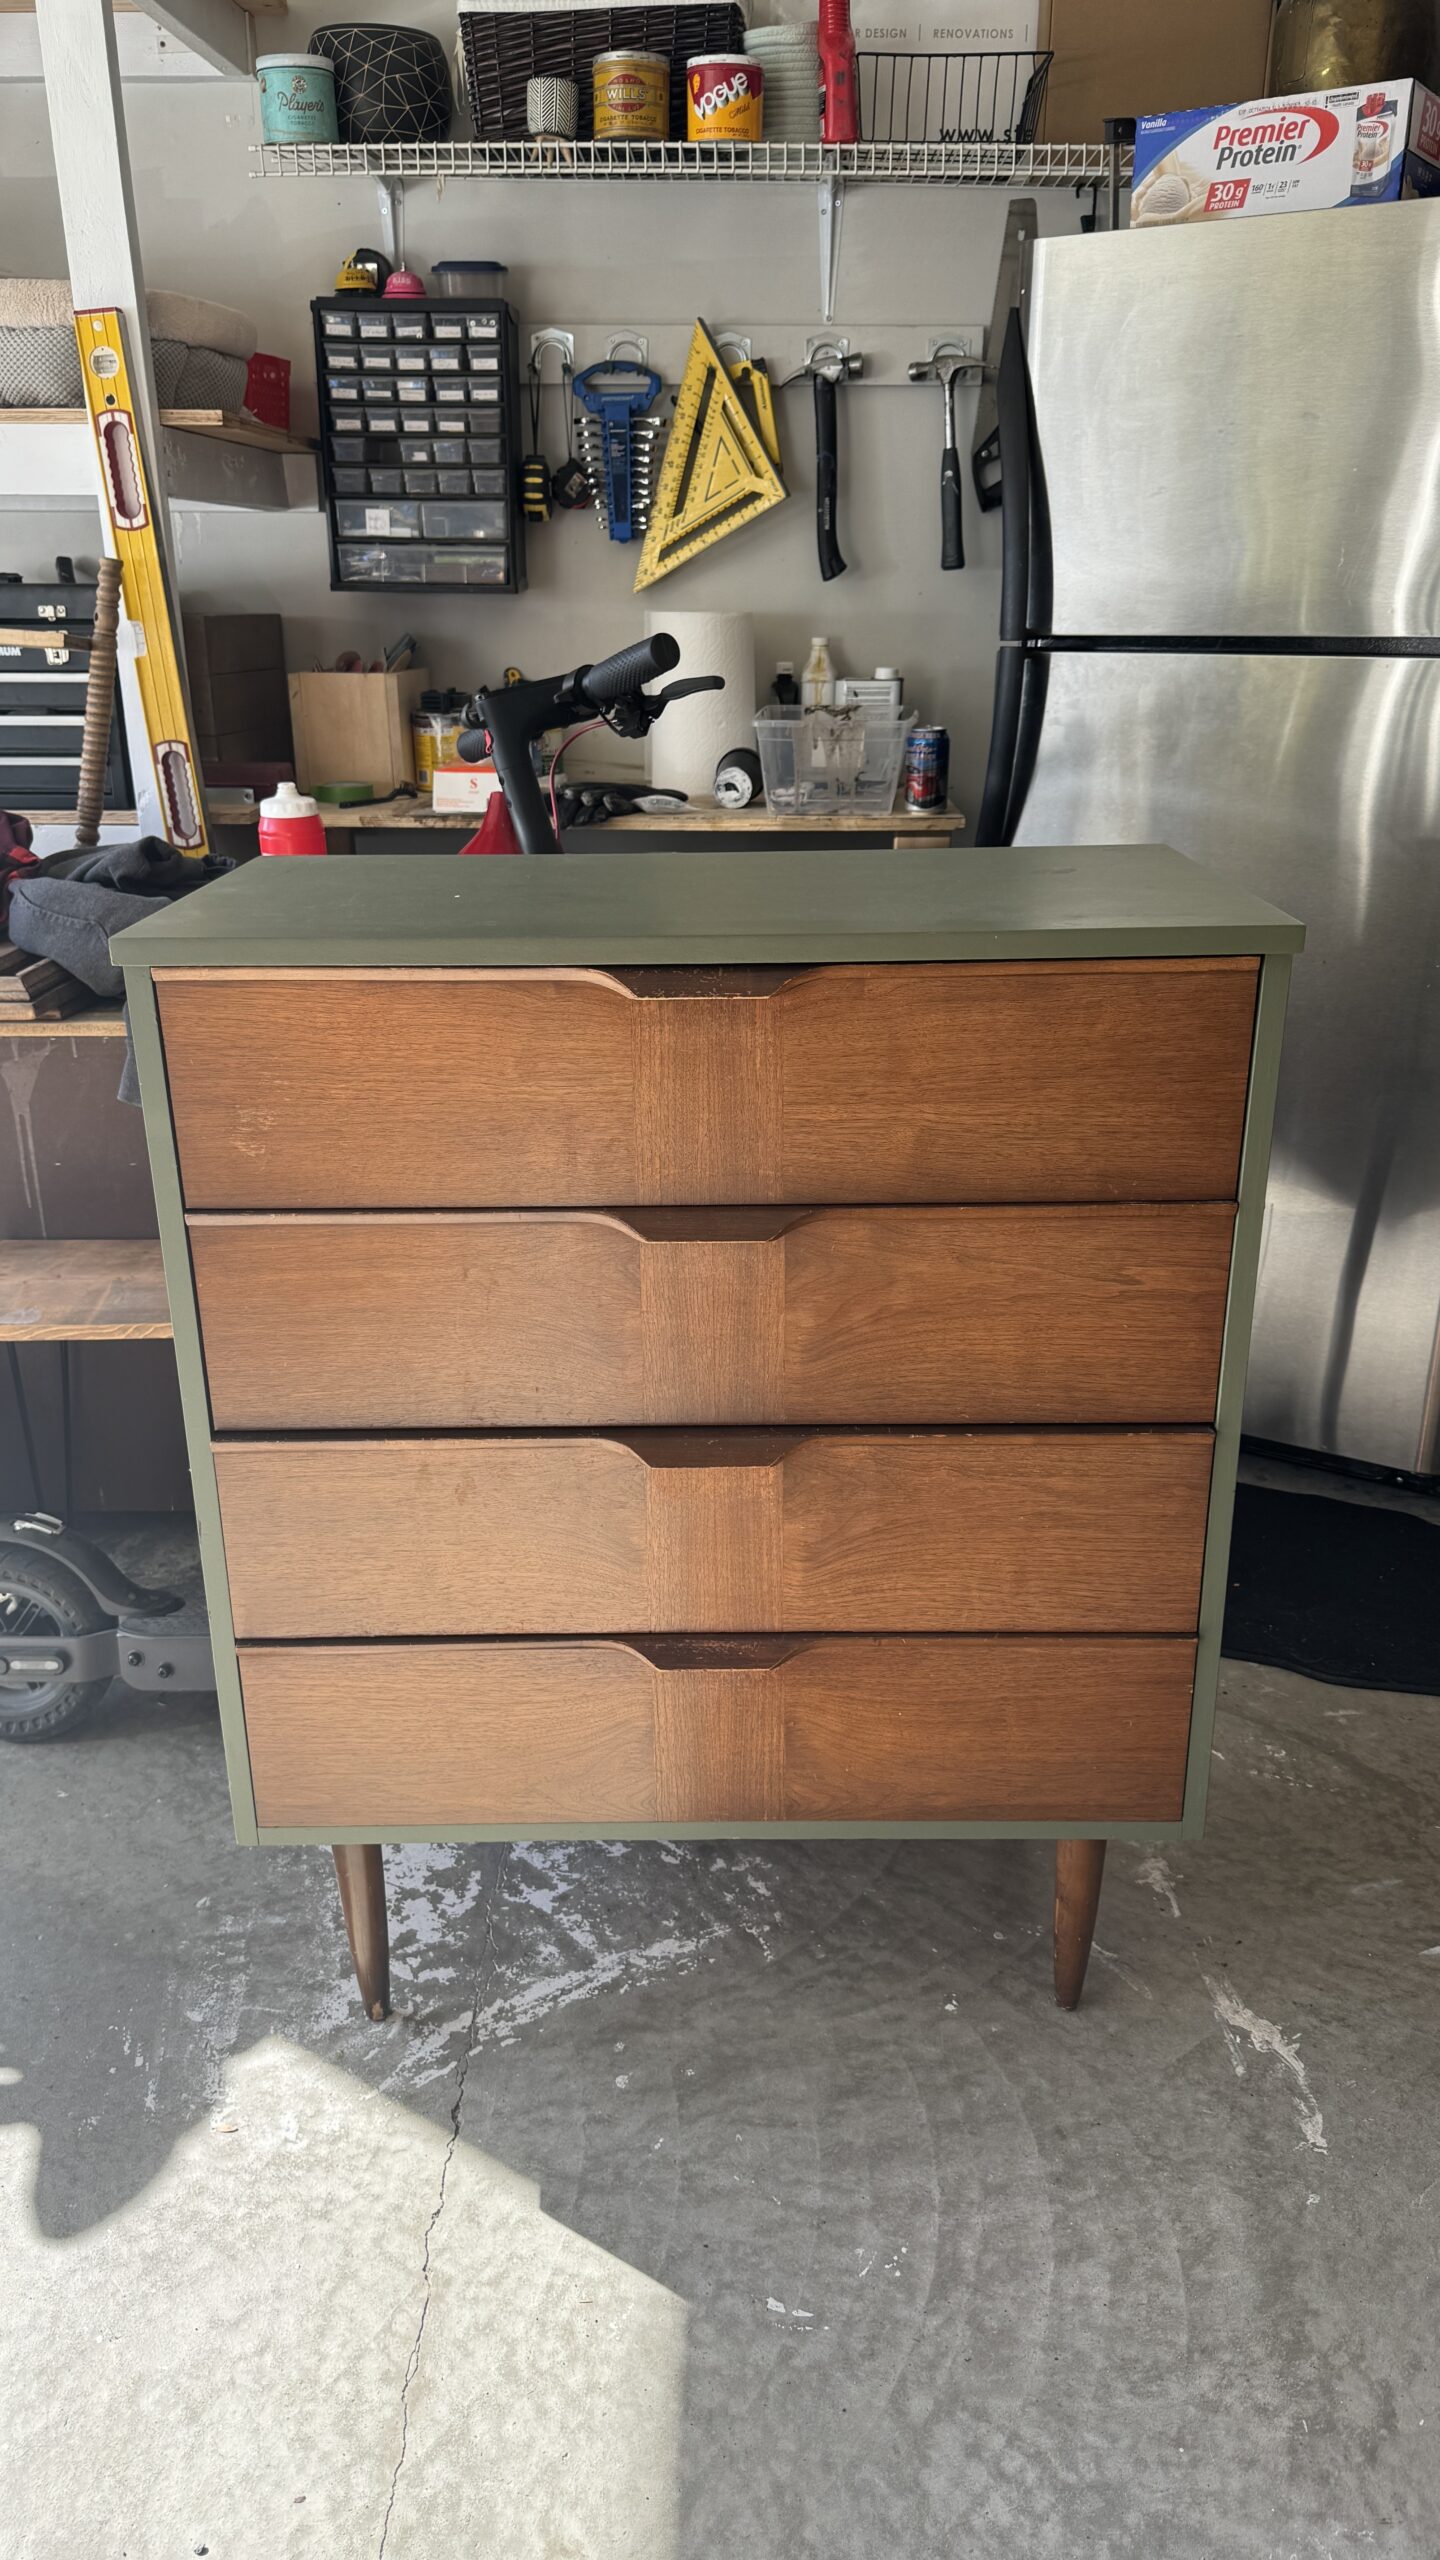
The Before...

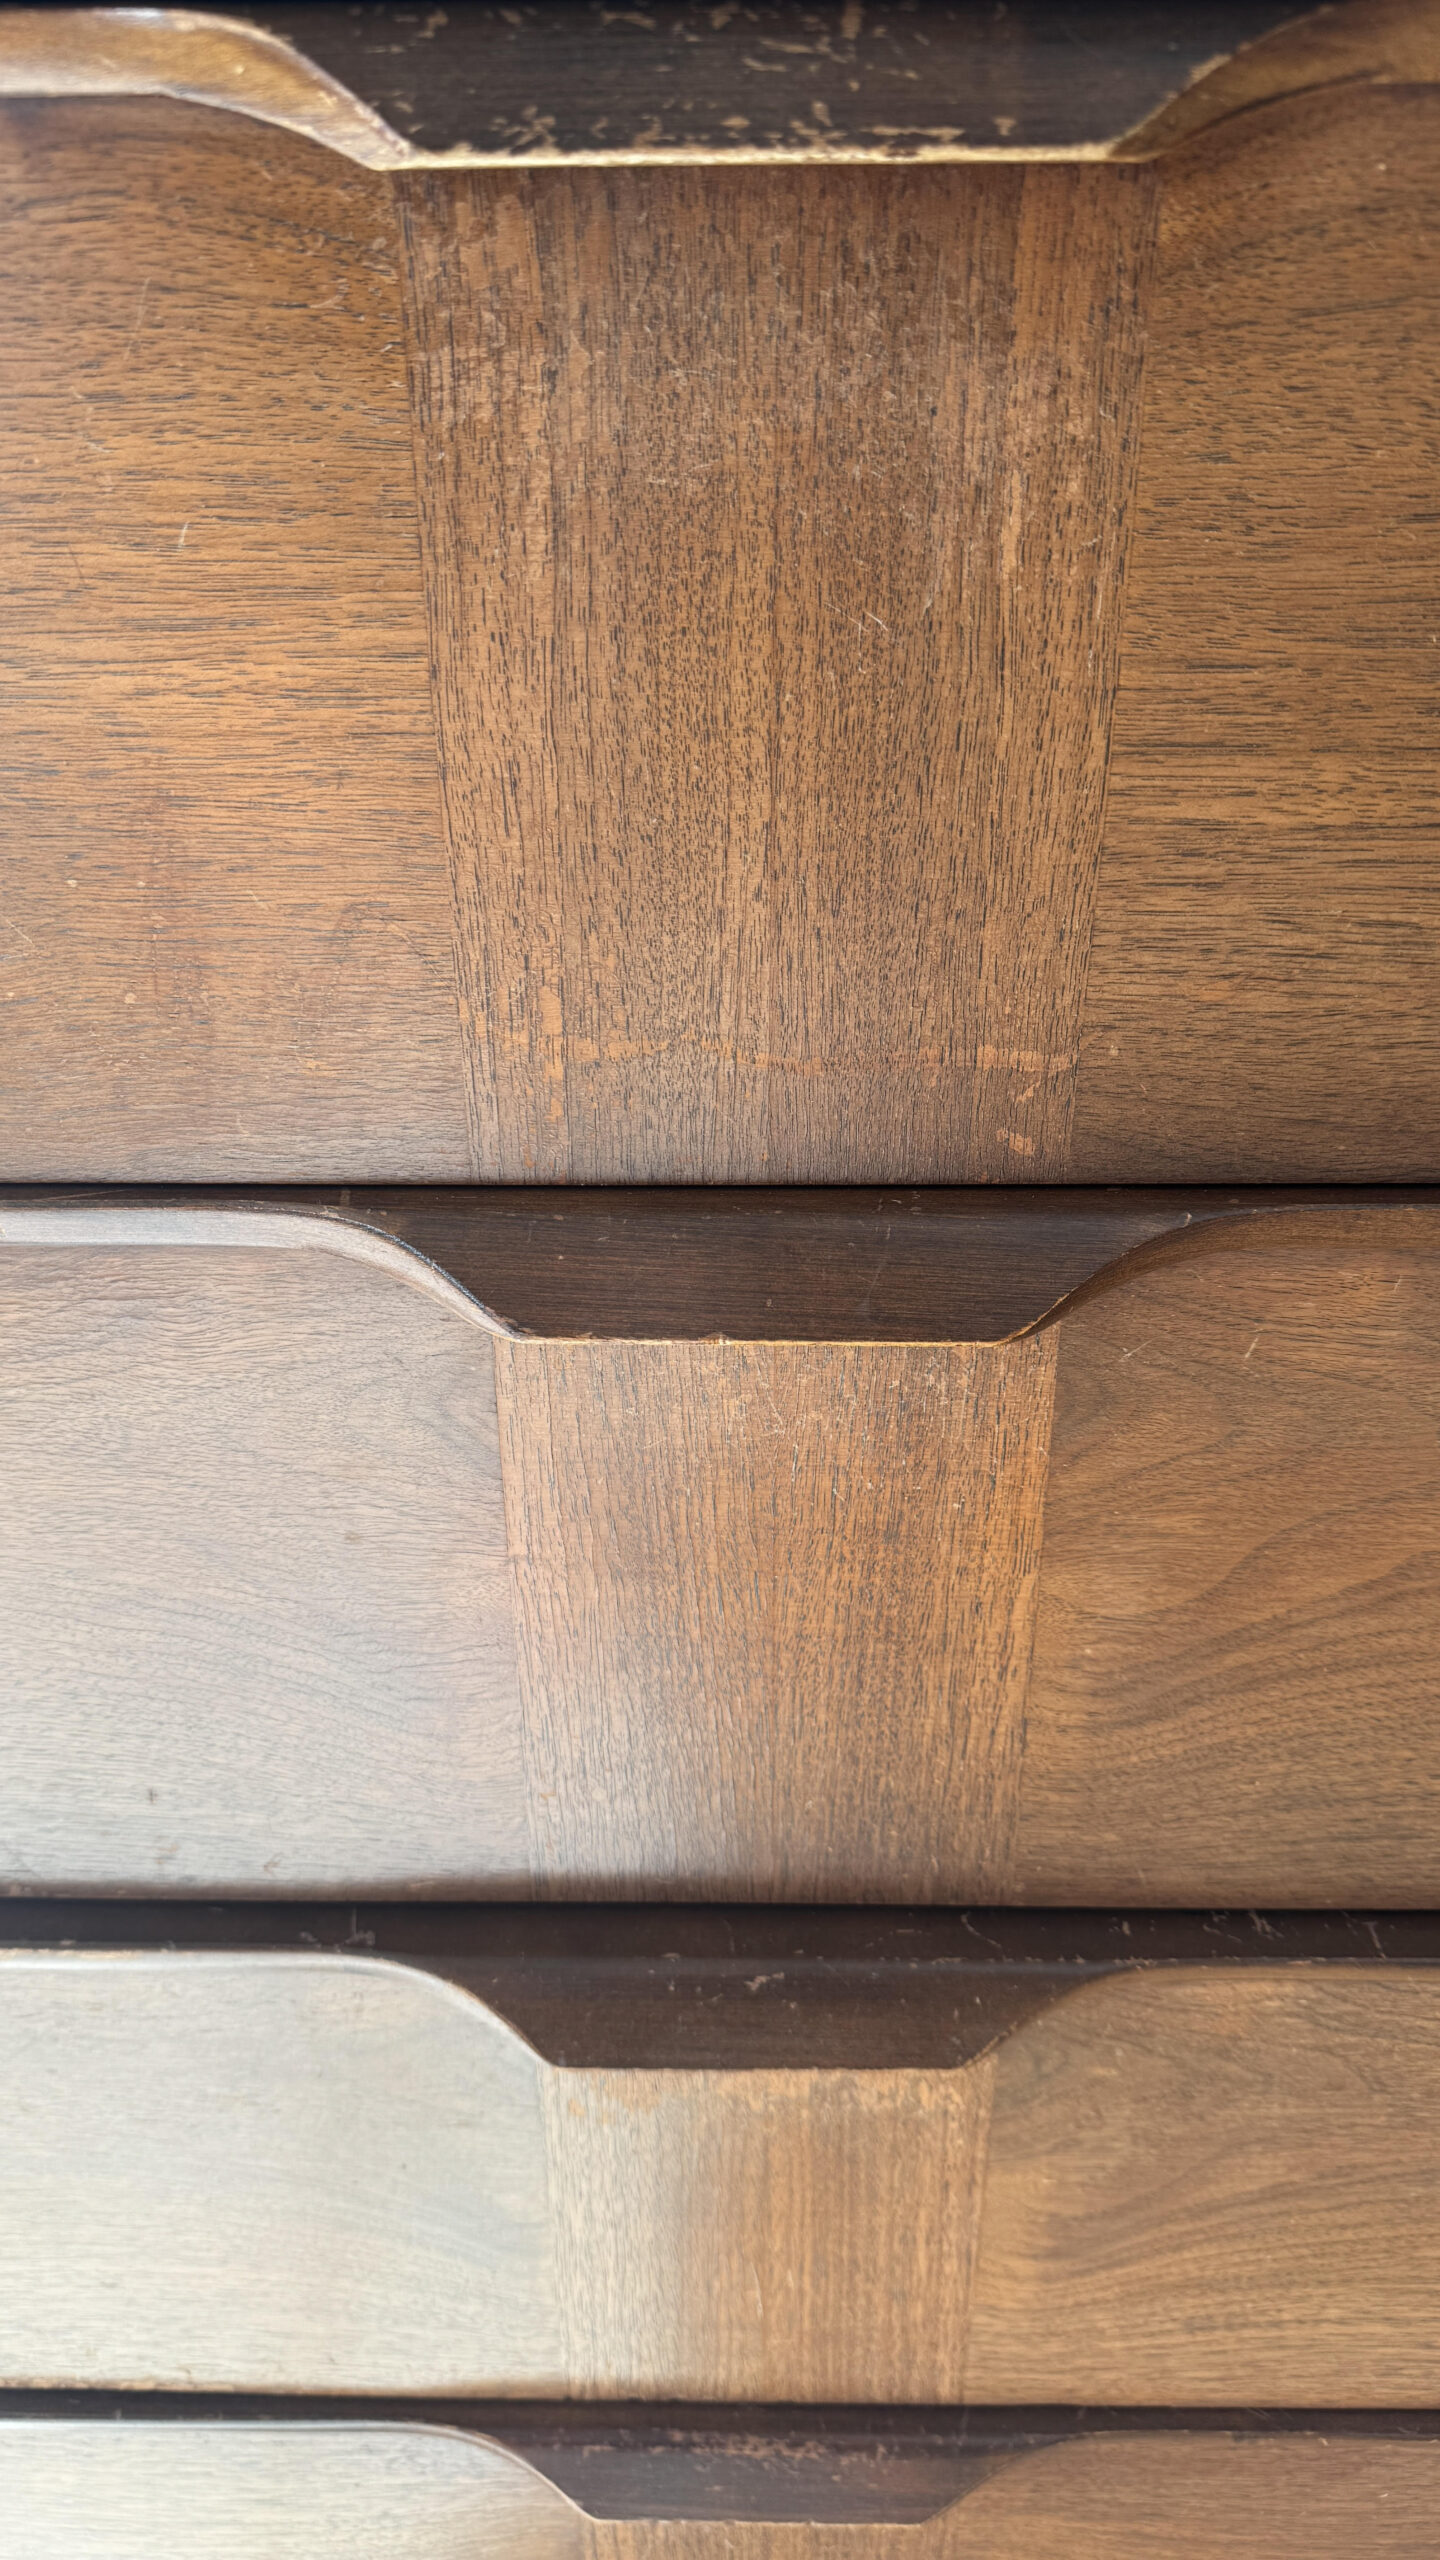
I picked up this dresser a few years ago for FREE and chalk painted it for my son's bedroom because I didn't think it was possible to refinish veneer, it was really rough. The stain was a sprayed on glossy varnish which took away from the beauty of the natural walnut.

Material List:

1 / Strip & Sand

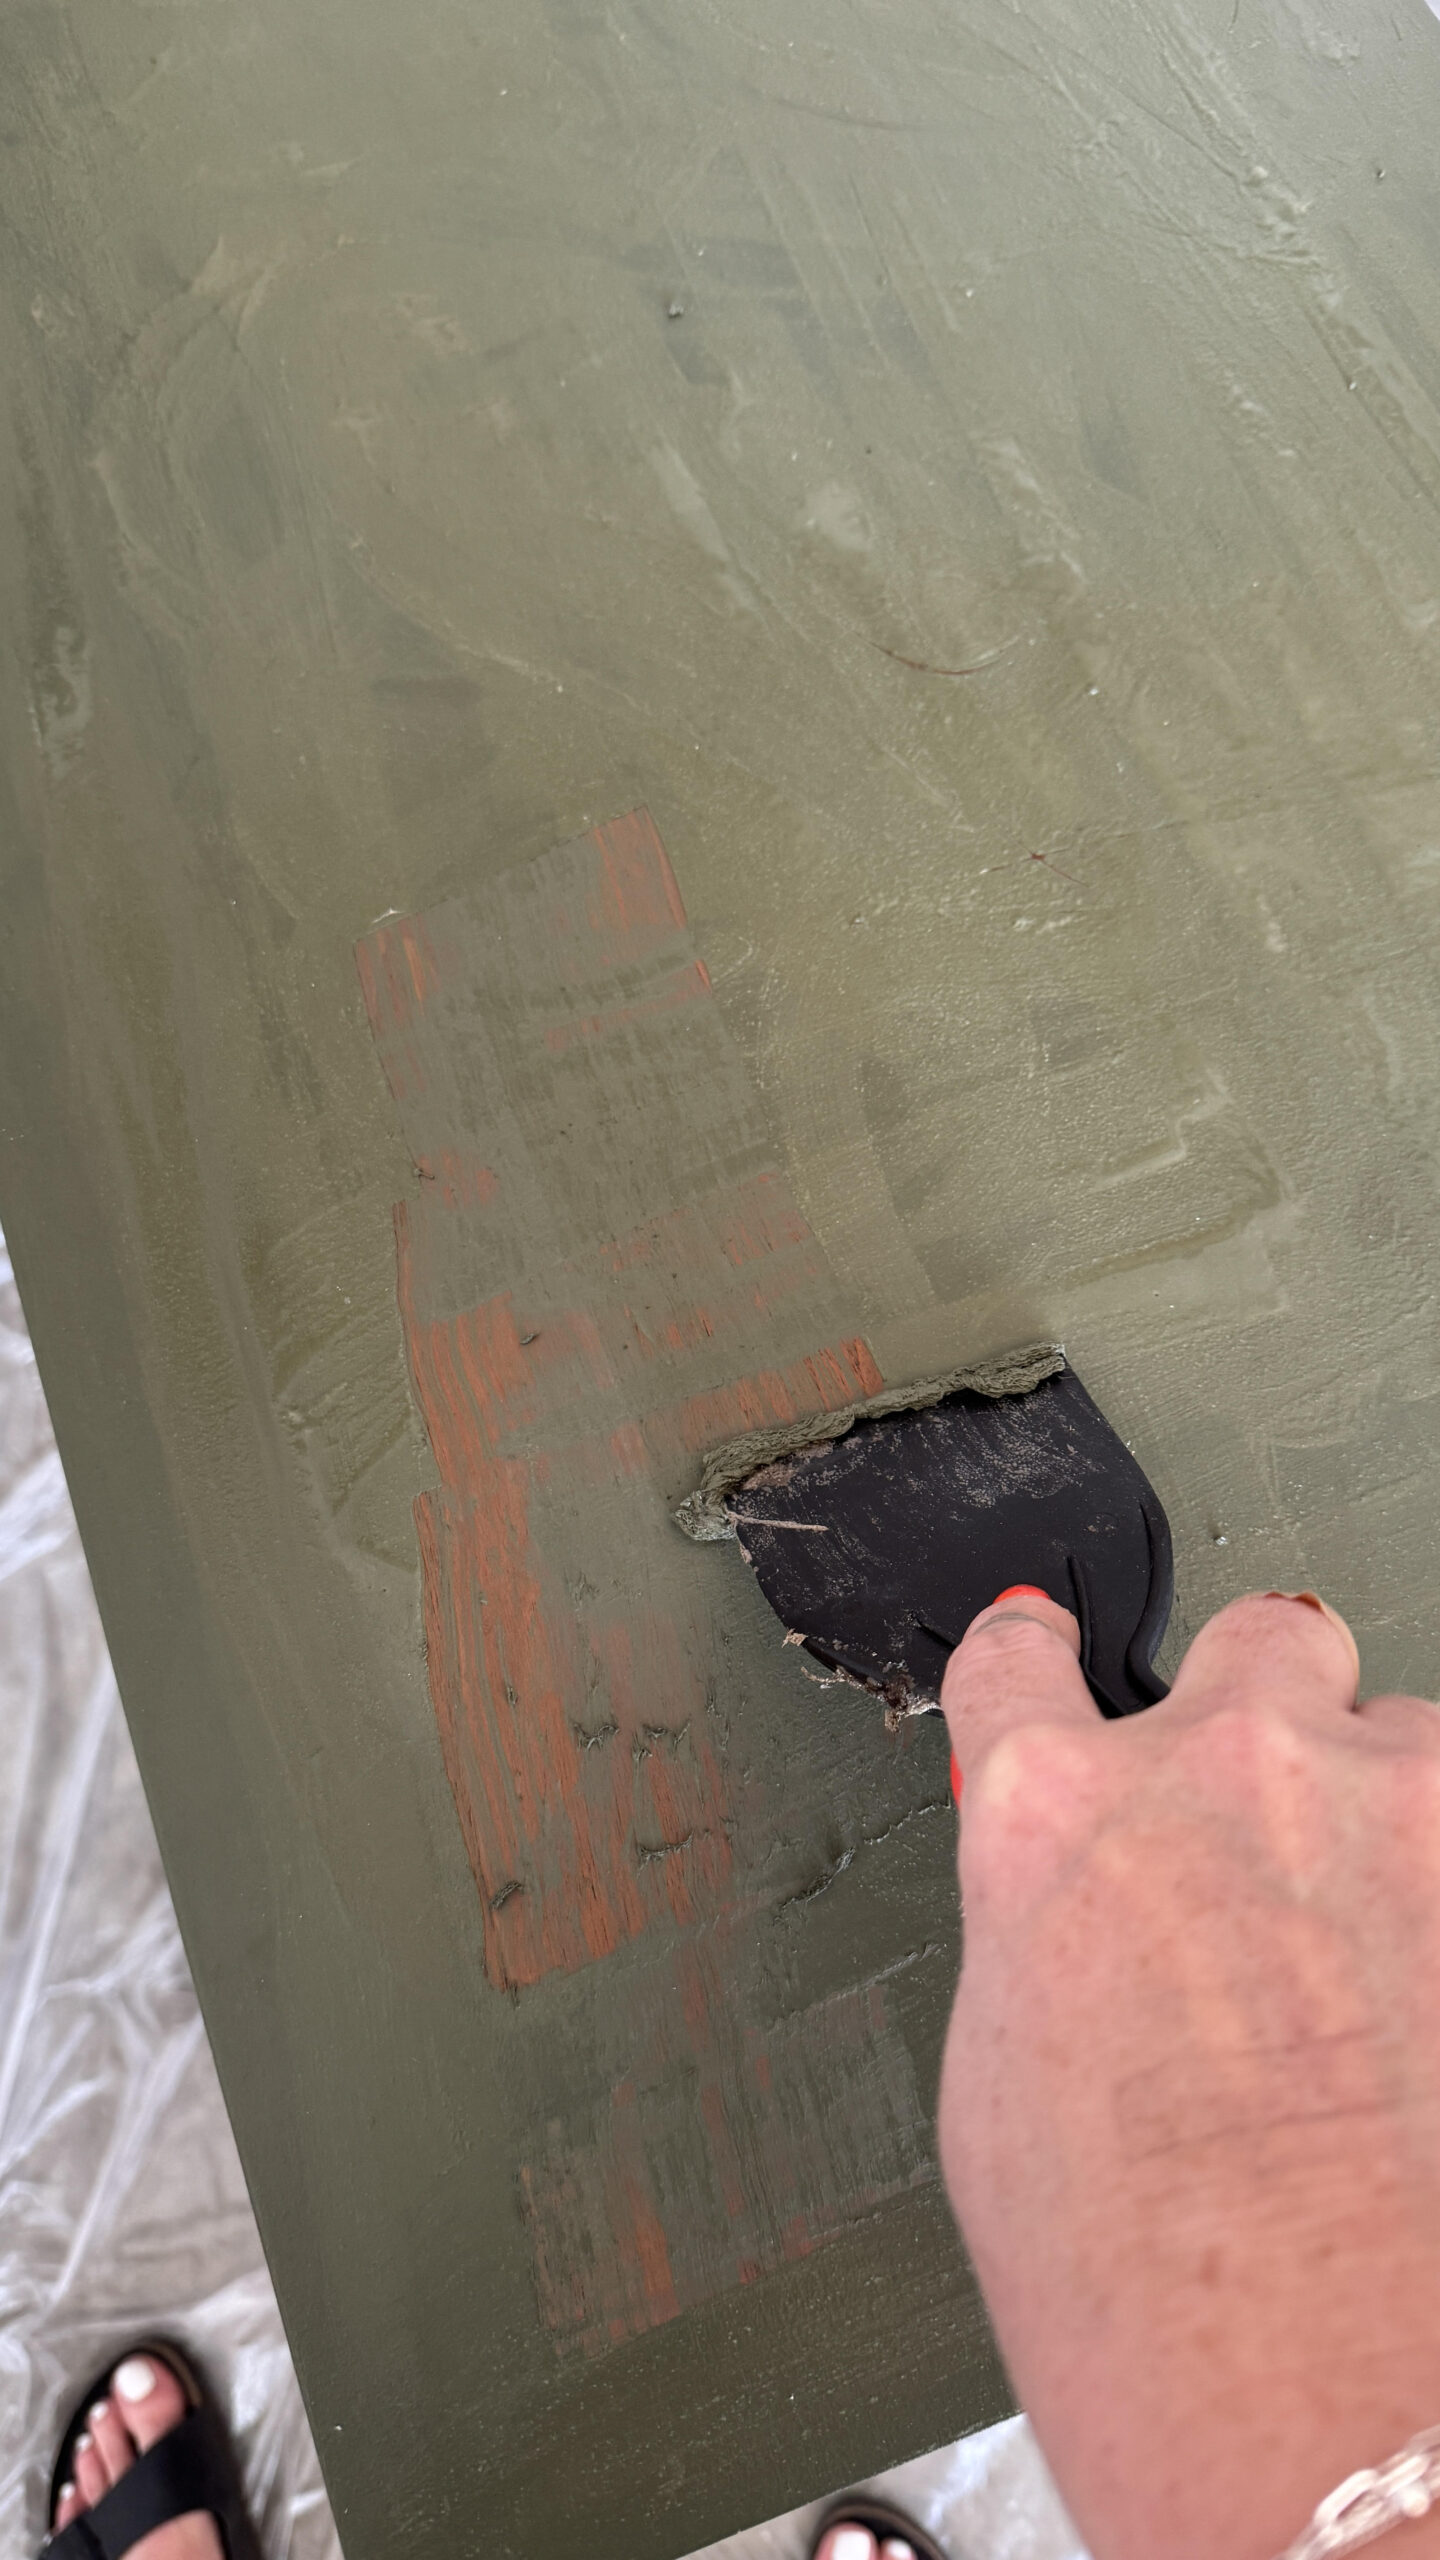
If your dresser is not painted, you may choose to skip the stripping and go right into sanding. Brush on the furniture stripper generously until to see it starting to loosen the paint. Use your scraper to start removing the paint. I started with plastic but it was too flexible so I carefully use a metal scraper. Be careful not to damage the veneer, it is very thin!
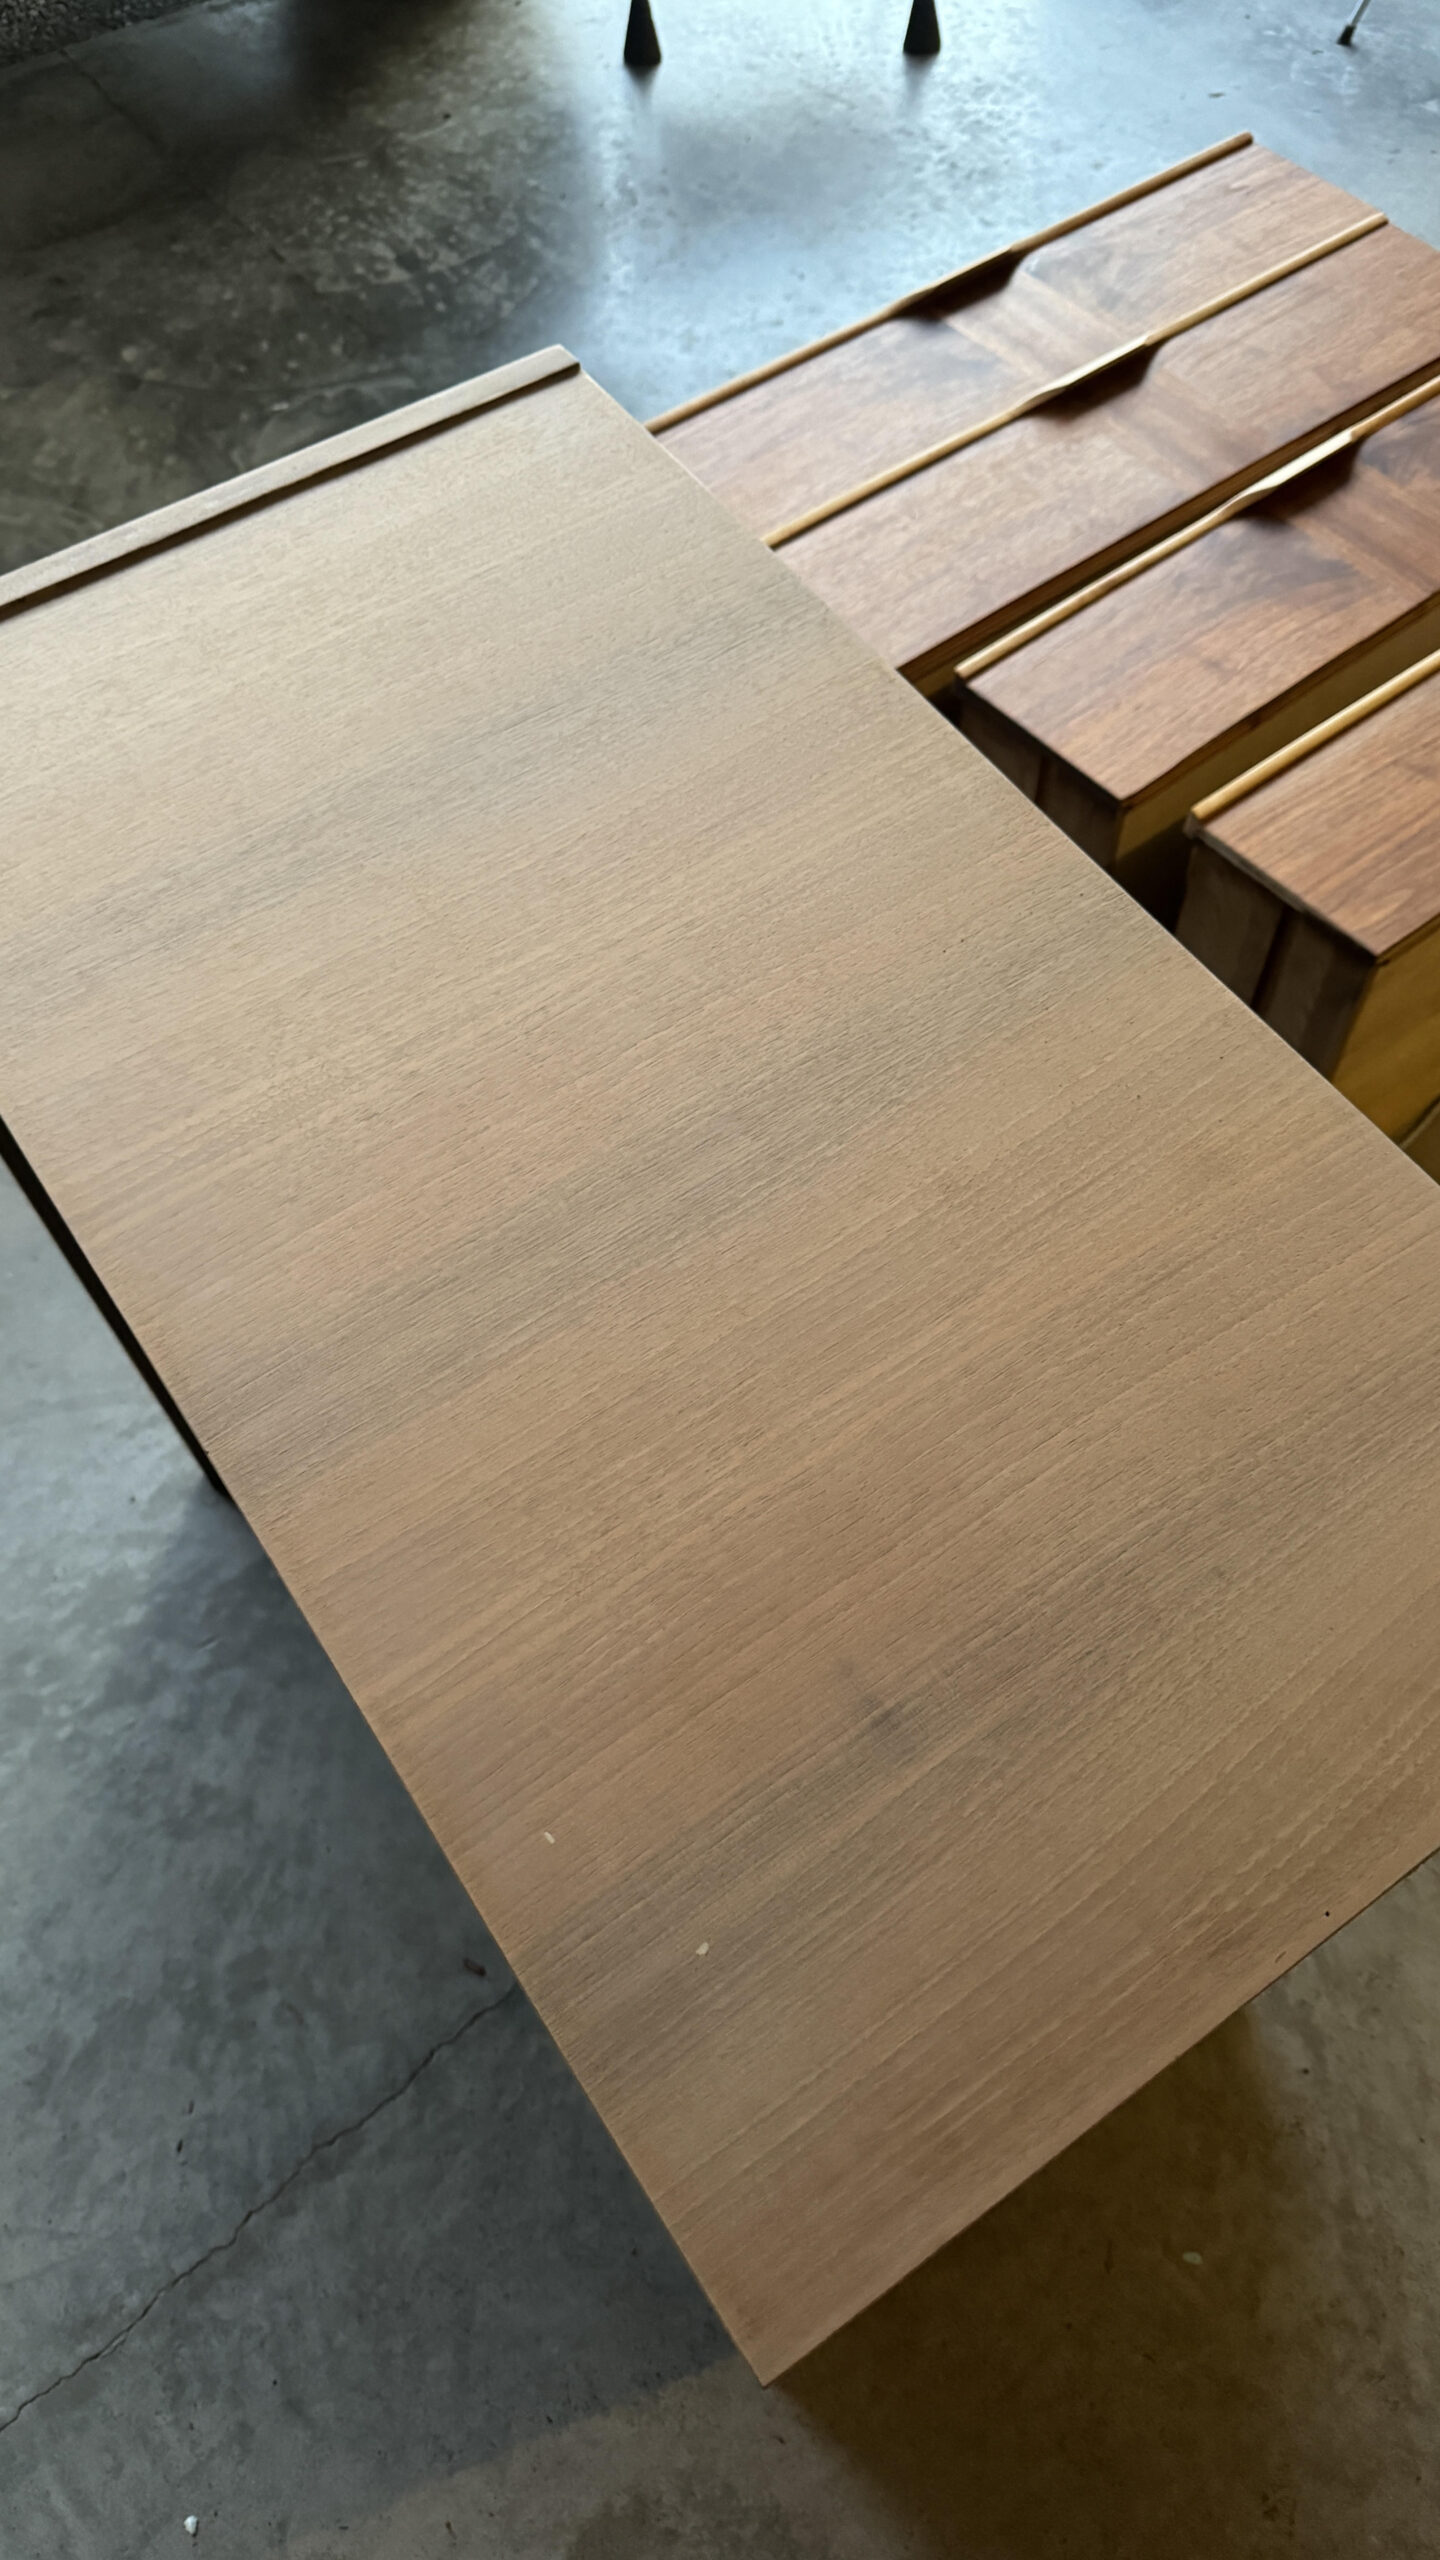
Once I got all of the paint off, I started sanding. I started with 80 grit sandpaper to take up most of the varnish. Then I worked my way down to 220 grit. Veneer is super thin, so you have to go slowly and carefully so not to go right through the veneer (which I did in some spots and will use a stain pen to touch them up). Isn't that raw walnut beautiful?! Wipe down your dresser with tack cloth or a clean rag before moving on to the next step.

The legs were really banged up , so I wrapped a piece of sandpaper around each leg and sanded them down by hand.

2 / Stain or Oil

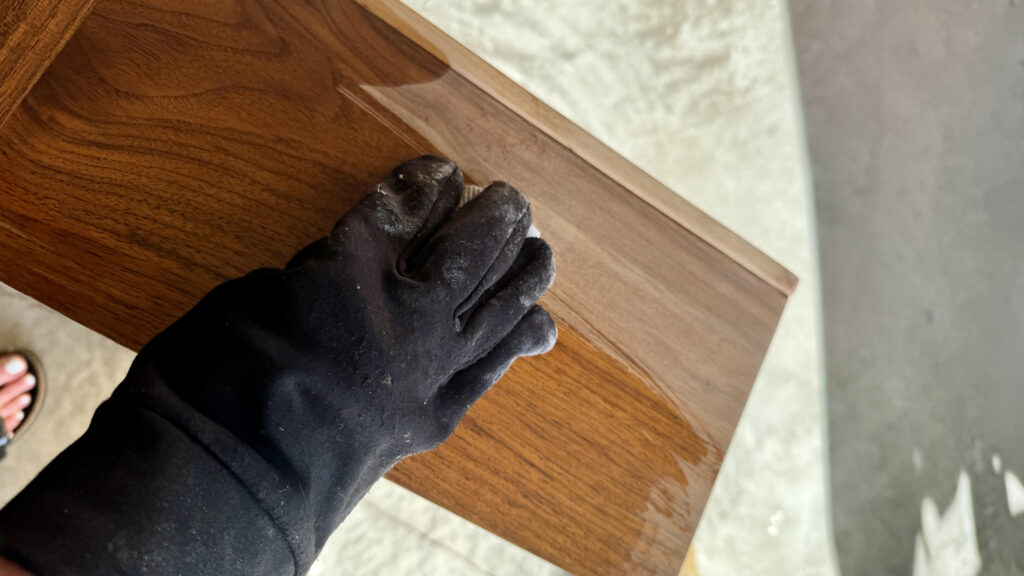
Walnut is beautiful in itself, so I did not want to change its natural color. If you have a lighter species of veneer you may choose to stain darker. I recommend Minwax furniture stain. I used Linseed oil to enhance the natural color and grain of the wood, and to give it a protective coating. Linseed oil gives a low luster finish which is what I was after.

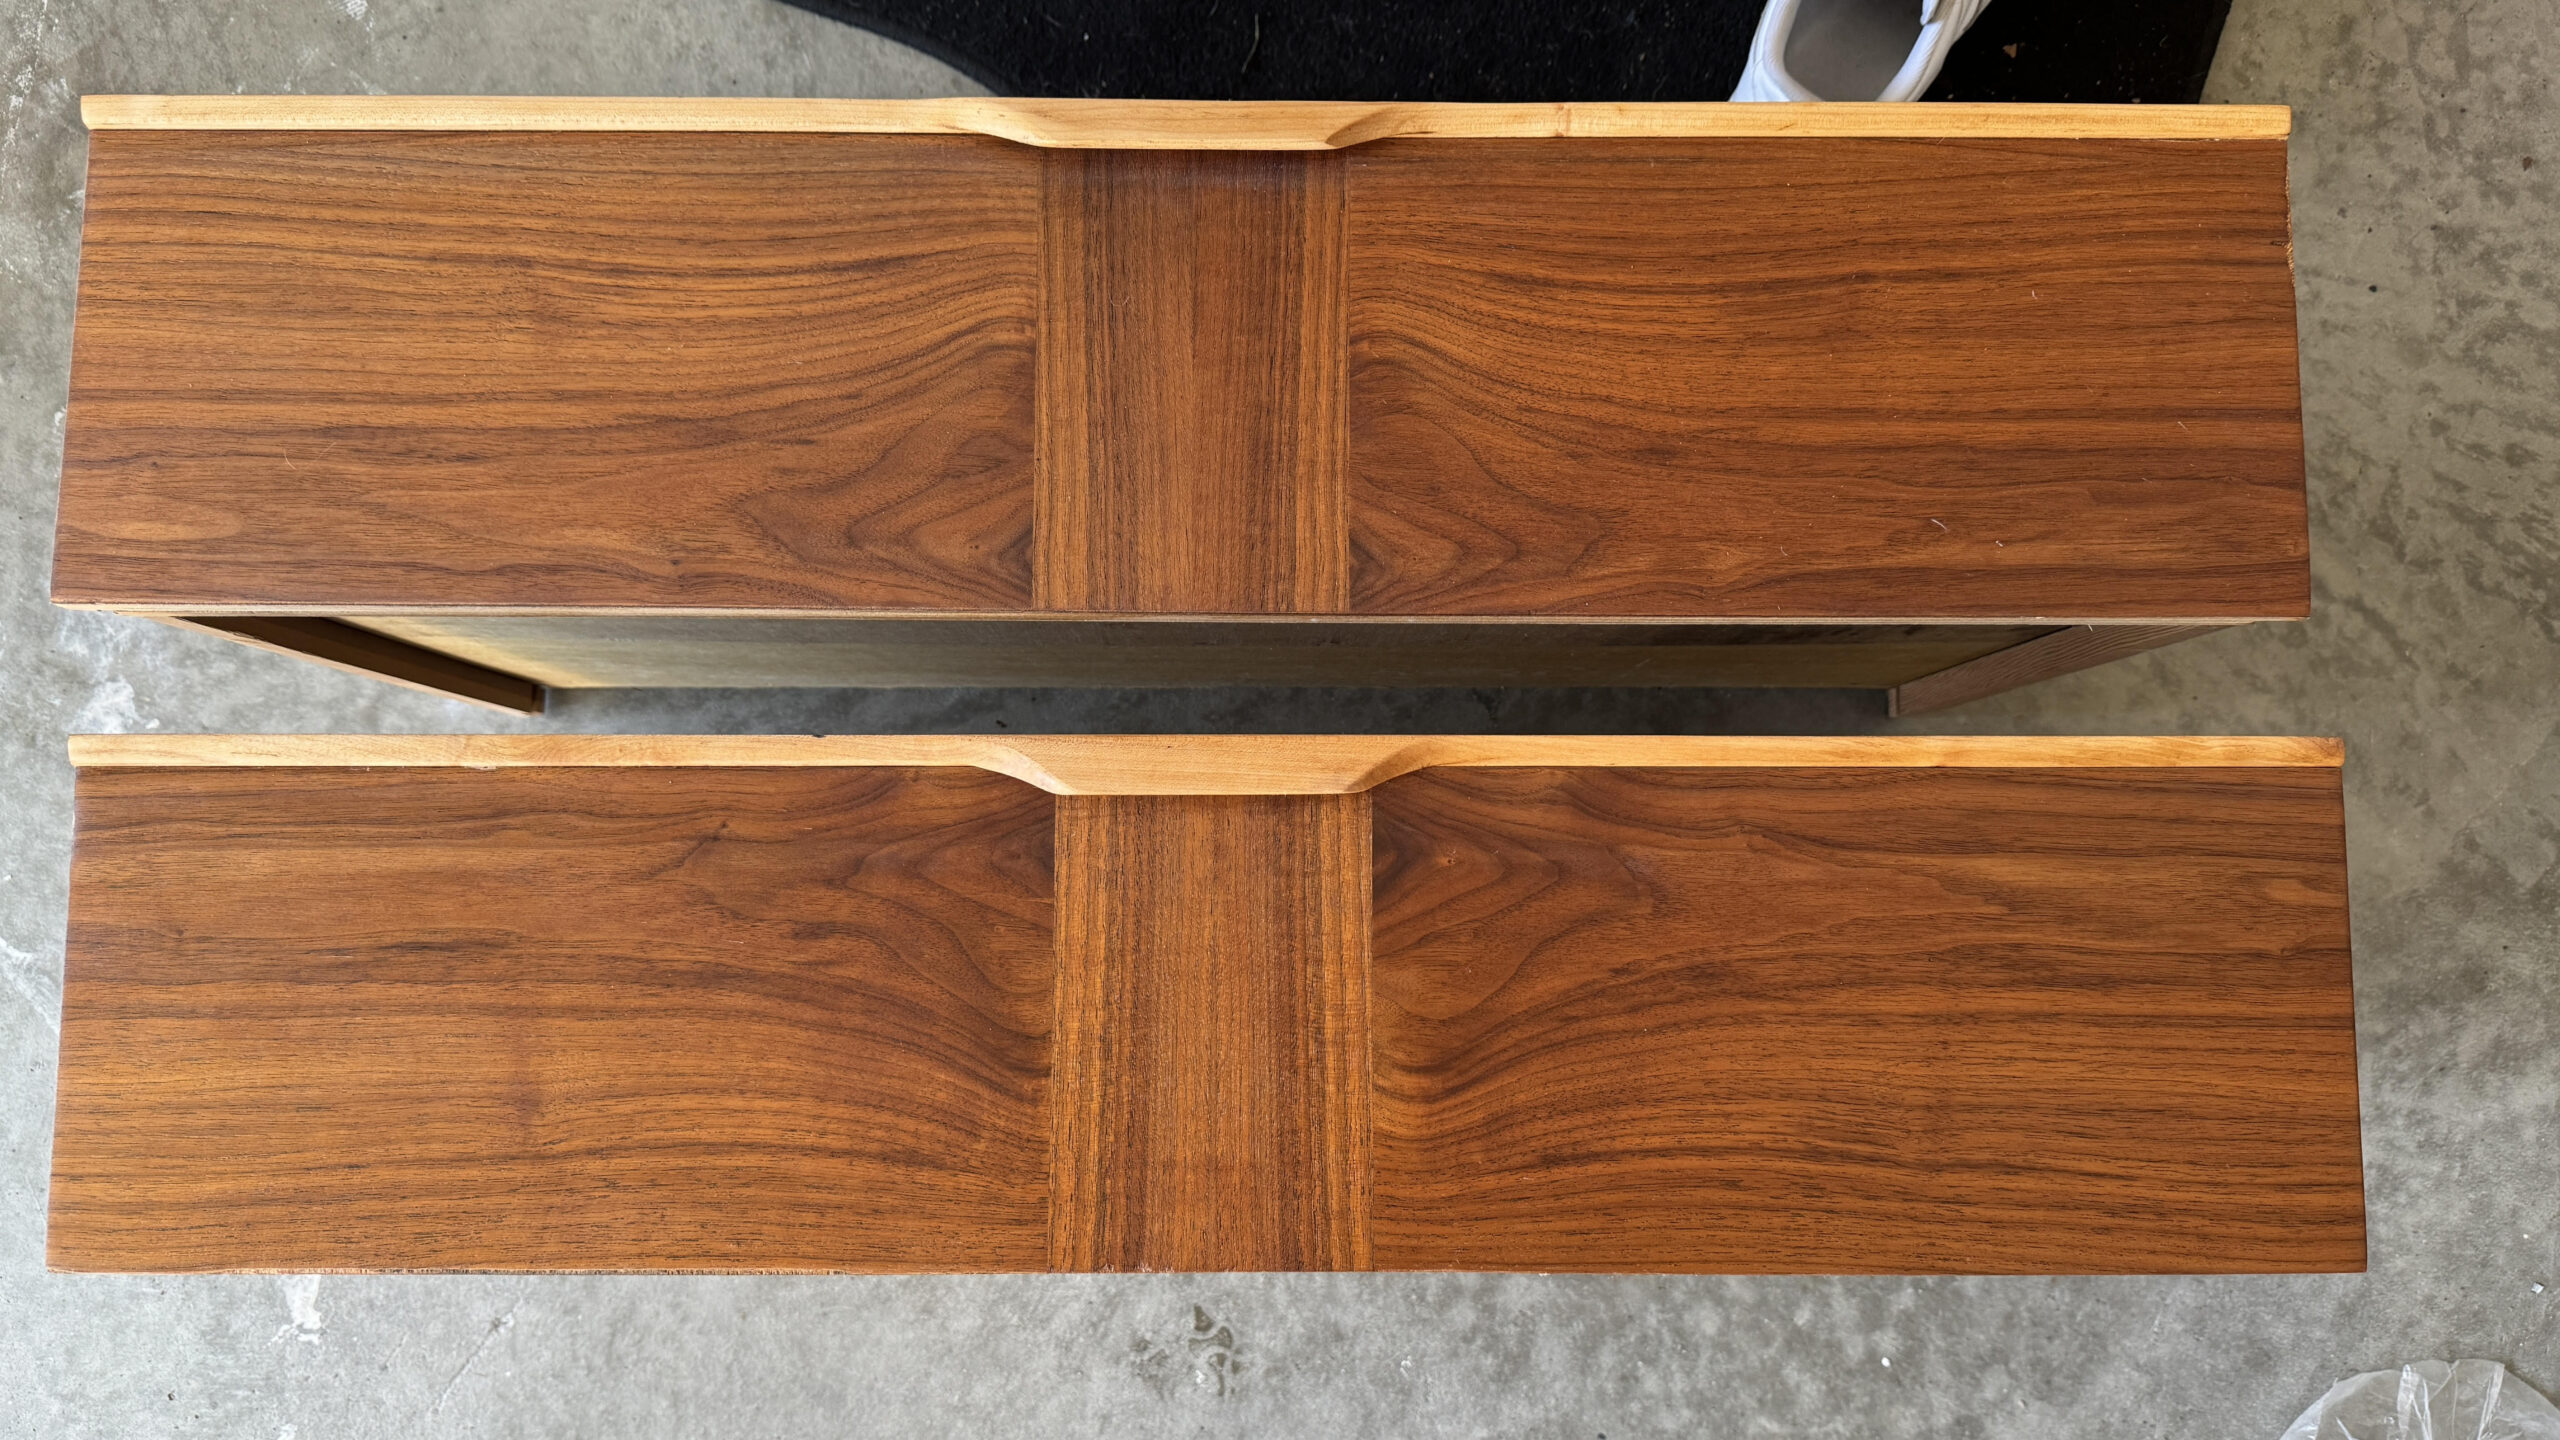
The drawer pulls were in rough shape, and once I sanded them down, I saw that the pulls were a different species and made of solid wood, unlike the drawer fronts, top and case.

Look how beautifully they turned out! Although I wasn't expecting this, I love the contrast between the drawer fronts and pulls. Like Bob Ross said, "there are no mistakes, only happy accidents."

3 / Line the drawers

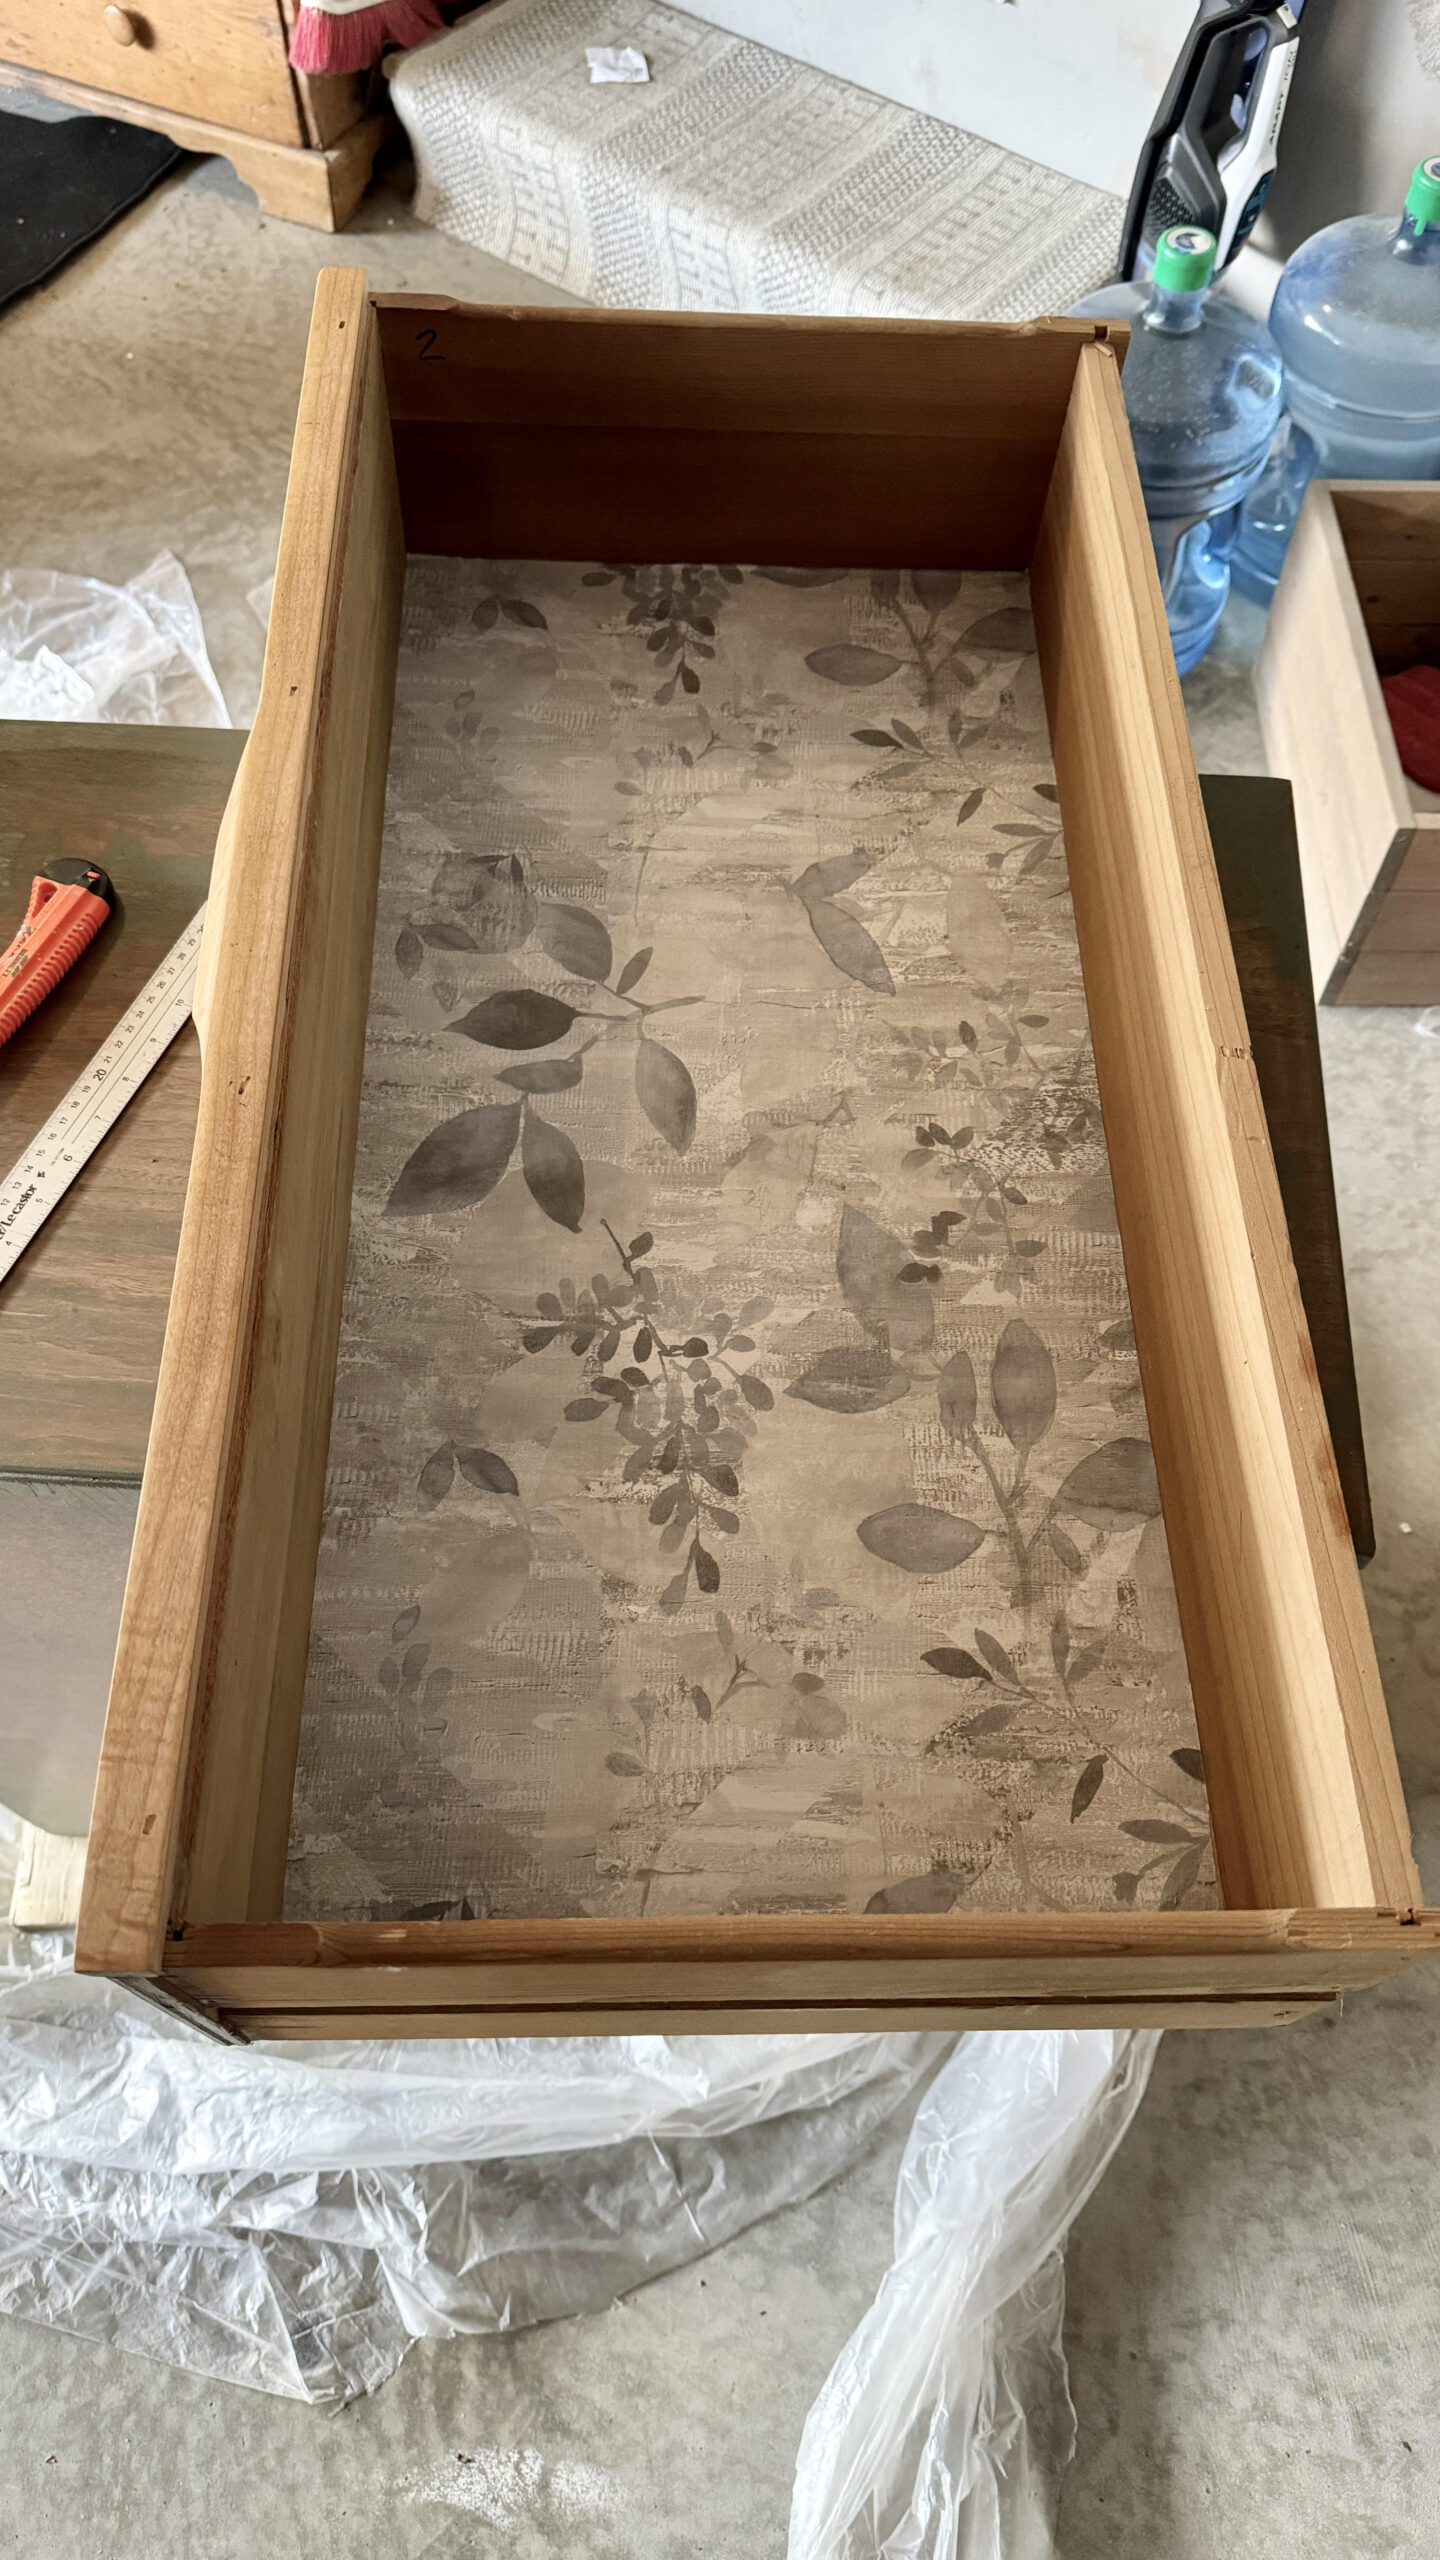
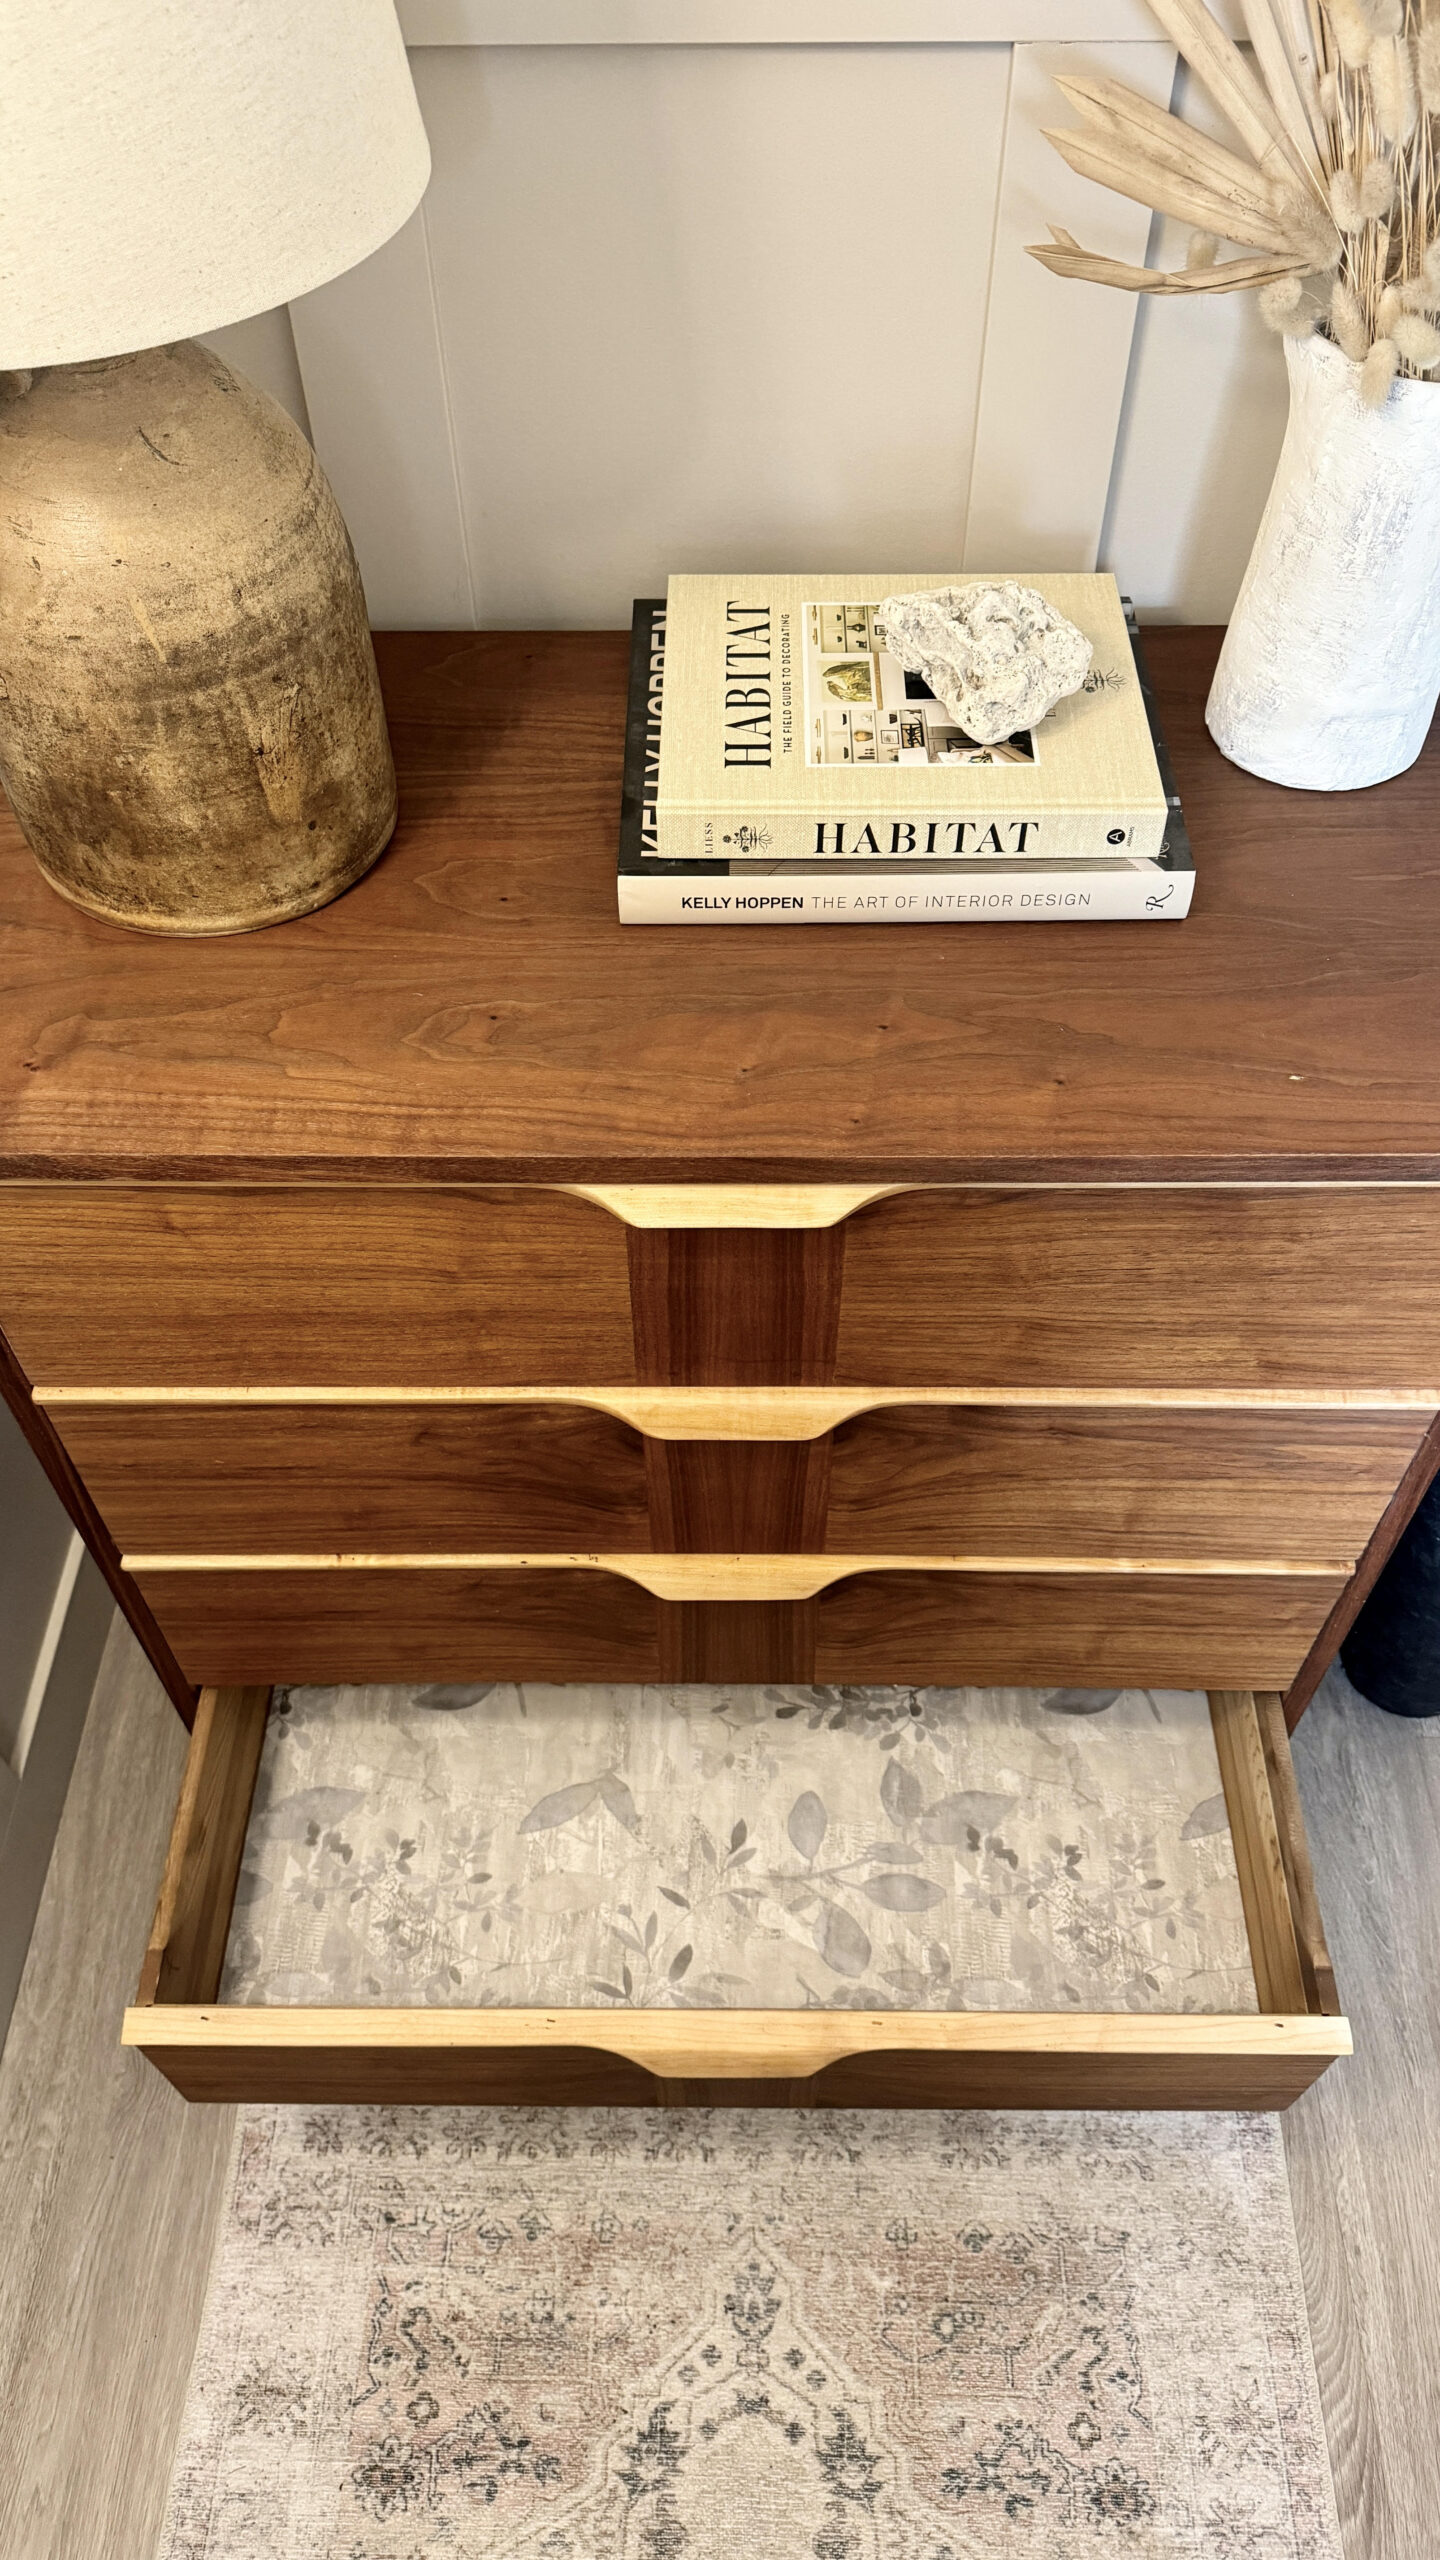
I chose to line the drawers with peel & stick wallpaper I got from Amazon . This is a great way to cover up damage, save yourself time on refinishing the inside of the drawers and make them pretty at the same time.

The After....

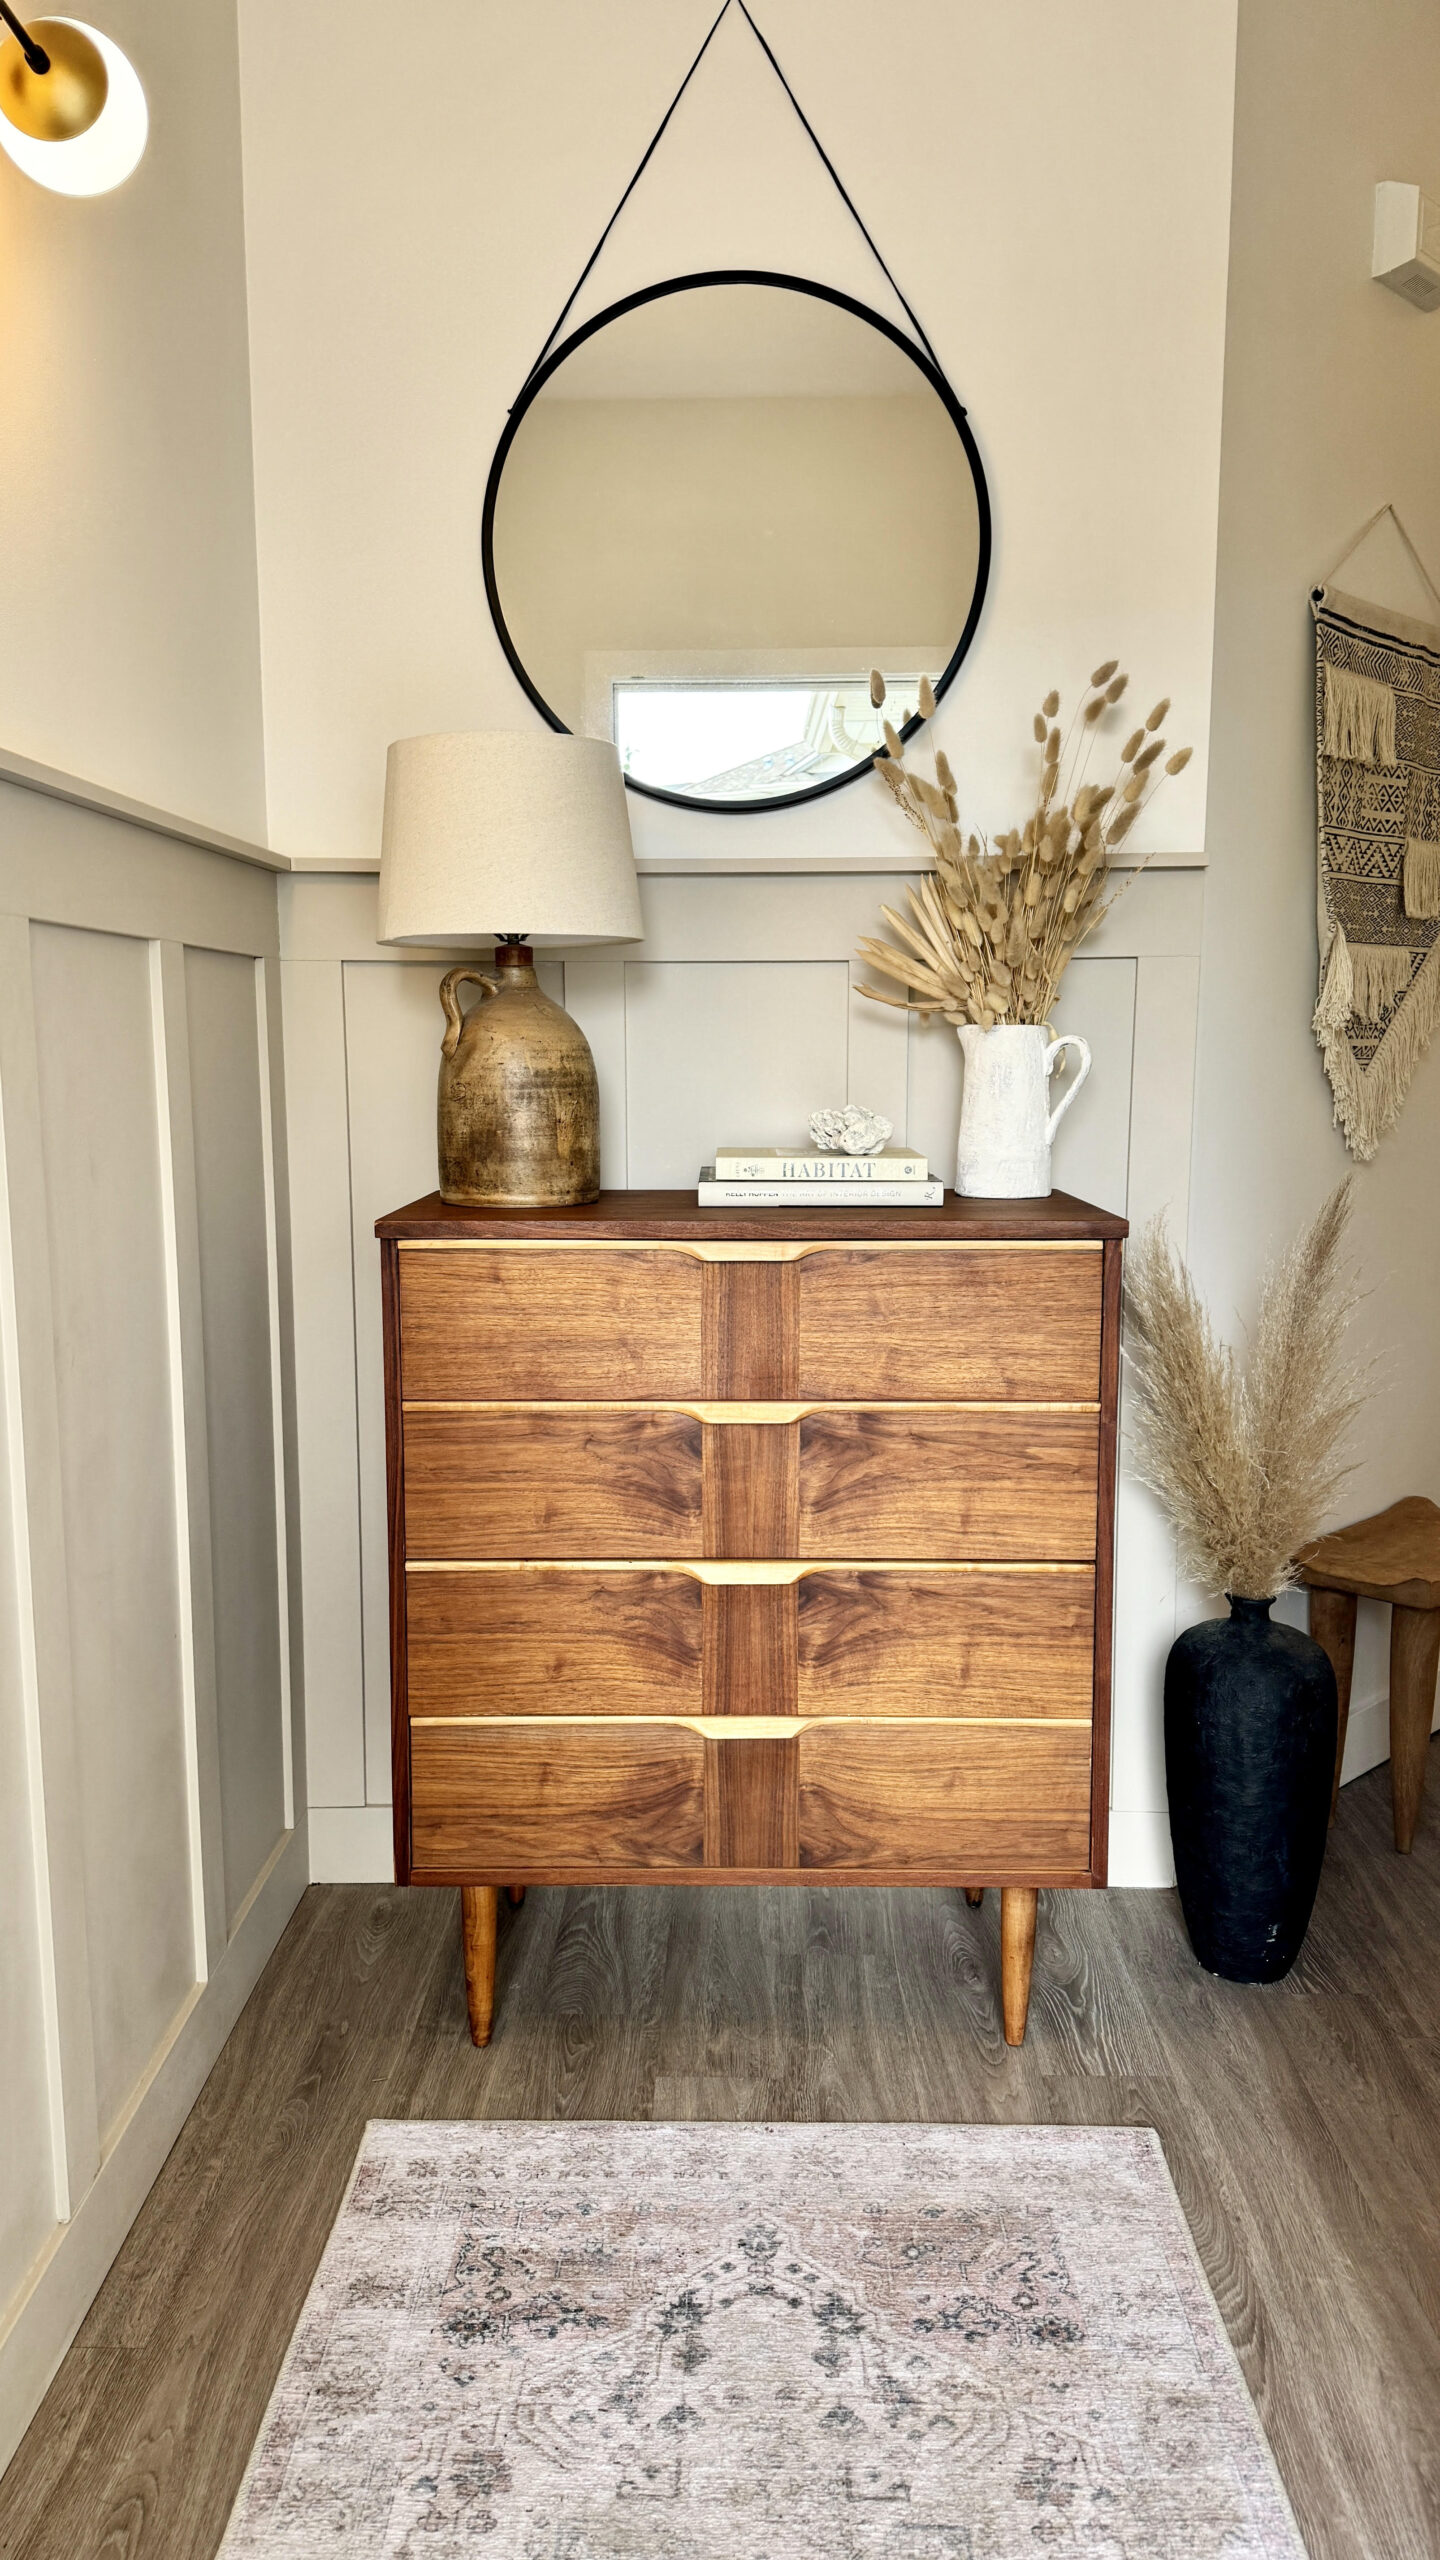
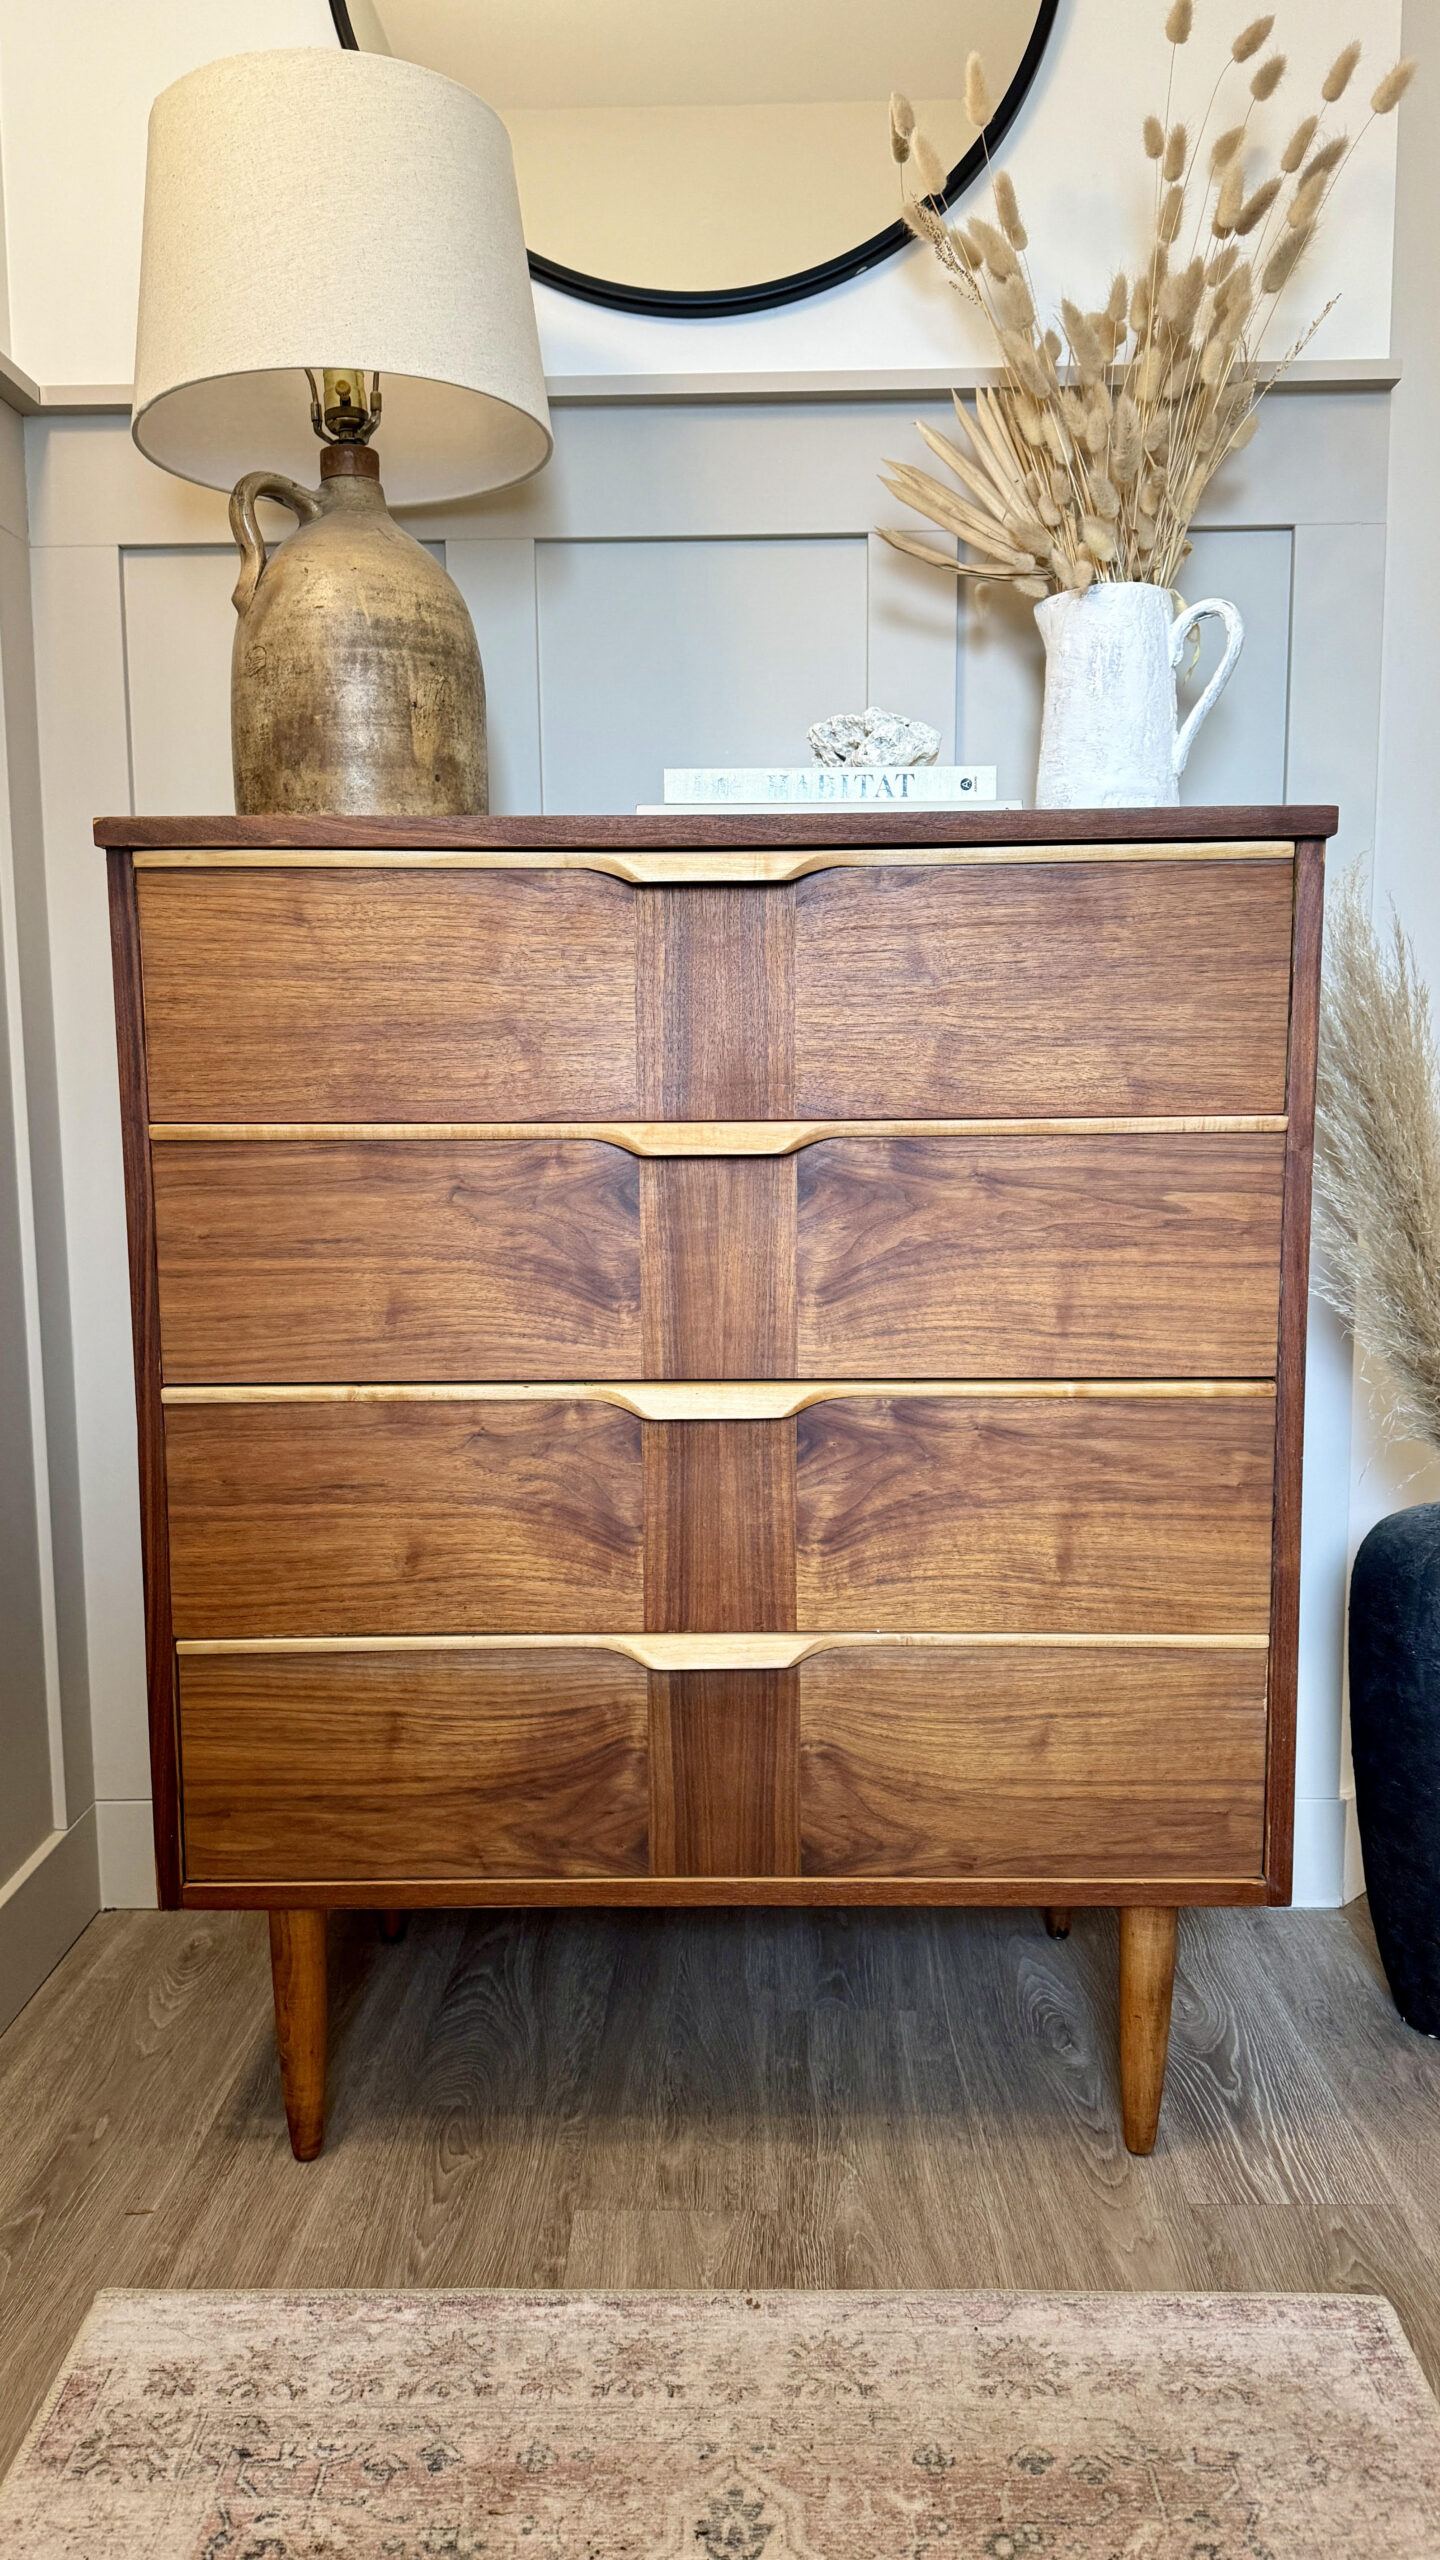
I completed this dresser in an evening, it is not as daunting as you might think! I could not be more pleased with how it turned out. Our front entry does not have a hall closet, weird I know. This dresser serves as our shoe storage to keep the entry neat and tidy.

If you need helping planning your next design project, please reach out. I’d love to discuss it with you!

4 types of Interior Design Fee's

Interior design billing methods can vary depending on the complexity of the project and the preferences of the Designer. One common approach is the hourly rate method, where Designers charge clients based on the number of hours spent on the project. This method is suitable for smaller projects or those with a less defined scope. Alternatively, a flat fee or fixed-rate approach involves establishing a predetermined cost for the entire project, which can be advantageous for both the Designer and the client, providing clarity and predictability. Some designers may also use a percentage or square foot method. Regardless of the method chosen, clear communication and transparency in billing are essential to maintain a positive client-designer relationship.

Understanding the different billing methods

1 / FLAT OR FIXED FEE

This is the most common pricing model in Interior Design. The designer charges a predetermined, fixed amount for the entire project or for a specific phase of the project. This fixed fee is agreed upon between the designer and the client before the project begins, there are no surprises. The designer and the client define the scope of the project, outlining the specific services to be provided.

PRO'S

CON'S

2 / HOURLY

Charing clients hourly is another popular method for Designers to charge for their services, however it can leave uncertainty with clients as they may underestimate the time that is involved with designing a home. Setting expectations is crucial when billing your clients hourly, so there are no surprises or unwanted tension when your invoice arrives. Hourly rates vary greatly with Designers, you will want to know how long they have been in the industry, their qualifications, and what their markups are. Transparency is key when using the hourly method. You can expect to be charged anywhere from $150-$500+ per hour, the average being $200-250/hour.

PRO'S:

CON'S

3 / PERCENTAGE

The percentage of project cost method is based on the overall project cost. Percentage billing is a common method used by interior designers to charge for their services. In this billing structure, the designer charges a percentage of the total project cost as their fee. The total project cost includes expenses such as materials, furniture, labor, and any other relevant costs incurred during the design and implementation of the project. The percentage will vary between Designers due to location, market and project specifics, make sure to ask when your are researching designers to work with.

PRO'S

CON'S

4 / SQUARE FOOT

Square foot billing, or per square foot pricing, is another common method used by interior designers to charge for their services. This method of pricing is most commonly used for new build custom homes, large scale and commercial spaces. In this billing structure, the designer charges a fixed rate for each square foot of space they are working on. This method is often used for specific services, such as design consultation, space planning, or drafting. Square foot pricing can range between $5 per square foot, to $17+, depending on the inclusions.

PRO'S

CON'S

With any of the above methods, it is important to measure the value & expertise a Designer brings to your project. A well-drafted contract is essential to outline the terms and conditions of the fixed fee arrangement, helping to prevent misunderstandings and disputes. Designing your home should be exciting and as stress-free as possible. Hiring a Designer that no only designs but has a strong design process, is crucial to a well executed project.

If you need helping planning your next design project, please reach out. I’d love to discuss it with you!

Kitchen Design for beginners

Designing your kitchen for the first time can be both exciting and a bit overwhelming. As a beginner in the world of kitchen design, it's essential to focus on creating a space that not only reflects your personal style but also functions seamlessly to meet your needs.

4 Tips to design the kitchen of your dreams

1 / THE WORKING TRIANGLE

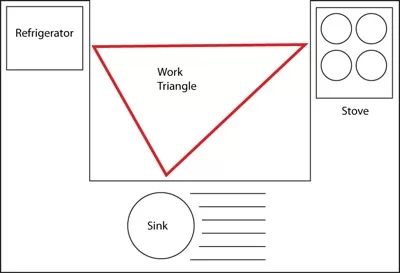
The kitchen working triangle is a design principle used to optimize the efficiency and functionality of a kitchen layout. The concept revolves around the three main work areas in the kitchen: the stove, the refrigerator, and the sink. These areas form a triangular layout, commonly known as the "kitchen work triangle." The goal is to minimize the distance and obstacles between these key elements, allowing for a smooth flow of work during food preparation. There are exceptions to this rule. In single wall kitchens, it's geometrically impossible to achieve a true triangle, but efficiency can still be achieved through the configuration of the three items, and how far apart they are.

Photo: Wikipedia

GUIDELINES FOR AN EFFECTIVE KITCHEN WORK TRIANGLE

  1. Triangle Dimensions:
    • The sum of the three sides of the triangle (distance between stove, refrigerator, and sink) should ideally be between 12 and 26 feet. This provides a balance between efficiency and spaciousness.
  2. Unobstructed Paths:
    • Ensure that there are clear, unobstructed paths between the key work areas. Avoid placing obstacles, such as islands or furniture, within the triangle.
  3. Efficient Layout:
    • Aim for a layout that minimizes unnecessary steps between the stove, refrigerator, and sink. This helps in optimizing the workflow.
  4. Consider Workflow:
    • Take into account the typical workflow in your kitchen. For example, you might want to place the dishwasher near the sink for easy dish transfer.
  5. Adapt to Kitchen Size:
    • The working triangle can be adapted to different kitchen sizes and layouts. In smaller kitchens, the triangle might be more compact, while larger kitchens may have a more spread-out triangle.
  6. Flexibility:
    • While the working triangle is a useful guideline, it's not a strict rule. The needs and preferences of the individuals using the kitchen should also be considered.

Remember that the working triangle is a design principle, and individual preferences, the size of the kitchen, and the overall layout should influence the final kitchen design. It's essential to strike a balance between efficiency and the overall functionality of the space based on the specific needs of the users.

2 / SPACE PLANNING & CIRCULATION

Planning your layout is the first step in designing the perfect kitchen. With proper space planning & design, you will not only achieve a beautiful space to cook meals, it will function well for you aswell.

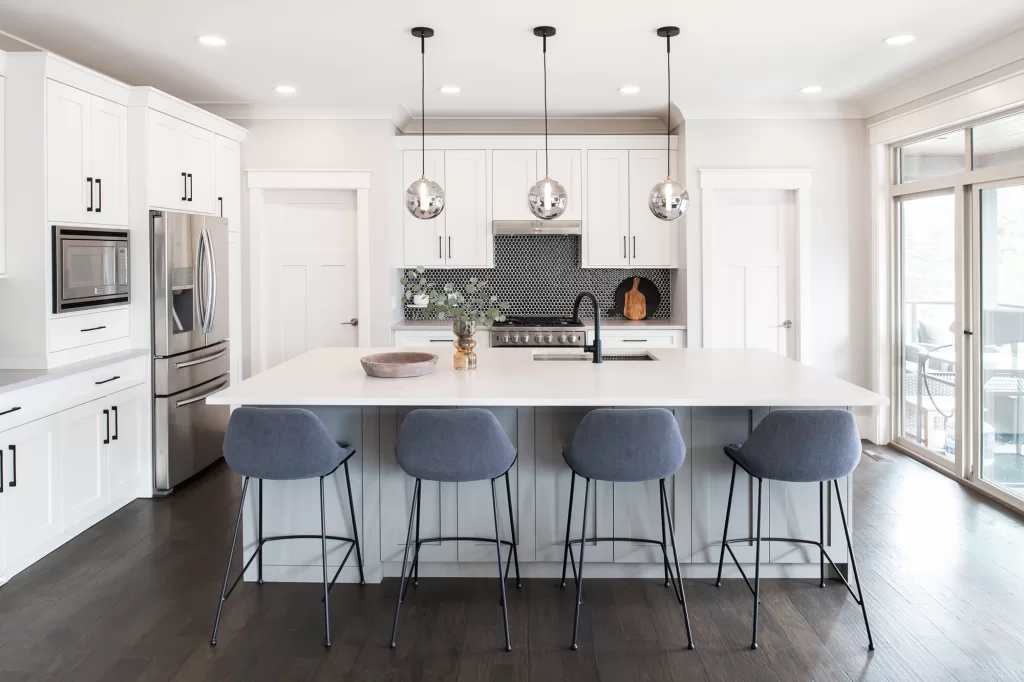
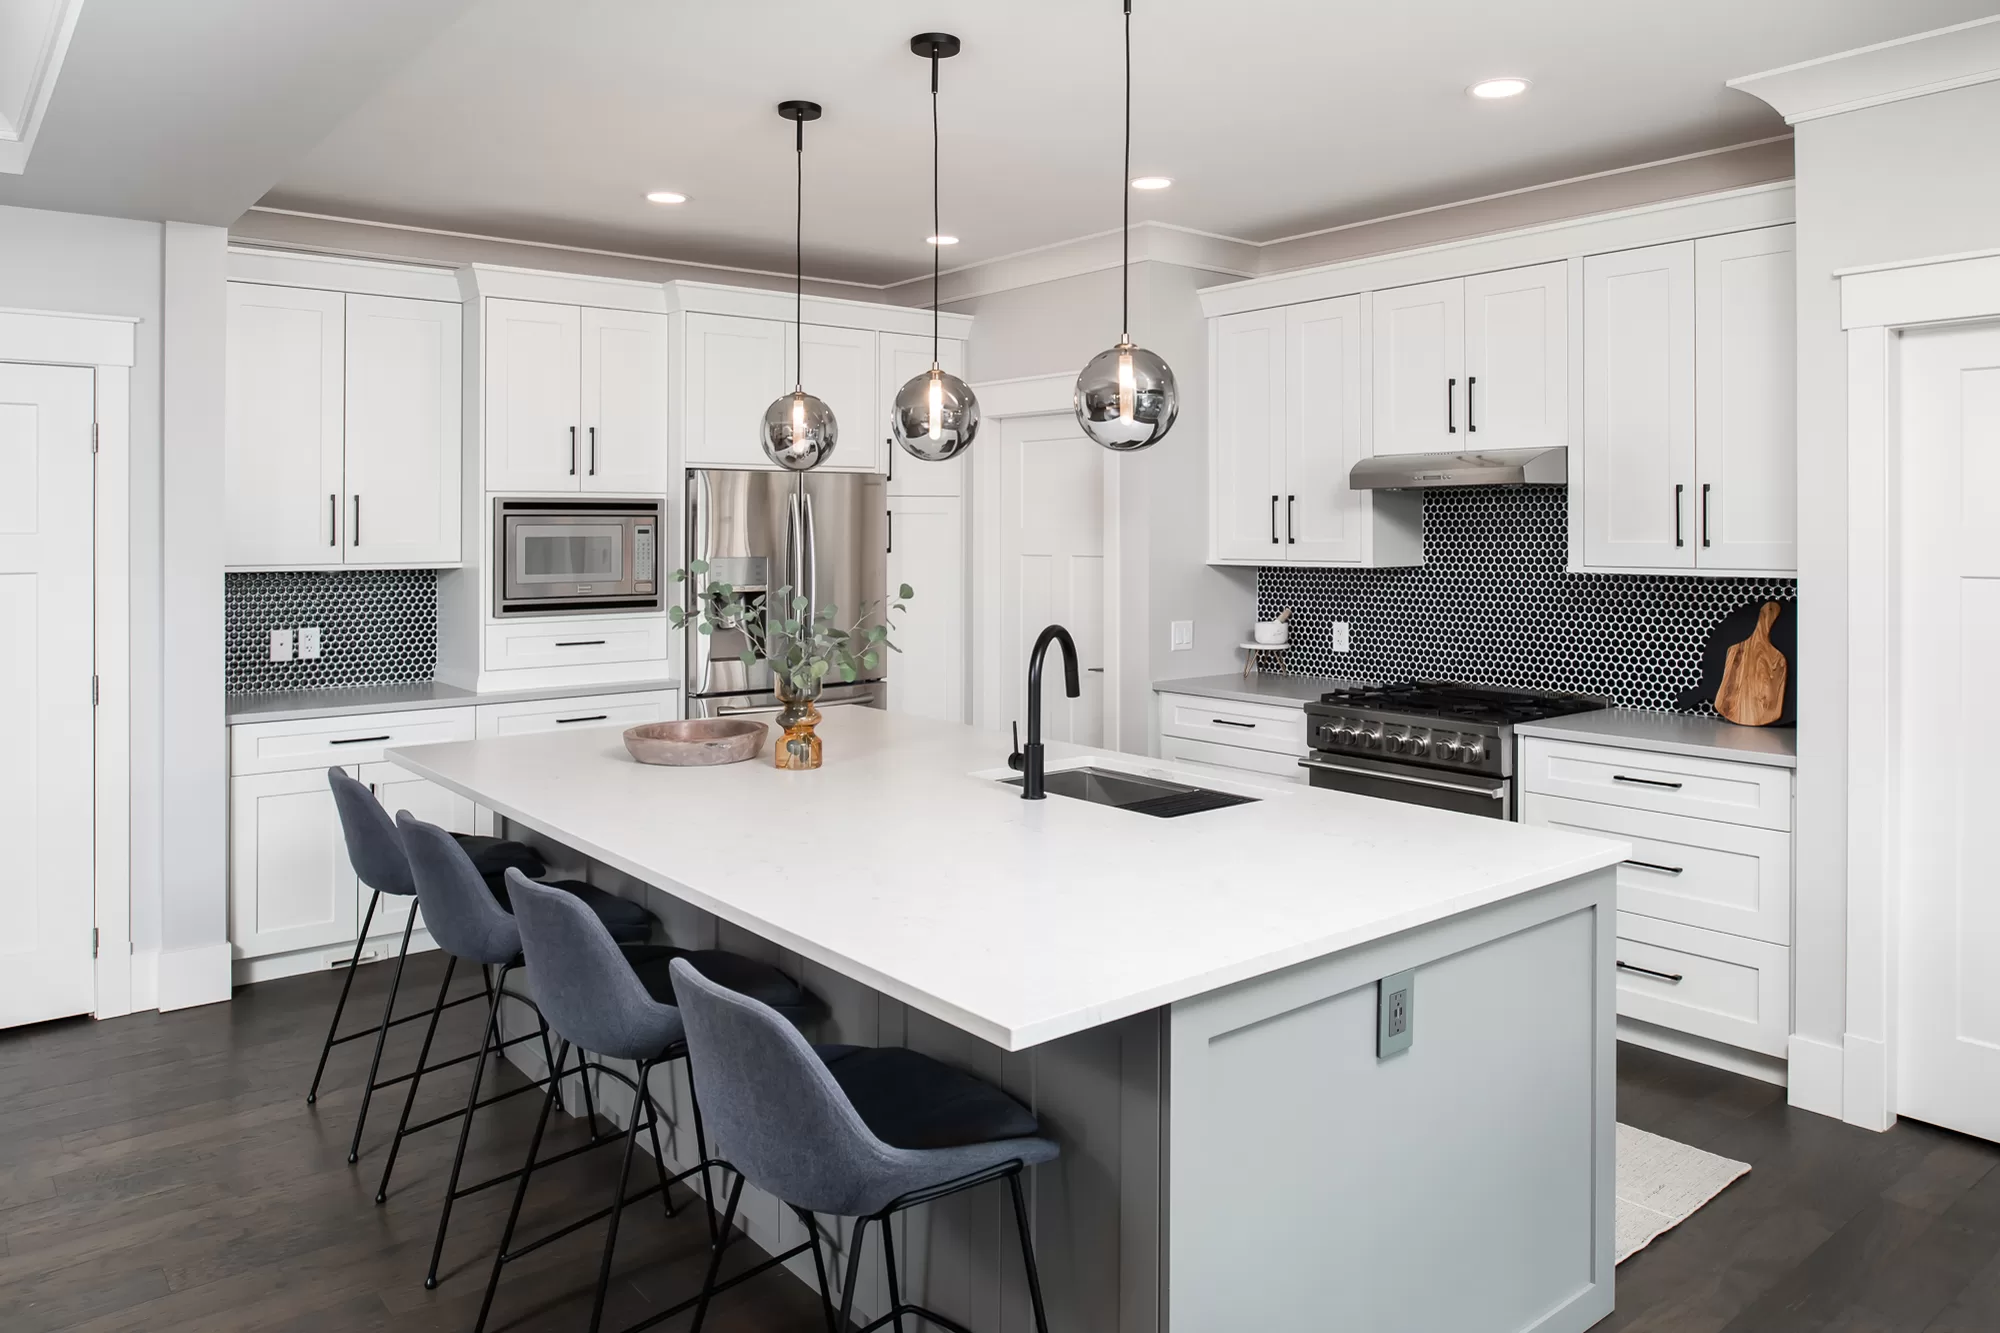
If you are planning to have an island, you will want to have a minimum of 36"-42" inches between your island and perimeter cabinets and appliances. Ideally, you will have 42"-48" minimum for detached homes and town homes, 36" is the bare minimum usually seen in smaller homes such as condos & apartments. The average person requires at least 2 feet of space, so consider how many you wish to seat at your island, and multiply that by 2-2.5. If you want to seat 4, you need at least an 8 foot island.

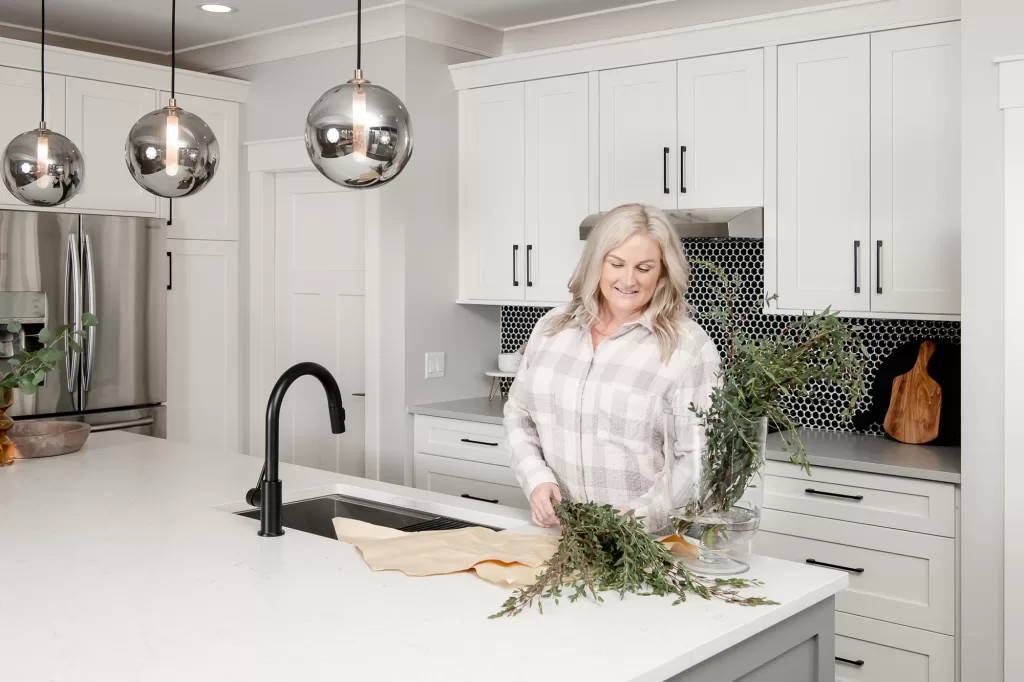
Designs by Stephanie Hilton Design

3 / CHOOSING YOUR APPLIANCES

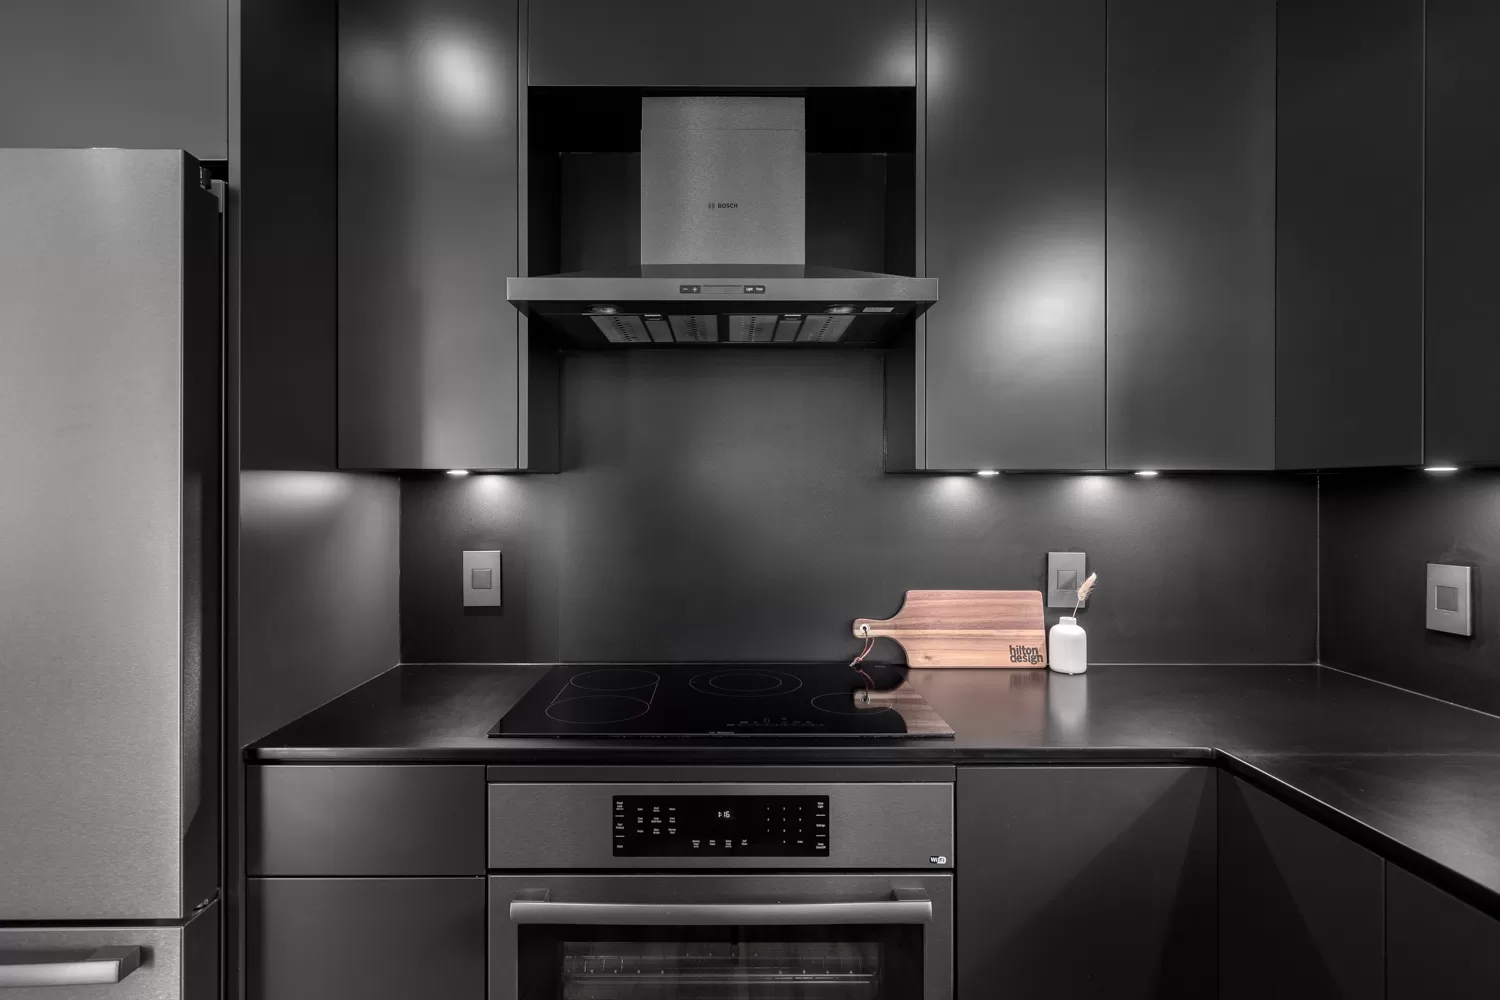
itchen appliances involves considering your cooking habits, lifestyle, budget, and the overall design of your kitchen. Consider integrated or built-in appliances for a seamless and cohesive look. Appliances that blend with the cabinetry contribute to a clean and modern aesthetic. Here are some tips to help you make informed decisions when selecting kitchen appliances:

  1. Define Your Budget:
    • Determine a realistic budget for your kitchen appliances. This will help narrow down your options and guide your choices.
  2. Consider Appliance Finish:
    • Choose an appliance finish that complements your kitchen's design. Stainless steel is a popular and versatile choice, but there are also options like black stainless steel, matte finishes, and classic white or black.
  3. Evaluate Your Cooking Needs:
    • Consider your cooking habits and needs. If you love to bake, you might prioritize a high-quality oven. If you entertain frequently, a spacious refrigerator and a reliable dishwasher may be essential.
  4. Research Appliance Brands:
    • Research different appliance brands, considering factors such as reputation, customer reviews, and warranty offerings. Choose reputable brands known for reliability and customer satisfaction.
  5. Energy Efficiency:
    • Look for appliances with the ENERGY STAR label. Energy-efficient appliances can save you money on utility bills and are environmentally friendly.
  6. Appliance Size and Capacity:
    • Ensure that the appliances you choose fit the available space in your kitchen. Consider the size and capacity of refrigerators, ovens, and dishwashers to meet your household's needs.
  7. Cooking Range:
    • Choose a cooking range that suits your cooking style. Options include gas, electric, and induction ranges. Consider features like convection cooking, multiple oven racks, and precise temperature control.
  8. Refrigerator Features:
    • Look for features such as adjustable shelving, humidity-controlled crisper drawers, water and ice dispensers, and energy-saving modes. Consider the layout of the refrigerator interior for optimal organization.
  9. Dishwasher Features:
    • Consider dishwasher features like adjustable racks, multiple wash cycles, and energy-efficient settings. Some dishwashers offer advanced features like smart technology and quiet operation.
  10. Microwave and Ventilation:
    • Choose a microwave that suits your cooking habits and kitchen layout. Consider built-in or over-the-range options. Ensure that your ventilation system effectively removes cooking odors and smoke.
  11. Smart Technology:
    • Explore appliances with smart technology features. Smart ovens, refrigerators, and dishwashers can offer convenience through remote control, scheduling, and integration with other smart home devices.
  12. Read User Reviews:
    • Check user reviews to gain insights into the performance and reliability of specific appliances. Real-world experiences from other consumers can help inform your decision.
  13. Consider Long-Term Costs:
    • While upfront costs are important, also consider long-term costs such as energy efficiency, maintenance, and potential repairs. Investing in quality appliances can be cost-effective over time.
  14. Coordinate Styles:
    • If you're updating multiple appliances, aim for a cohesive look. Coordinating styles and finishes can contribute to a unified and aesthetically pleasing kitchen design.

Designs by Stephanie Hilton Design

4 / KNOW YOUR FINISHES, FIXTURES & MATERIALS

When it comes to selecting your finishes, fixtures & materials for your kitchen, the options are truly endless and can be overwhelming. If you can familiarize yourself with what is available, the pros & cons of each, and the options to consider, it will help you narrow down what is suitable for your space. We have listed the most common and linked some resources for you:

  1. COUNTERTOPS:
  2. BACKSPLASH:
    • Use the backsplash as an opportunity to make a statement. Choose interesting tiles, patterns, or materials to add personality to the kitchen. A stylish backsplash can be a focal point in the room.
    • mosaic tile
    • subway tile
    • large format tile
    • quartz splash
    • quartz curb
  3. MILLWORK:
    • Consider incorporating open shelving to display attractive dishes, glassware, or cookbooks. This not only adds a decorative element but also provides easy access to frequently used items.
    • If space allows, include a kitchen island. Islands can serve multiple purposes, such as extra counter space, additional storage, or a casual dining area. Ensure there is enough clearance around the island for easy movement.
    • panel style - slab, shaker, raised panel, recessed panel, stained wood, louvered, glass
    • painted wood (not recommended as the rails & stile can separate)
    • painted MDF
    • veneer over MDF
    • HPL (laminate) over MDF
    • hardware or no hardware (pushlatch)
    • pullouts, organizers & interior fittings - Use organizers and dividers in drawers and cabinets to keep utensils, cookware, and pantry items well-organized. Customized storage solutions can maximize space efficiency.
  4. PLUMBING & LIGHTING:
    • finish - back, chrome, stainless, black stainless, nickel etc. (most finishes vary from one supplier to the other, keep this in mind)
    • mixing metals
    • options - touchless, pull down spray faucet etc
    • single bowl or divided bowl sink
    • decorative lighting vs. recessed - Install task lighting in key work areas, such as over the sink, stove, and countertops. This ensures adequate illumination for various kitchen tasks.
    • undercabinet lighting - Illuminate countertops with undercabinet lighting. This not only enhances visibility for food preparation but also adds a warm and inviting ambiance to the kitchen
    • accessible outlets - Install outlets with USB ports in convenient locations for charging electronic devices. This is especially useful for keeping devices accessible while cooking or entertaining.
    • designer outlets on your island or backsplash

Designs by Stephanie Hilton Design

I hope that that these design tips are helpful when planning your kitchen project.

Remember, as a beginner, it's okay to take your time exploring options and experimenting with different elements. The key is to design a kitchen that aligns with your lifestyle, preferences, and, most importantly, inspires you to create delicious meals and lasting memories. Happy designing!!

If you need helping planning your next design project, office or otherwise, reach out. I’d love to discuss it with you.

DIY bunk bed for under $200

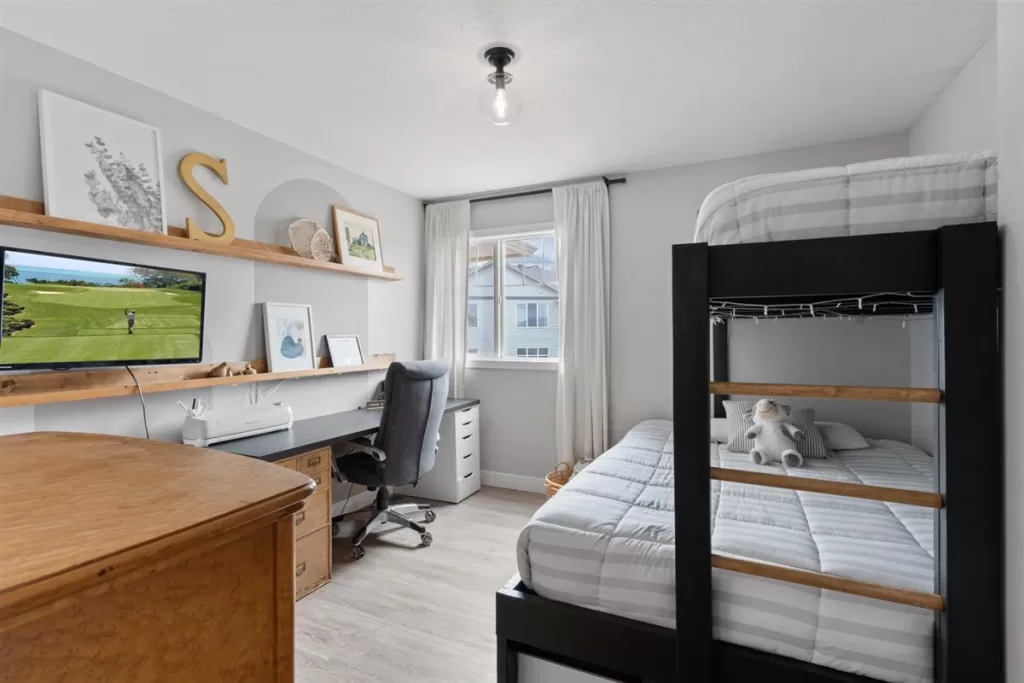
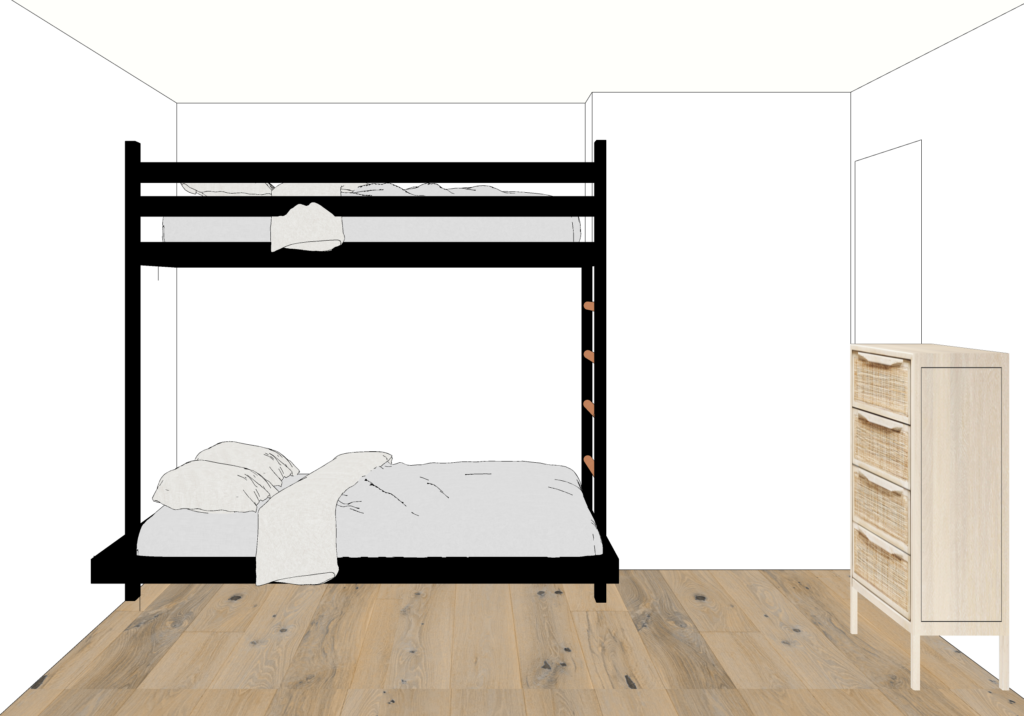
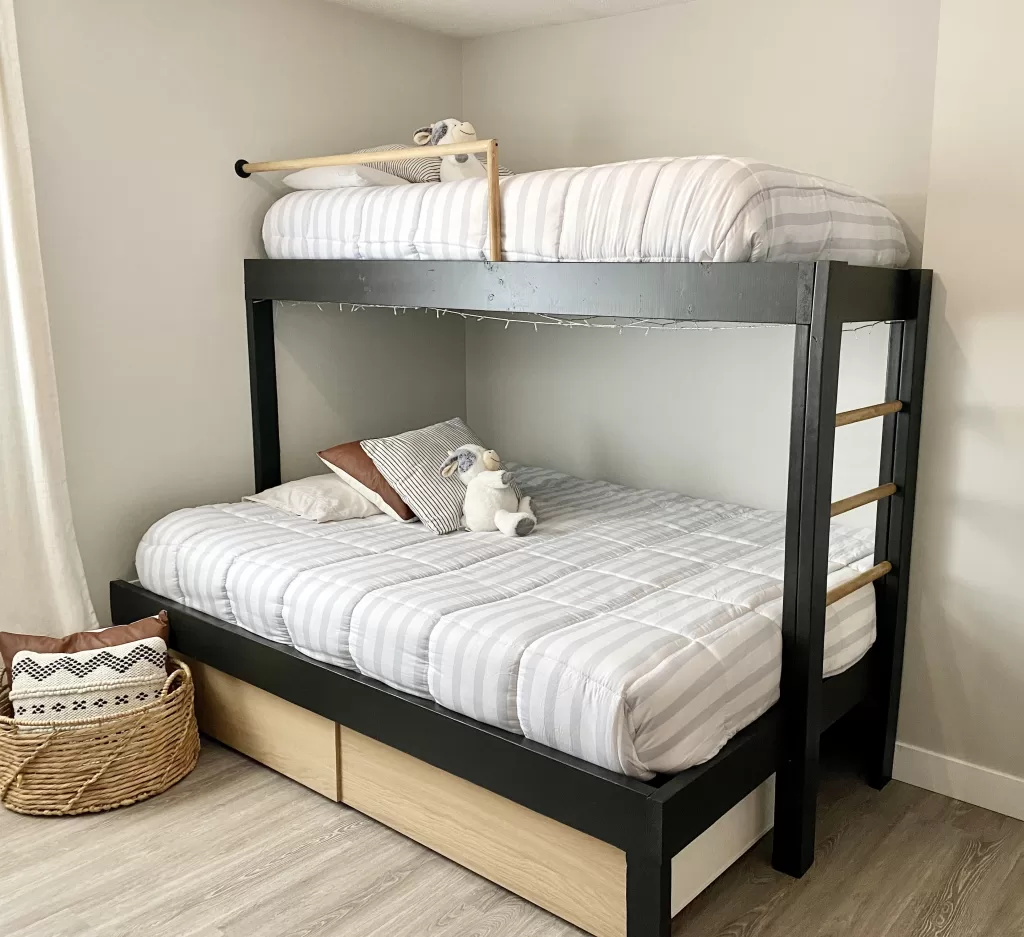
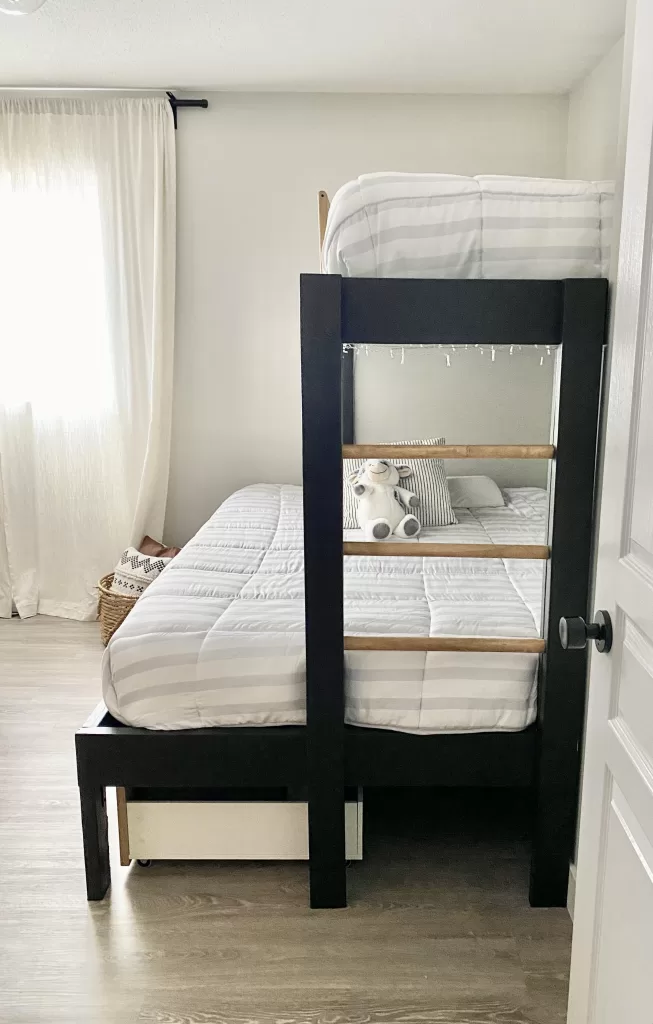
We desperately needed to add some extra space for guests and kids sleepovers, as this room also doubles as my home office. None of the store bought bunks beds were really our taste, and were super expensive for what you got. It is also hard to find bunks that have a queen bed on the bottom and a single on top, so we decided to build our own DIY bunkbed that would fit our space perfectly. This blog will give you step-by-step instructions, photos, and a material list so you can build your own DIY bunkbed for a fraction of the cost of store bought bunks.

MATERIALS LIST:

TOOLS REQUIRED:

THE DESIGN:

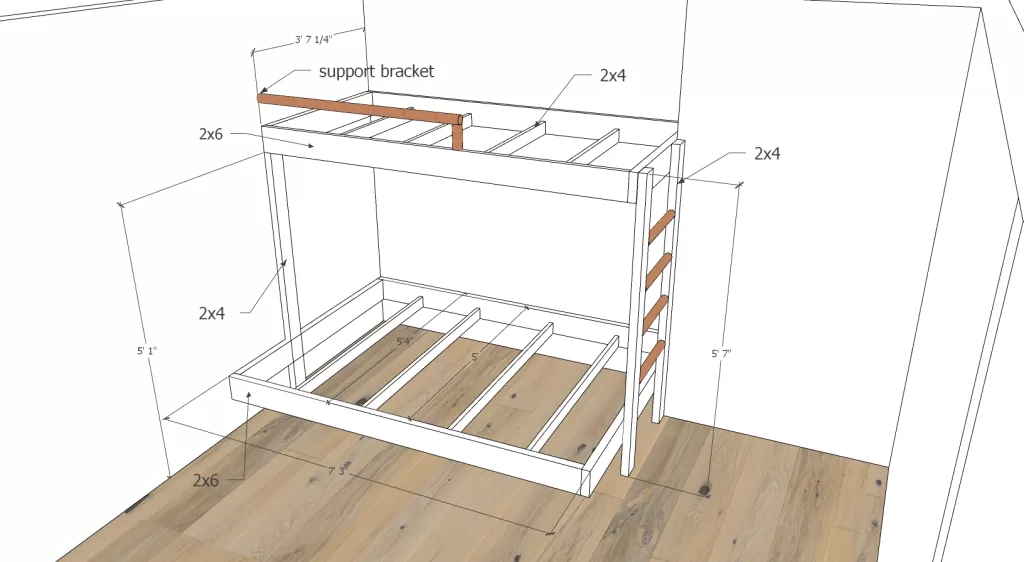
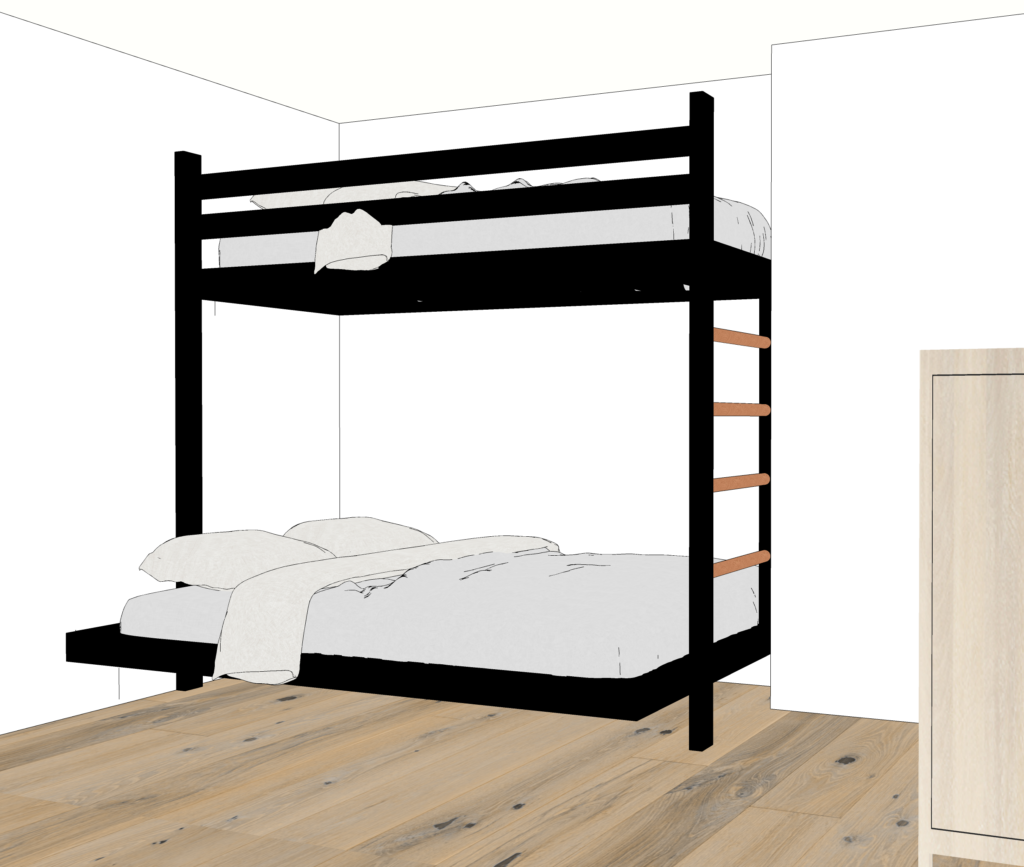
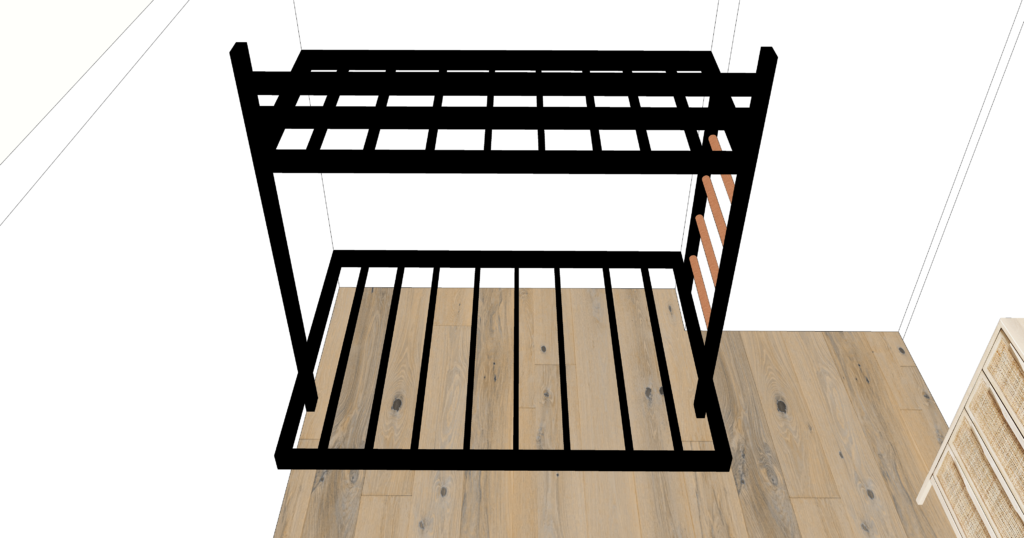
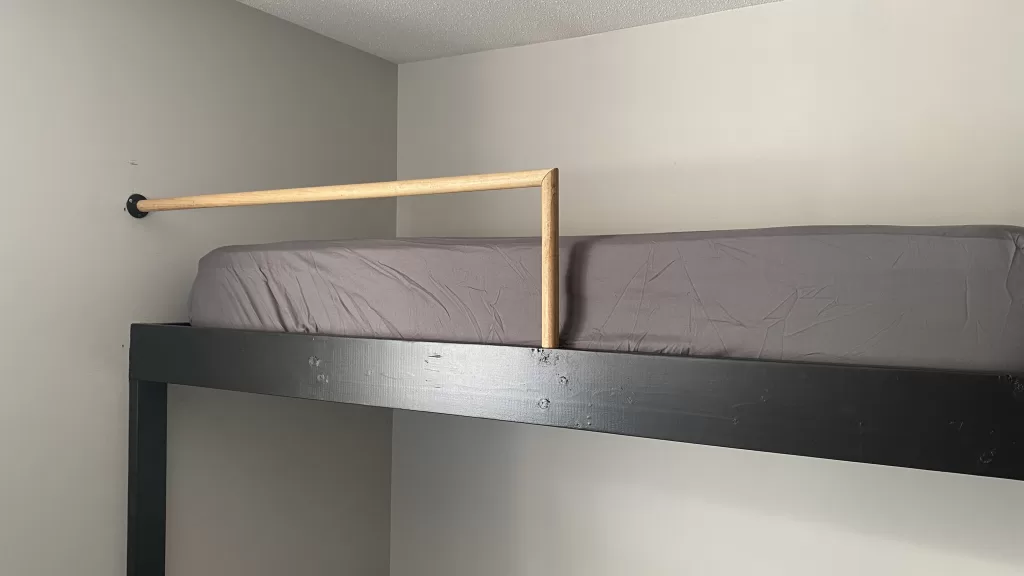
My design of our DIY bunkbed changed a a bit throughout the construction of the bunks, and we made some modifications on the fly to add additional support. I originally had 2x4's as the safety rail, then changed that to round dowel to complement the ladder, didn't need as many cross supports as I had originally thought, and changed the construction of the ladder.

STEP 1: PREPAINT YOUR LUMBER

You will thank me later. Paint all lumber and plywood before starting your cuts. You can easily touch up after and not have to worry about getting paint all over your walls.

STEP 2: MEASURE YOUR SIDE & TOP RAILS & CUT

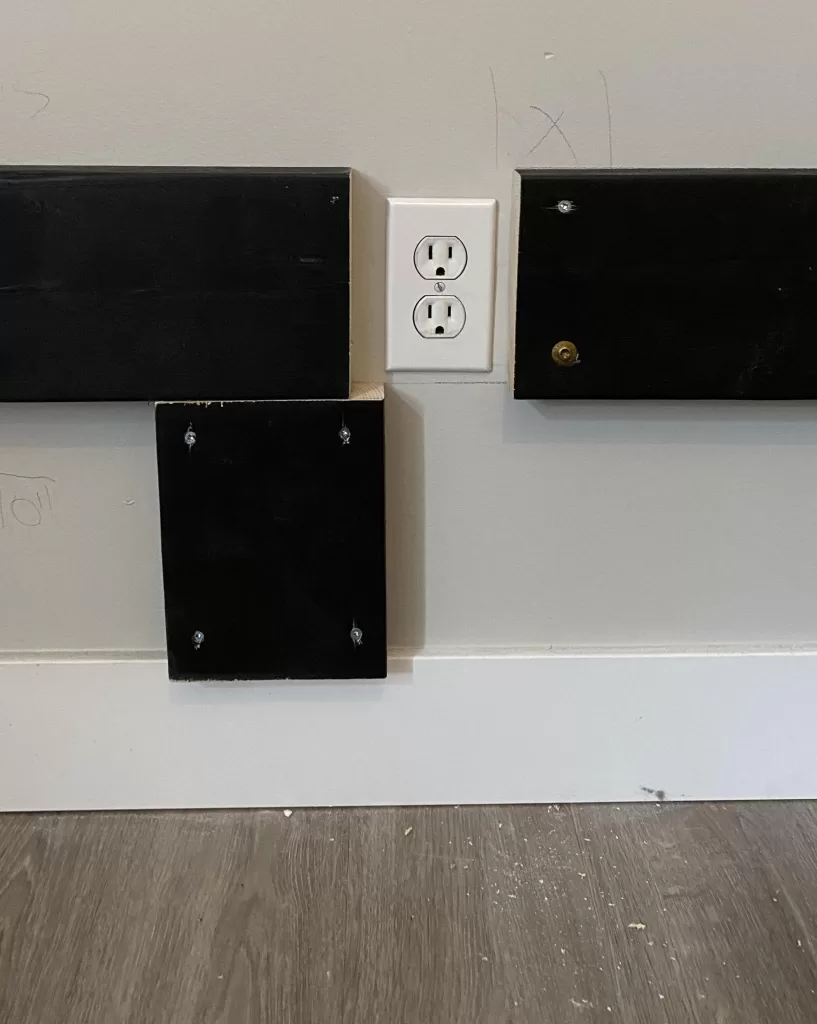
We had a nook in our guest bedroom so we decided to cut our boards to fit this nook to give us as much floor space as possible, and having walls on 3 sides would allow extra support. Remember, queen size mattresses are 60" x 80", and single mattresses are 38" x 75" so the top bunk will have a little extra room at the foot of the bed, or get a twin XL mattress which is 38" x 80". Attach the boards onto the wall directly into studs using the GRK Fasteners. We wanted 12" under the bed for storage bins, so we had electrical outlets to work around, we figured this out as we went along.

STEP 3: INSTALL OUTER SIDE RAILS & CROSS SUPPORTS

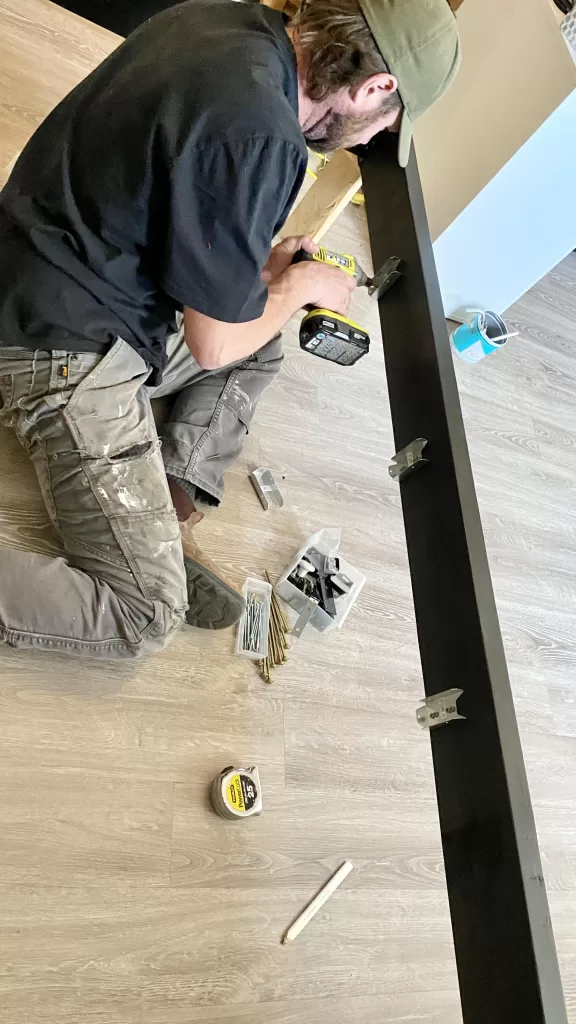
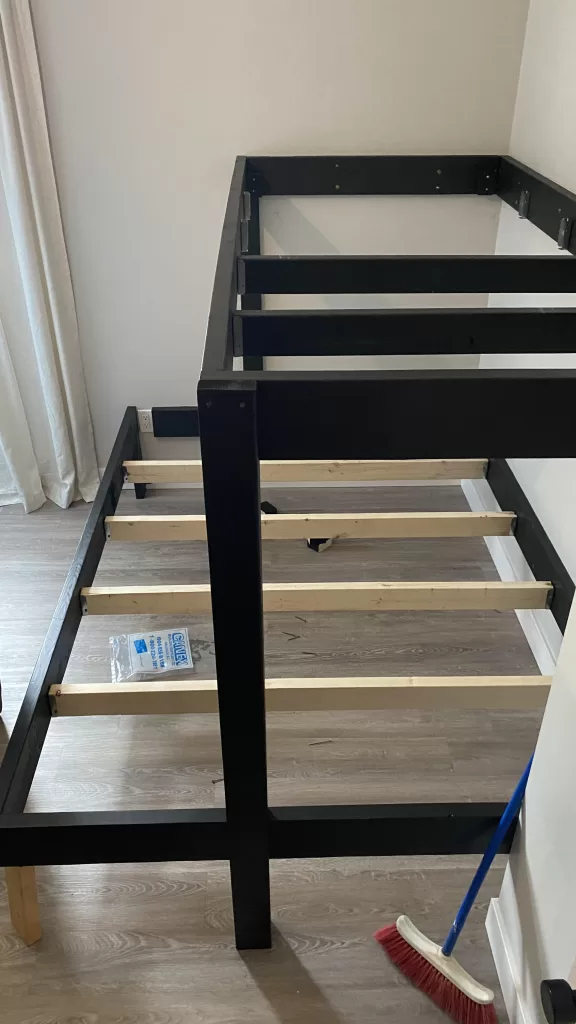
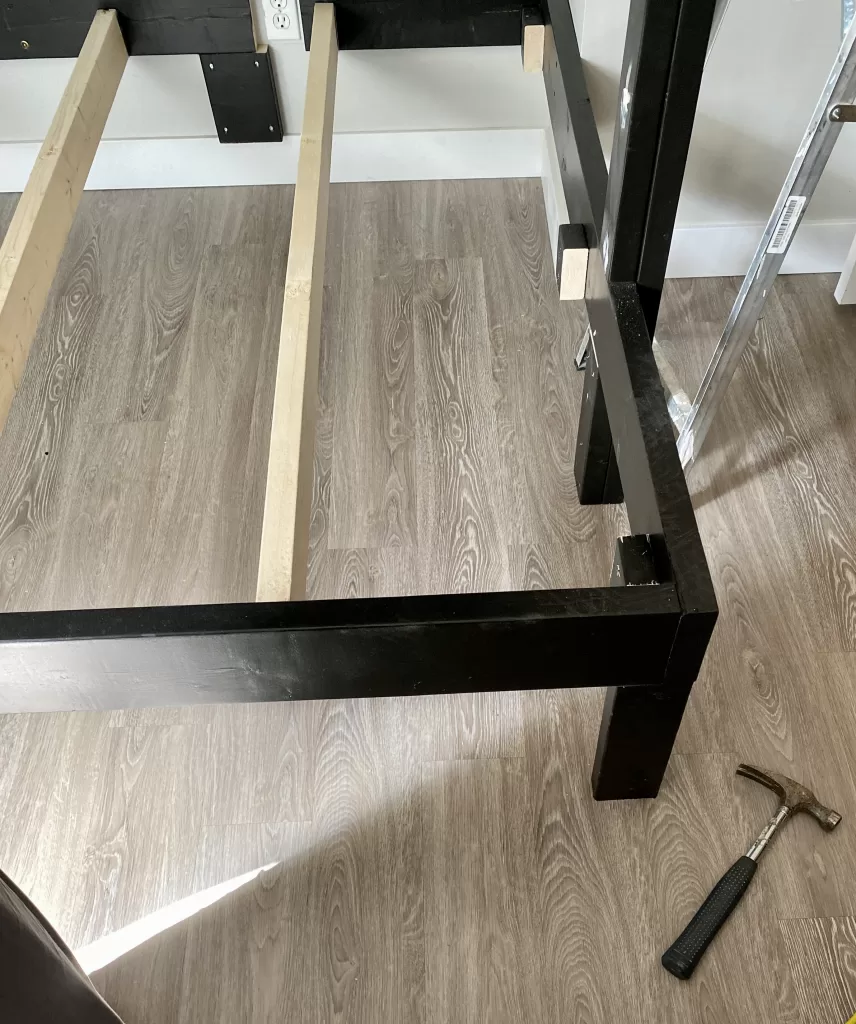
Attach the outer side rails by butting inside the top and foot rails and screwing in place. Use a temporary support in the corners if needed until you are ready to install the ladder.

Install the joist hangers spaced equally.

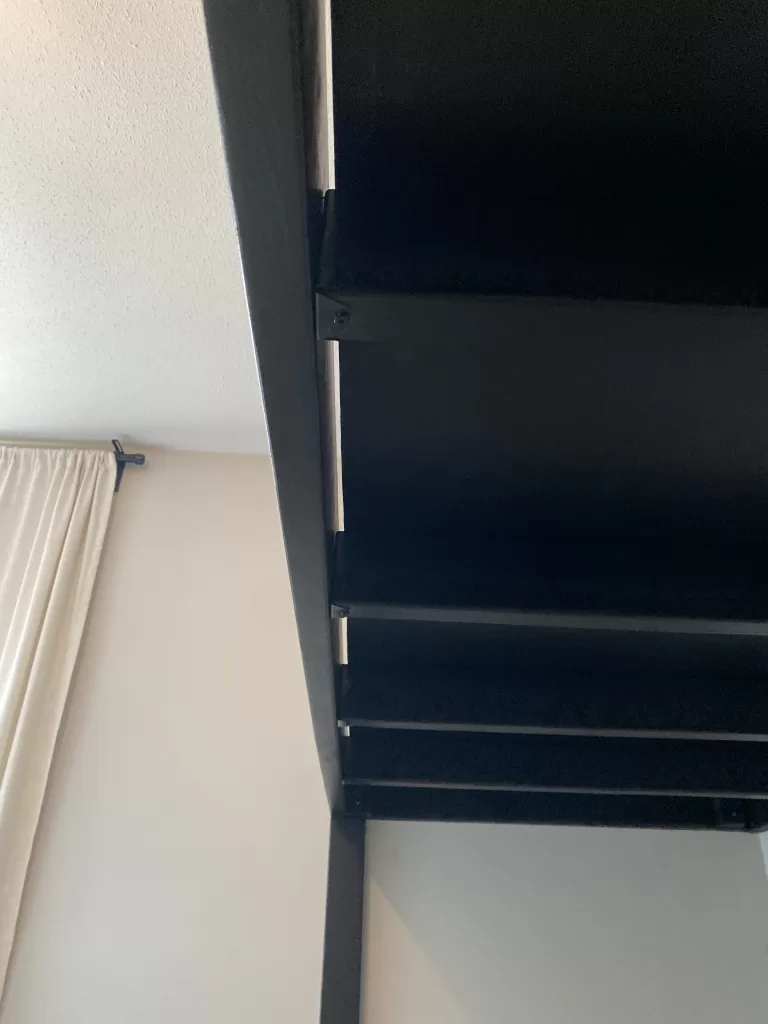
Measure (twice and cut once!) & install your 2x4 cross supports. These slide into the joist hangers, then get screwed in place. We saved paint and time by only painting the top bunk cross supports as you will never see the bottom bunk supports once the plywood and mattress are on top.

STEP 4: INSTALL THE PLYWOOD

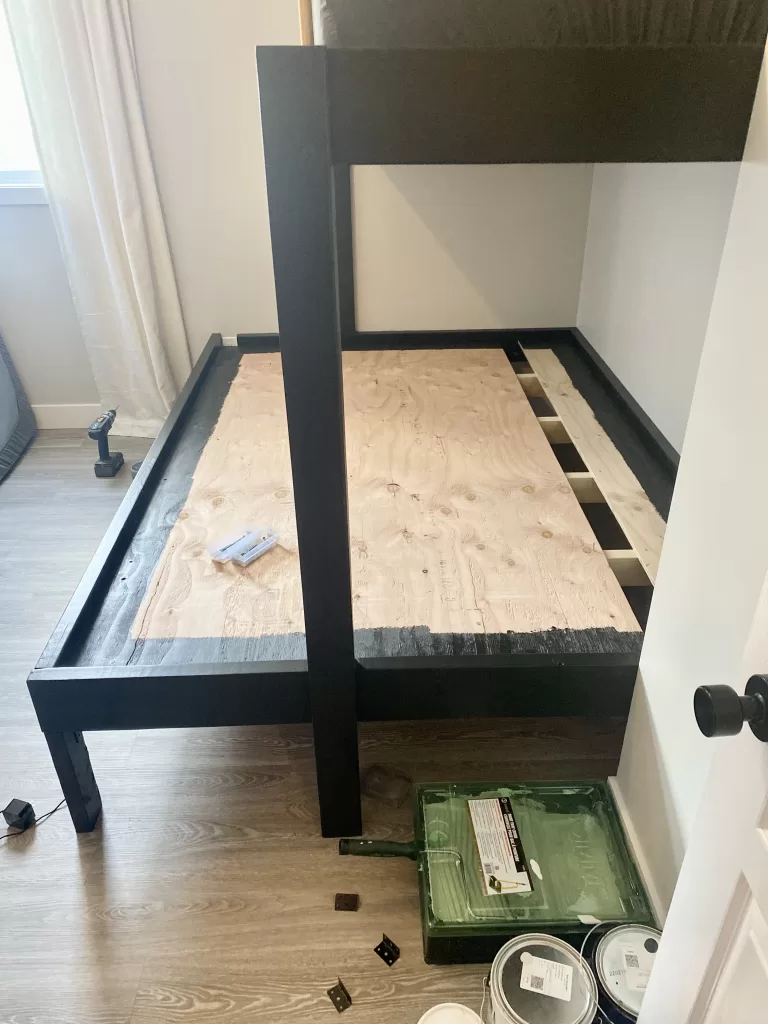
Install your pre-painted plywood on each bunk by screwing the plywood into the cross supports. I am all about saving time, so again to save time & paint, we painted only the perimeter of the visible parts, and the bottom of the sheet going on the top bunk as you will see it from the bottom bunk. A 4x8 sheet doesn't cover the entire width of the bottom bunk so we used a cut off from the top bunk to save on materials. This will not affect support in any way, this thing is literally built like a deck and could withstand an earthquake.

STEP 5: BUILD & INSTALL THE LADDER

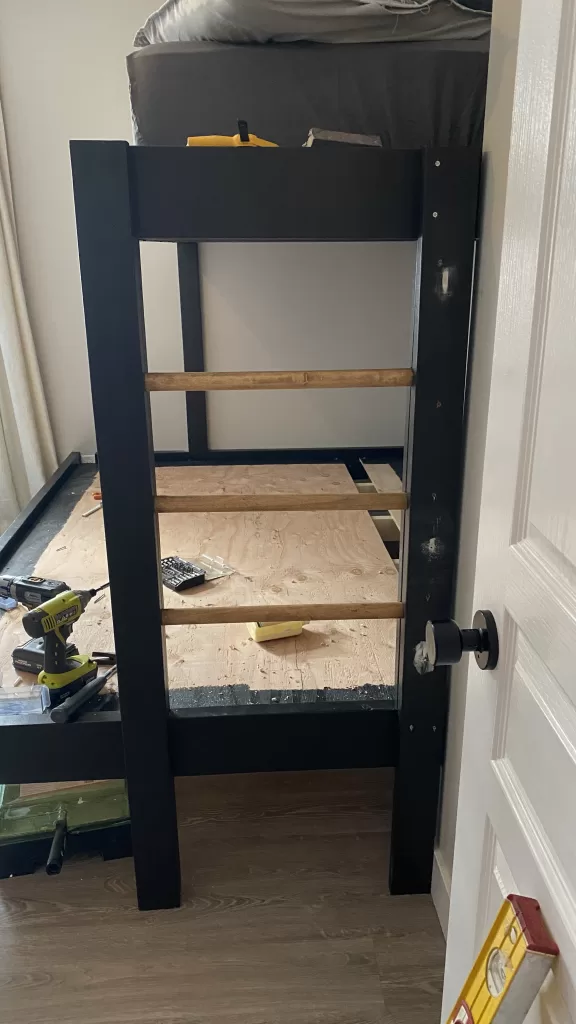
At this point we made some modifications on the fly. My original design of the DIY bunkbed created the illusion of a floating bottom bed, but we felt a little more support was needed and more important than aesthetics. I also changed the safety rail from 2x4's to the round dowel.

Although the ladder was going to provide most of the support, we decided to add some legs at the outer corners using cut-offs.

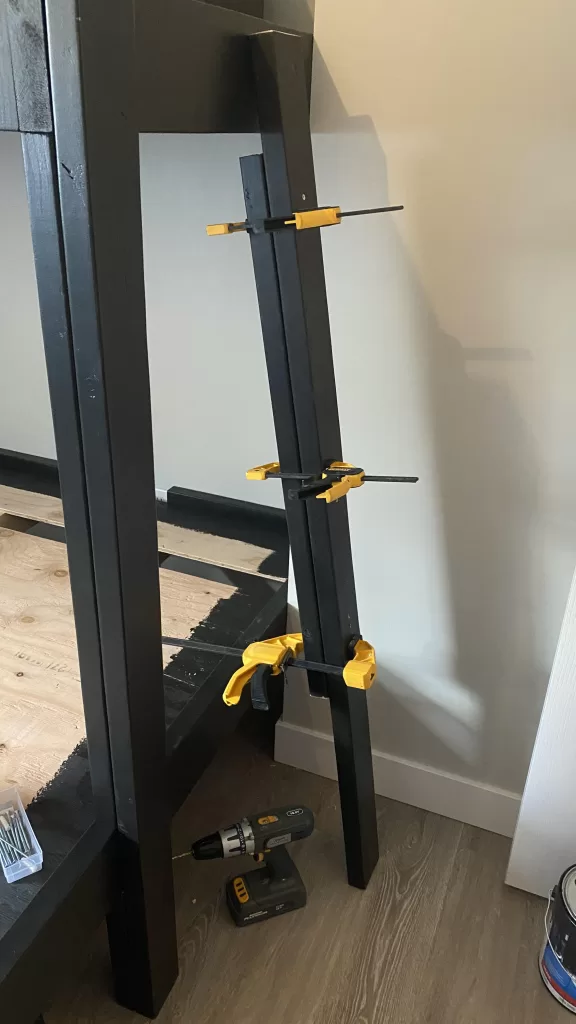
Measure the space between the bottom and top rail, cut two 2x4's to fit. Measure the outside from floor to the top of the top rail, cut two pieces. Assemble your ladder and dry fit it to ensure it fits the space.

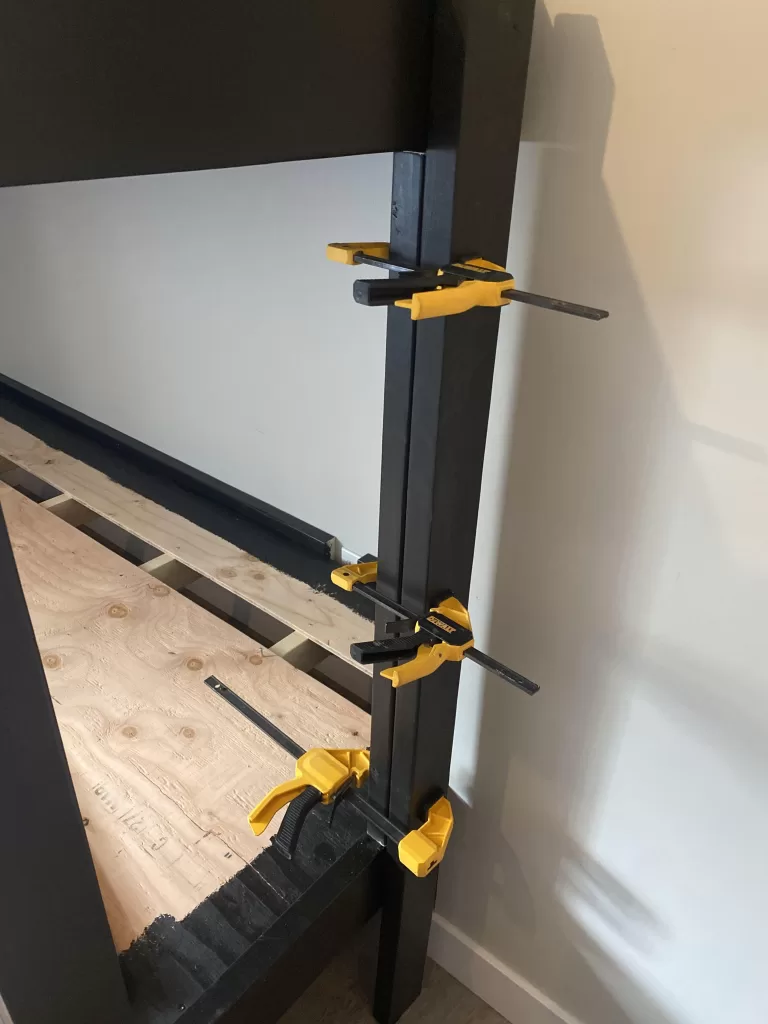
Add wood glue between your boards, clamp and screw together. Remove and let dry.

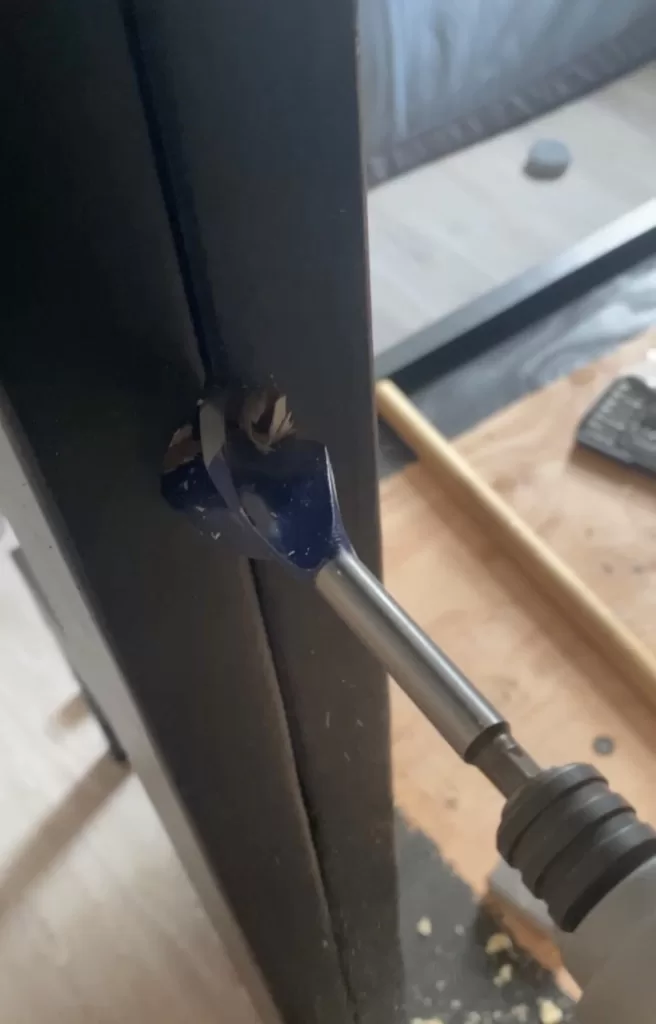
Measure the placement of the ladder rungs, and using the Forstner bit, drill holes to fit the rungs. Install one side of your ladder by screwing it to the outside of the foot boards. Insert glue into the holes, insert the rungs into the holes of the ladder you have attached. Then insert the rungs into the holes of the side of the ladder that you have not yet attached, make snug & and then screw that side of the ladder to the foot boards. Your ladder is complete!! You can start filling holes at this point so you can start on your safety rail while this dries.

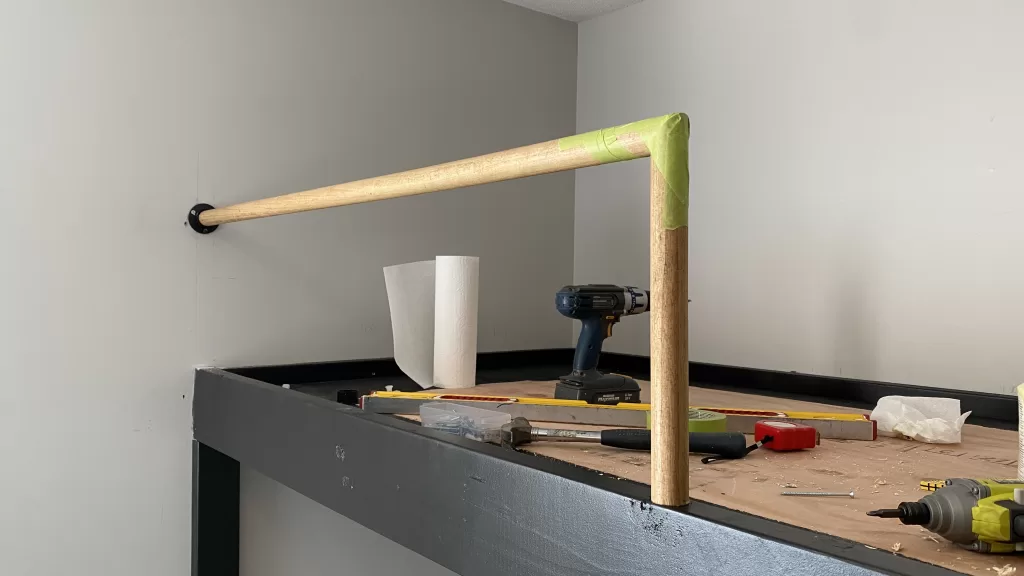
STEP 6: BUILD & INSTALL THE SAFETY RAIL

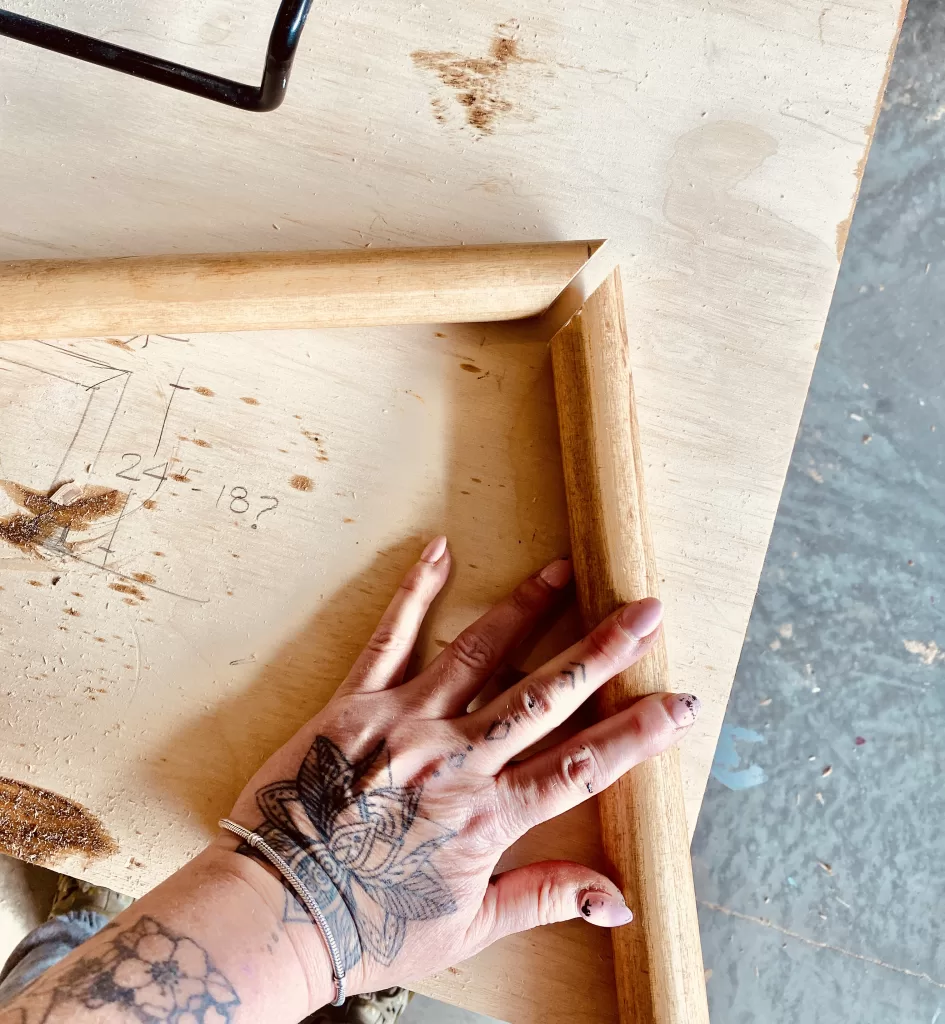
This is where you will need your miter saw. This can be any size you want really, and it will depend on the height of your mattress, so take that into account when measuring.

Make a 45 degree cut using your saw.

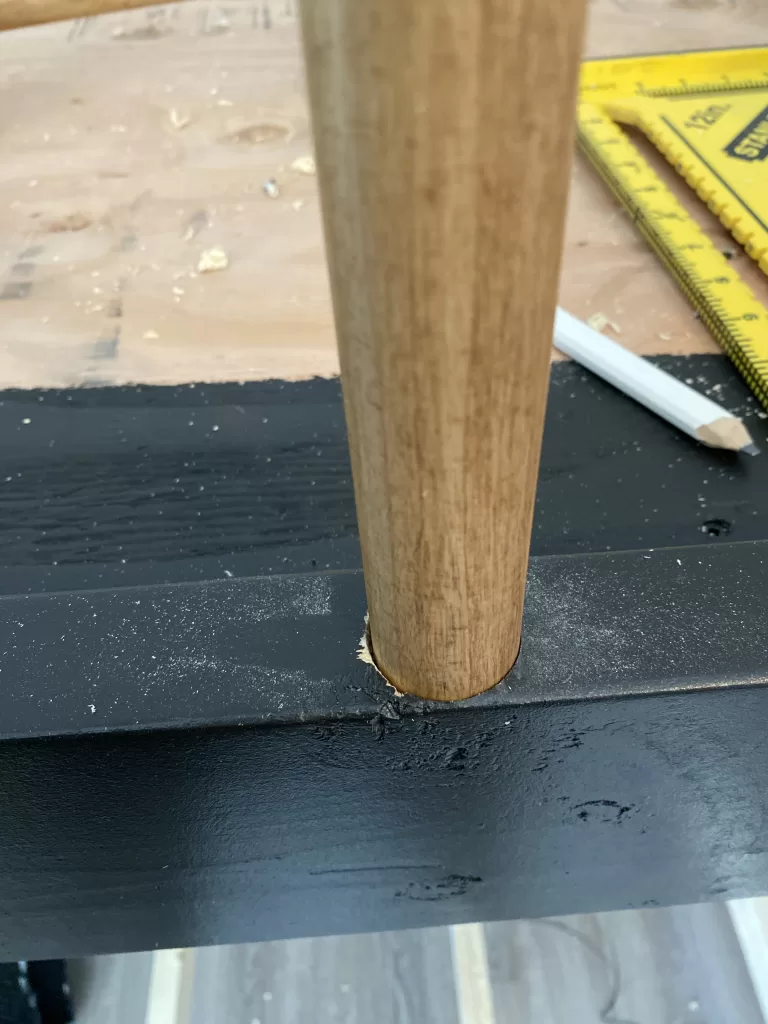
Using your Forstner bit, drill a hole very carefully into the top bunk side rail. You do not have much room for error here!

Place the wall bracket on the wall, and secure into place (you may need drywall supports if you don't hit a stud)

Place glue into the hole on the top rail, install the safety rail and let dry.

While this is drying, fill your holes using wood filler, let dry, sand & paint. The hard part is done, now onto the fun stuff!

STEP 7: STYLE YOUR DIY BUNKBED!

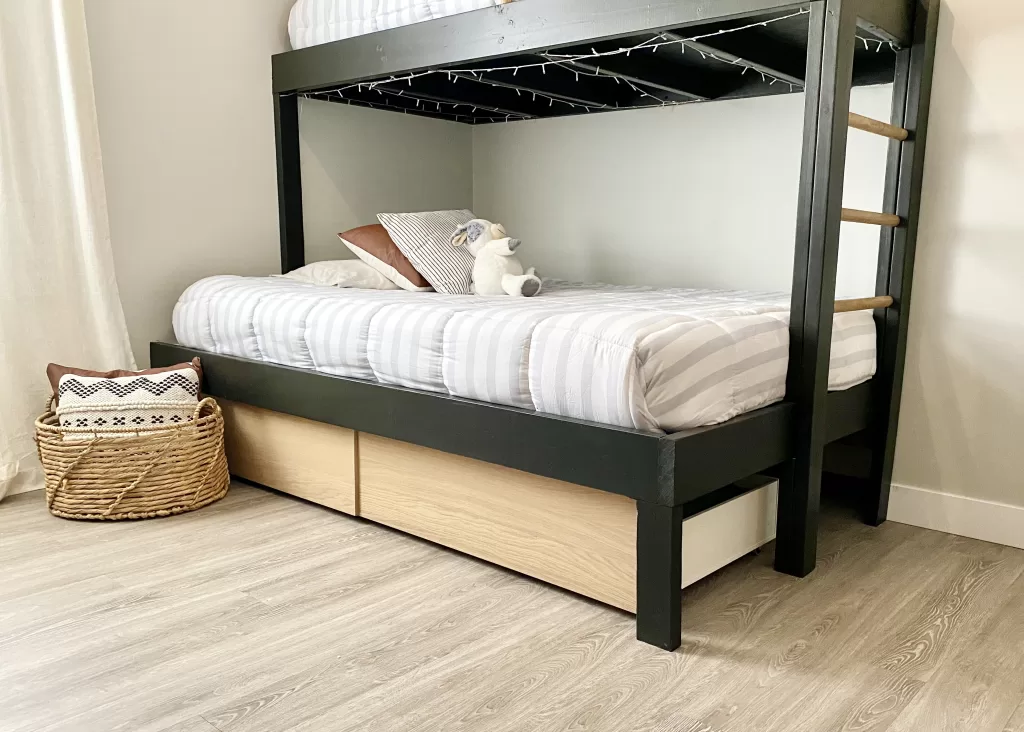
I chose this striped bedding from Amazon and added some twinkle lights to the bottom bunks for our daughters.

We ensured we had 12" under the bottom bunks for MALM underbed storage boxes from IKEA

If you enjoyed this tutorial on building your own DIY bunkbed's , please subscribe to my blog & newsletter for DIY projects, designer tips and resources. Happy DIY'ing!