There are a number of reasons why painting kitchen cabinets can make a big difference in the appearance of a kitchen, one of which is that it offers a new and improved look. If you are willing to make a little preparation and exert some effort, you will save a lot of money by painting your cabinets rather than having them professionally refinished or new cabinets installed.
Painting kitchen cabinets can bring many benefits, both aesthetic and practical:
Painting kitchen cabinets can be a rewarding DIY project, but it requires patience and careful preparation for a lasting, professional-looking finish. Here's a step-by-step guide:
Before starting your kitchen cabinet painting project, you will need to gather the necessary supplies:
- Paint (water-based latex acrylic or alkyd paint used for cabinets)
- Paint brushes
- Paint rollers and tray
- Drop cloths
- Grits: fine (220) and medium (400)
- Tack cloth
- Painter’s tape
- Rags
- Denatured alcohol
- Putty knife
- Screwdriver
- Pry bar (used for lifting doors and drawers).
Remove Cabinet Doors and Hardware: Unscrew the cabinet doors, drawers, and any hardware (knobs, handles, and hinges). Label each piece or place them in a marked bag for easy reassembly later.
Remove Cabinet Doors and Hardware: Unscrew the cabinet doors, drawers, and any hardware (knobs, handles, and hinges). Label each piece or place them in a marked bag for easy reassembly later.
Clean the Cabinets: Clean the surfaces with a degreaser or a solution of soap and water. Remove grease, grime, and dirt buildup to ensure the paint adheres properly.
Fill Any Holes: Use wood filler to fill in any imperfections or old hardware holes (if you plan to change the hardware later). Sand smooth once dry.
Sand: Using 220-grit sandpaper, lightly sand the cabinet frames and doors to create a slightly abrasive surface. Then, sand the surface with 400-grit sandpaper. It is essential to sand the whole surface to ensure that it can hold paint well. Sand the raised edges gently around the ridges and trim them. After sanding, ensure all surfaces are dust-free by using a tack cloth to remove all the dust.
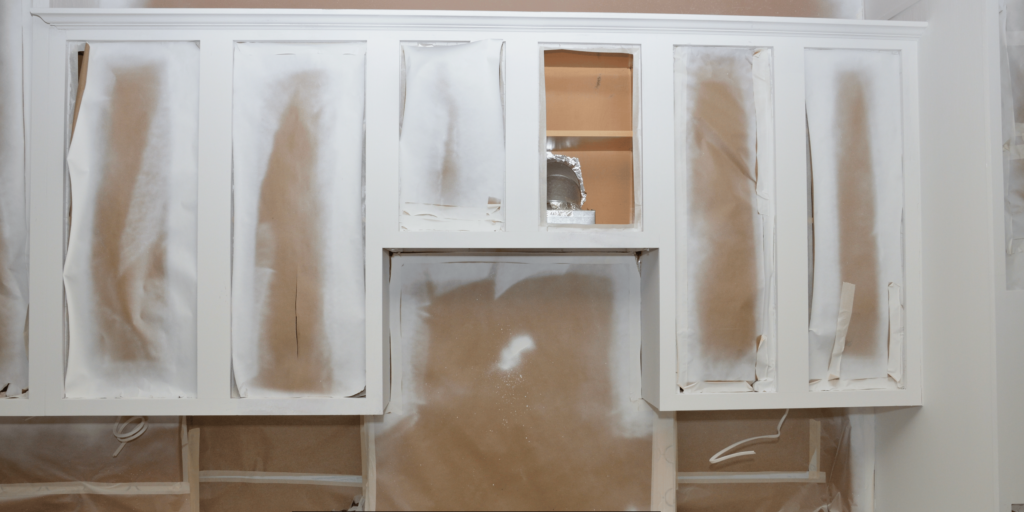
Tape and Cover Surrounding Areas: Use painter’s tape to cover areas you don't want to paint, such as walls, countertops, and backsplash. Lay down drop cloths to protect the floors.
Select a good quality primer intended for use on cabinet doors and other surfaces that will be painted. Oil-borne primers offer excellent sticking ability on smooth and glossy substrates. With a trim brush at a 45-degree angle, apply primer to edges, corners, and trim. Then, apply a primer coat to all the cabinet areas using a roller, which can be attached to an extension handle to cover areas that are hard to reach. Wait for the primer to dry based on the instructions written on the container before proceeding to paint. Once the primer is dry, lightly sand the cabinets with 220-grit sandpaper for a smooth surface. Wipe off the dust with a clean, damp cloth.
First Coat: Start by applying the first coat of paint using the brush for edges and crevices, and a foam roller for larger surfaces. Paint in thin, even coats to avoid drips.
Dry and Sand Between Coats: Allow the first coat to dry completely (usually 4-6 hours), then lightly sand with fine-grit sandpaper. Clean off the dust before applying a second coat.
Second Coat: Apply the second coat of paint for full coverage and an even finish. Depending on the color and quality of the paint, you may need a third coat.
Once the paint is fully dry (typically 24-48 hours), carefully reattach the cabinet doors, drawers, and hardware. Make sure the paint has fully cured before handling to avoid smudges or dents.
It may be time-consuming and somewhat labor intensive, but painting kitchen cabinets is an excellent do-it-yourself home improvement project that can really transform the appearance of the kitchen with a fraction of the cost of having to replace all the cabinets.