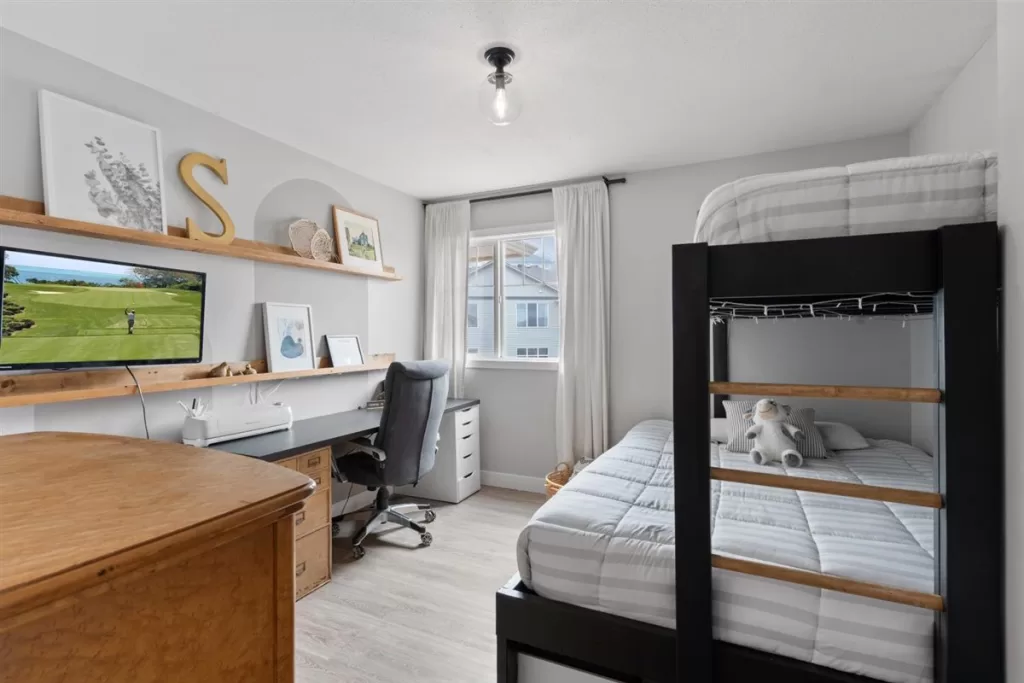
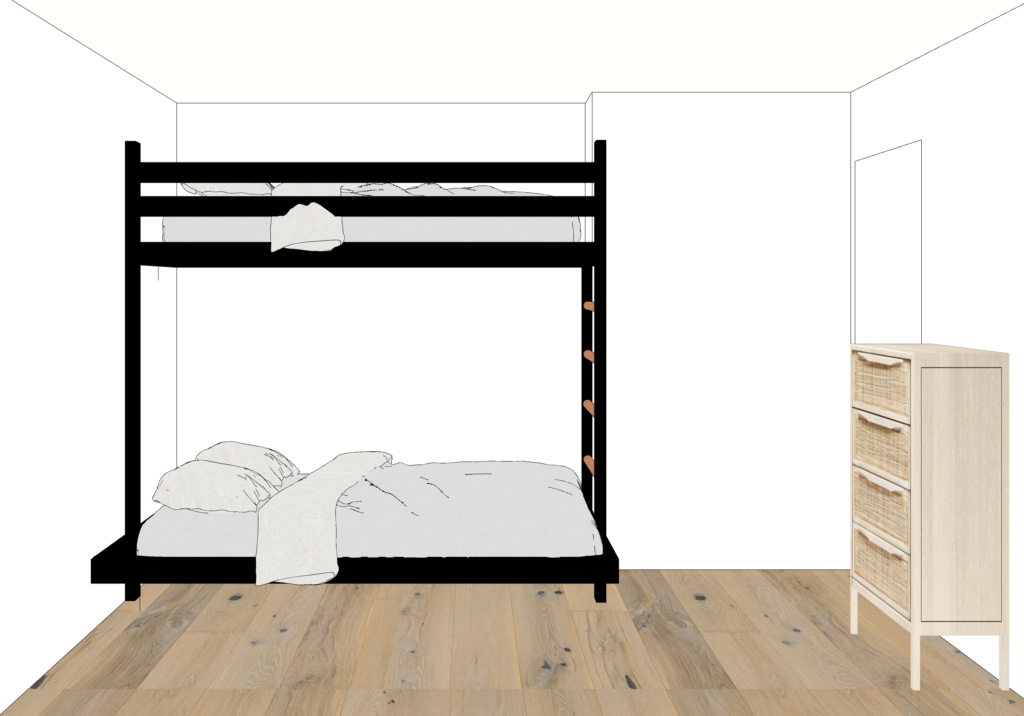
We desperately needed to add some extra space for guests and kids sleepovers, as this room also doubles as my home office. None of the store bought bunks beds were really our taste, and were super expensive for what you got. It is also hard to find bunks that have a queen bed on the bottom and a single on top, so we decided to build our own DIY bunkbed that would fit our space perfectly. This blog will give you step-by-step instructions, photos, and a material list so you can build your own DIY bunkbed for a fraction of the cost of store bought bunks.
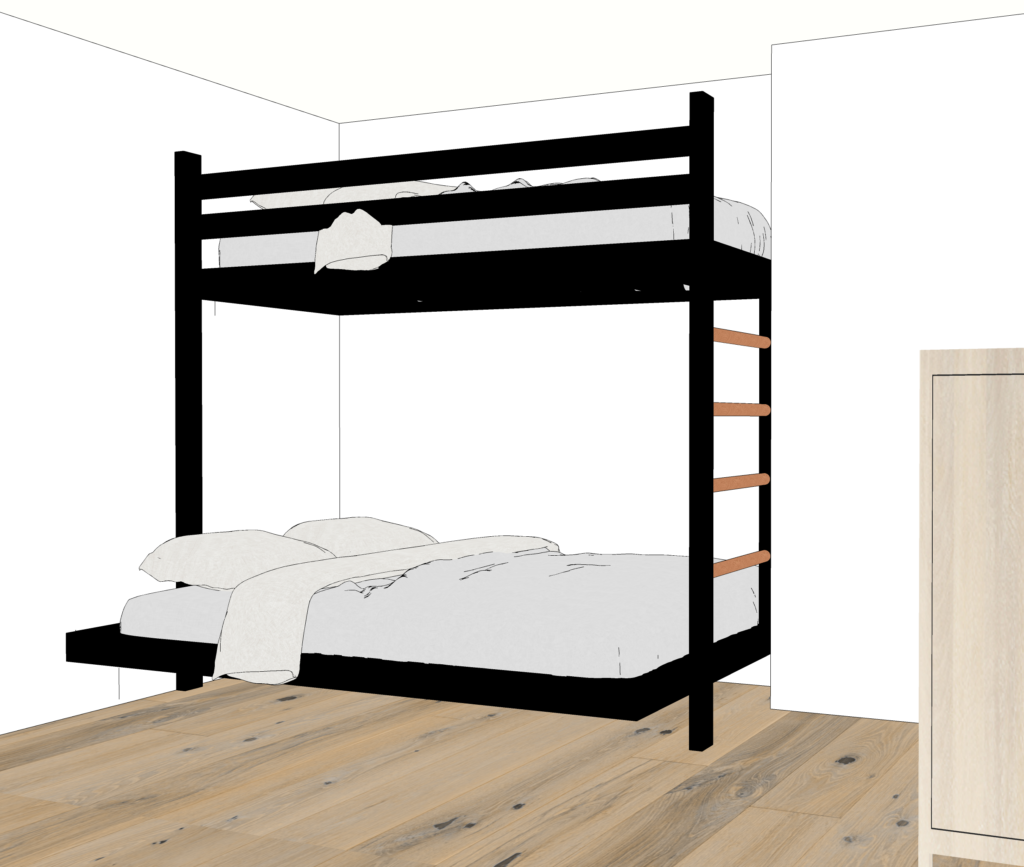
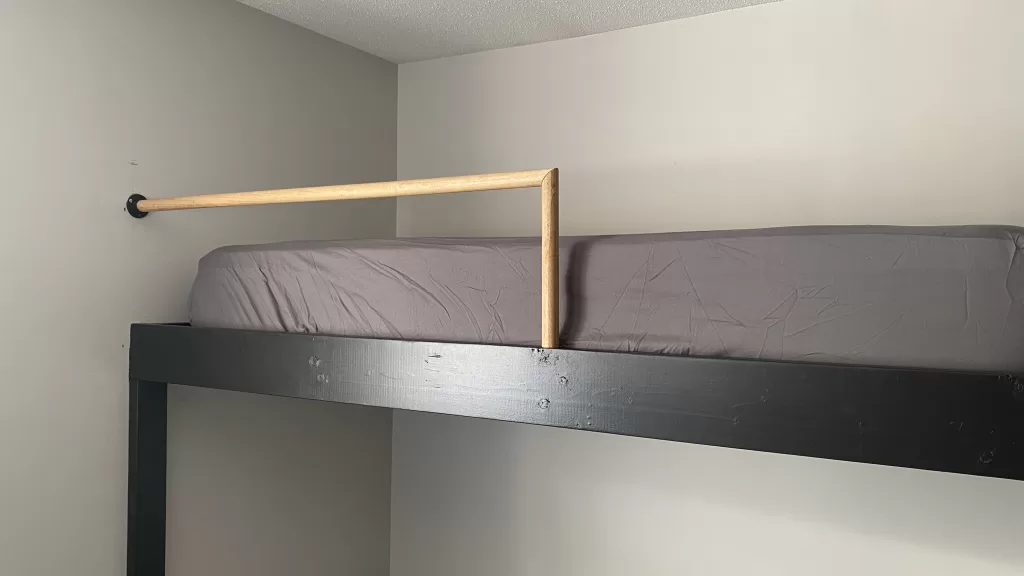
My design of our DIY bunkbed changed a a bit throughout the construction of the bunks, and we made some modifications on the fly to add additional support. I originally had 2x4's as the safety rail, then changed that to round dowel to complement the ladder, didn't need as many cross supports as I had originally thought, and changed the construction of the ladder.
You will thank me later. Paint all lumber and plywood before starting your cuts. You can easily touch up after and not have to worry about getting paint all over your walls.
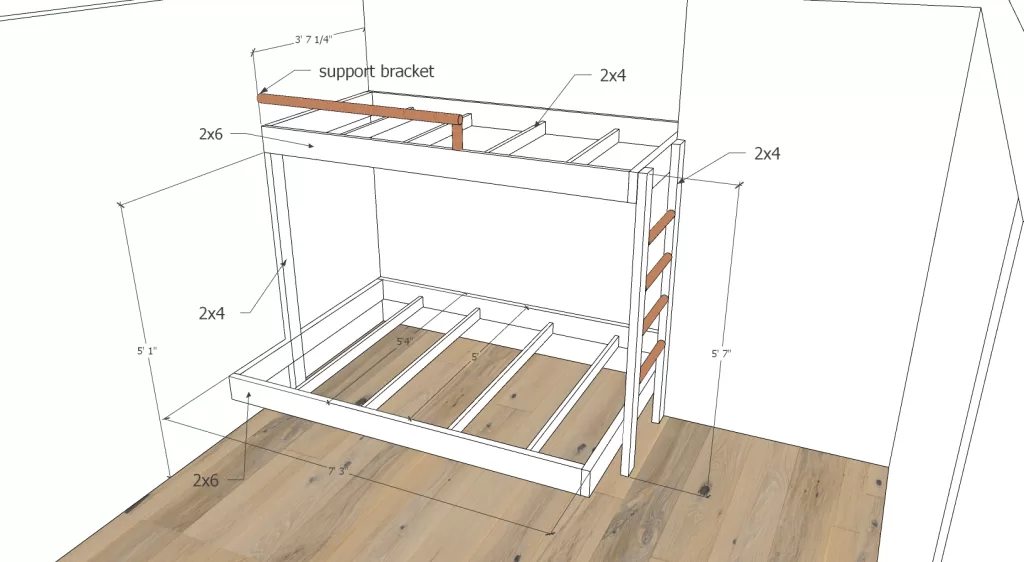
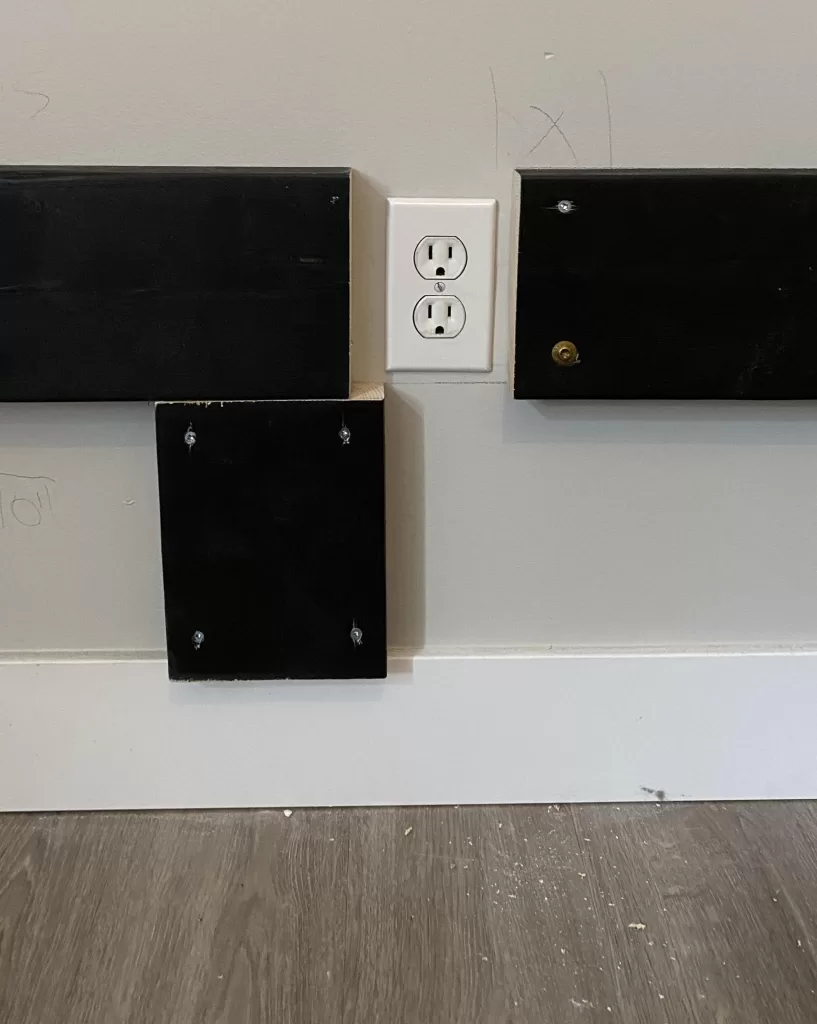
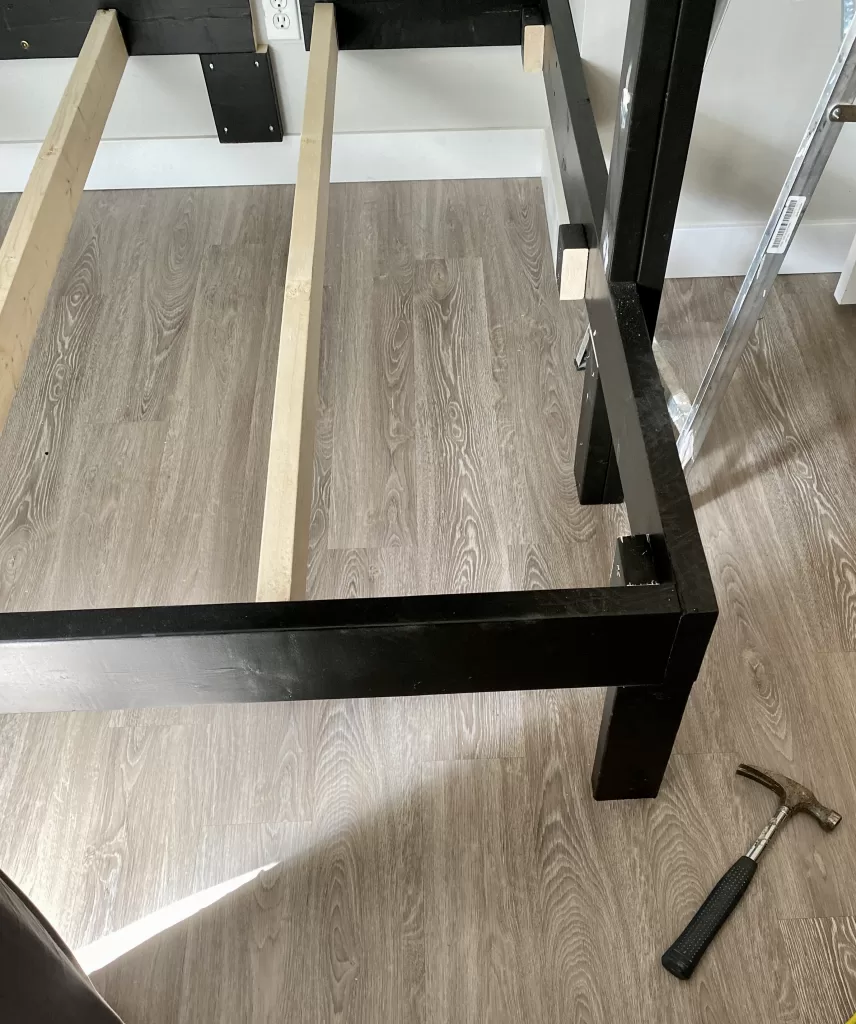
We had a nook in our guest bedroom so we decided to cut our boards to fit this nook to give us as much floor space as possible, and having walls on 3 sides would allow extra support. Remember, queen size mattresses are 60" x 80", and single mattresses are 38" x 75" so the top bunk will have a little extra room at the foot of the bed, or get a twin XL mattress which is 38" x 80". Attach the boards onto the wall directly into studs using the GRK Fasteners. We wanted 12" under the bed for storage bins, so we had electrical outlets to work around, we figured this out as we went along.
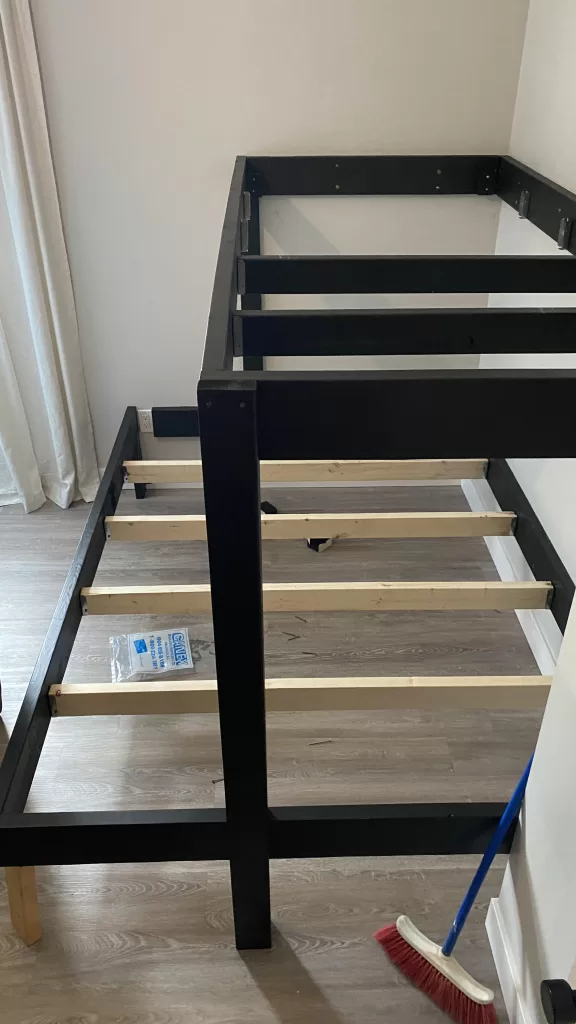
Attach the outer side rails by butting inside the top and foot rails and screwing in place. Use a temporary support in the corners if needed until you are ready to install the ladder.
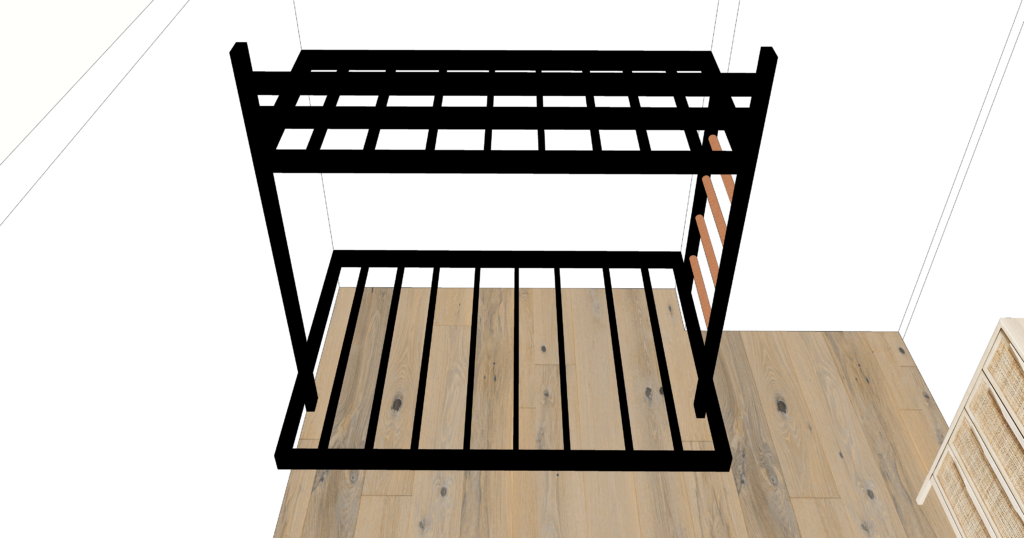
Install the joist hangers spaced equally.
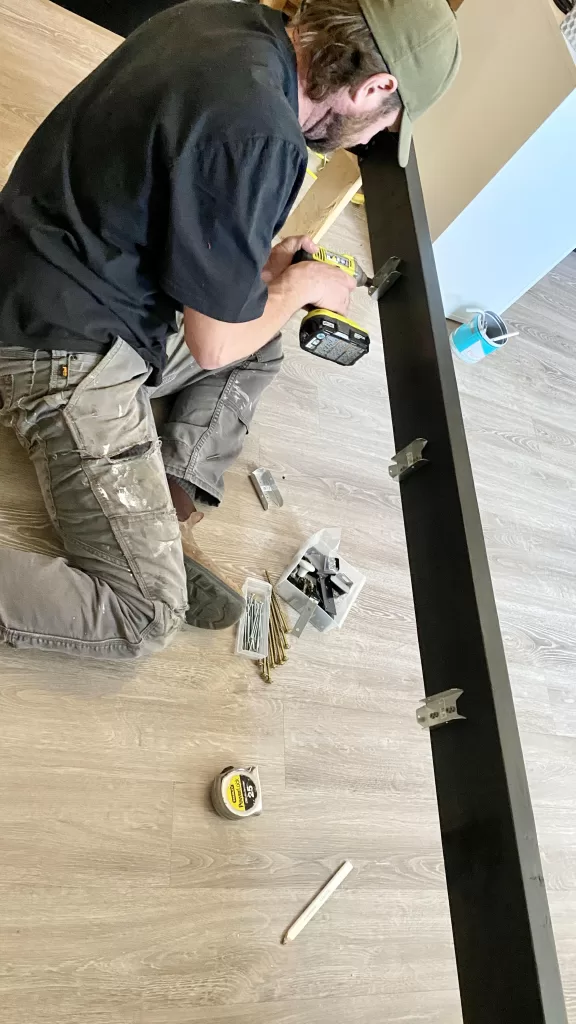
Measure (twice and cut once!) & install your 2x4 cross supports. These slide into the joist hangers, then get screwed in place. We saved paint and time by only painting the top bunk cross supports as you will never see the bottom bunk supports once the plywood and mattress are on top.
Install your pre-painted plywood on each bunk by screwing the plywood into the cross supports. I am all about saving time, so again to save time & paint, we painted only the perimeter of the visible parts, and the bottom of the sheet going on the top bunk as you will see it from the bottom bunk. A 4x8 sheet doesn't cover the entire width of the bottom bunk so we used a cut off from the top bunk to save on materials. This will not affect support in any way, this thing is literally built like a deck and could withstand an earthquake.
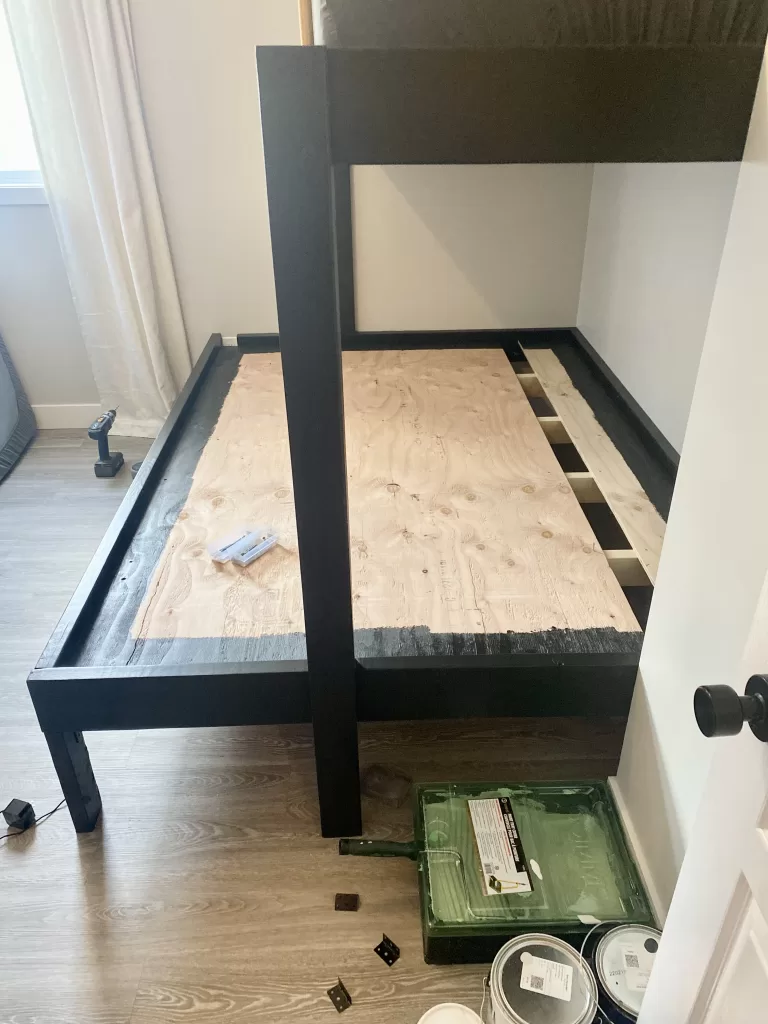

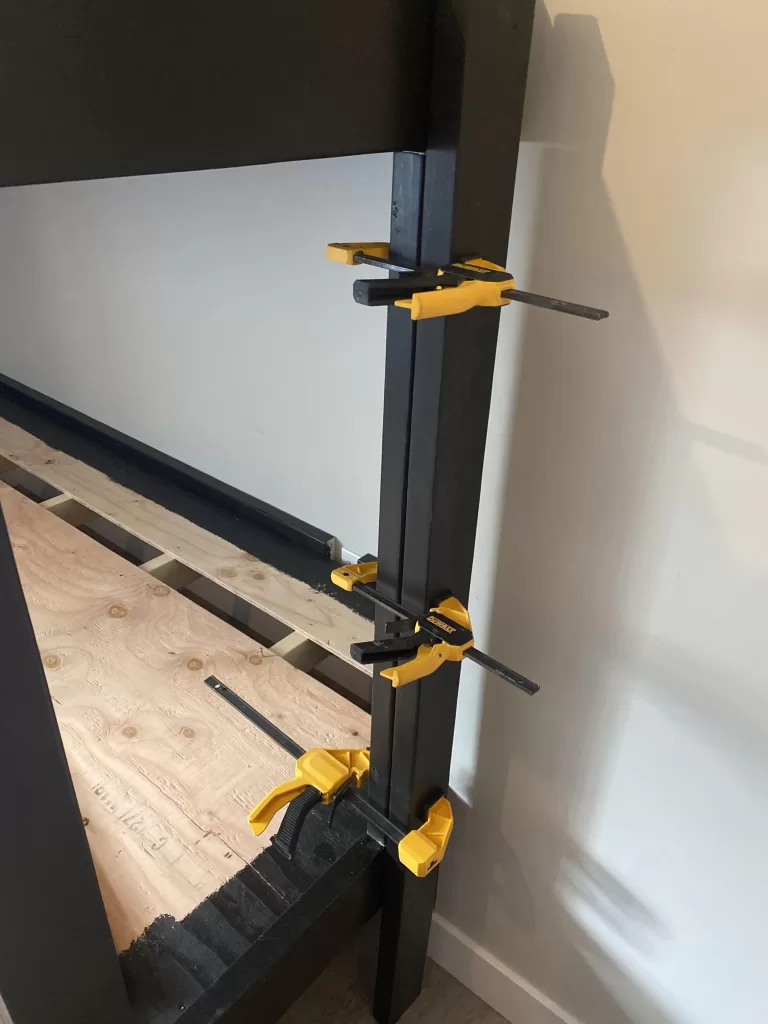
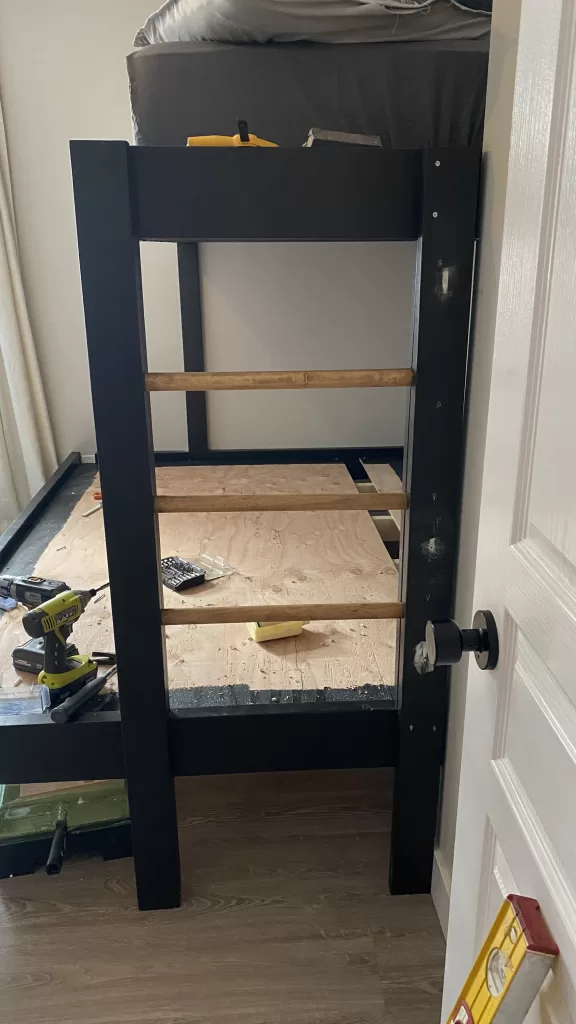
At this point we made some modifications on the fly. My original design of the DIY bunkbed created the illusion of a floating bottom bed, but we felt a little more support was needed and more important than aesthetics. I also changed the safety rail from 2x4's to the round dowel.
Although the ladder was going to provide most of the support, we decided to add some legs at the outer corners using cut-offs.
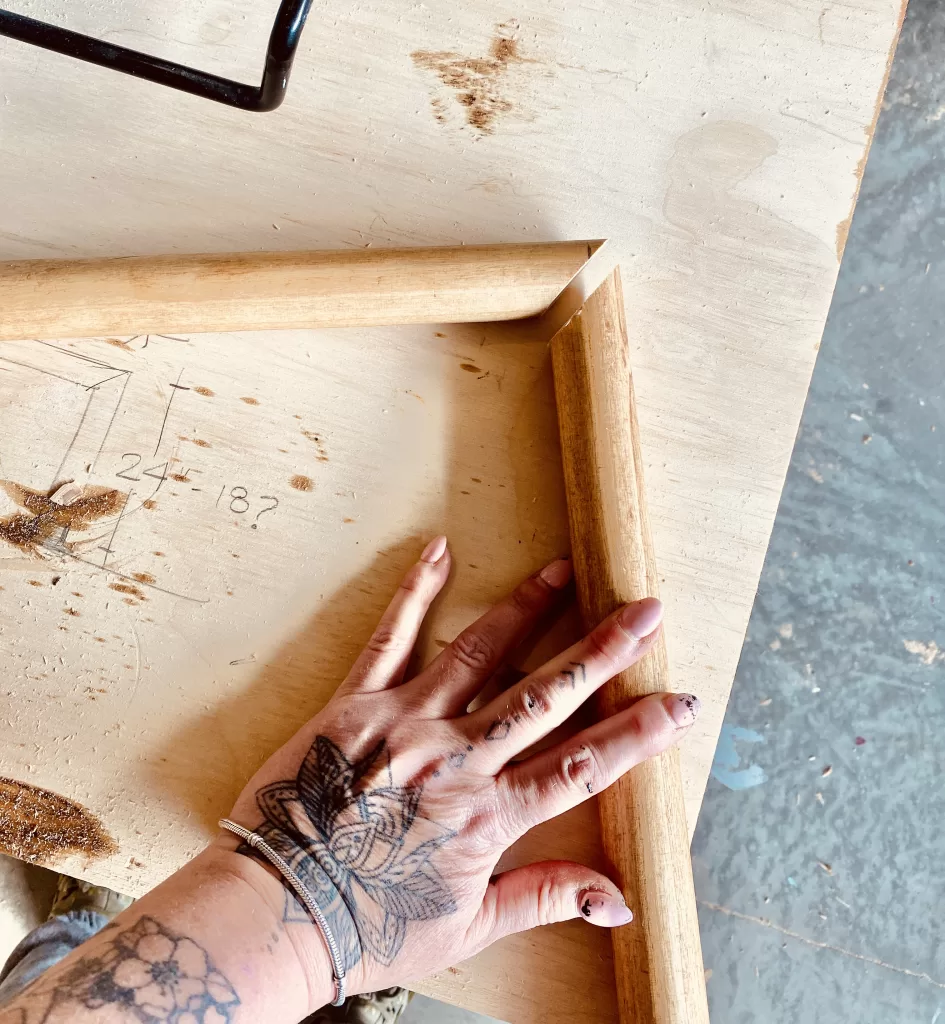
Measure the space between the bottom and top rail, cut two 2x4's to fit. Measure the outside from floor to the top of the top rail, cut two pieces. Assemble your ladder and dry fit it to ensure it fits the space.
Add wood glue between your boards, clamp and screw together. Remove and let dry.
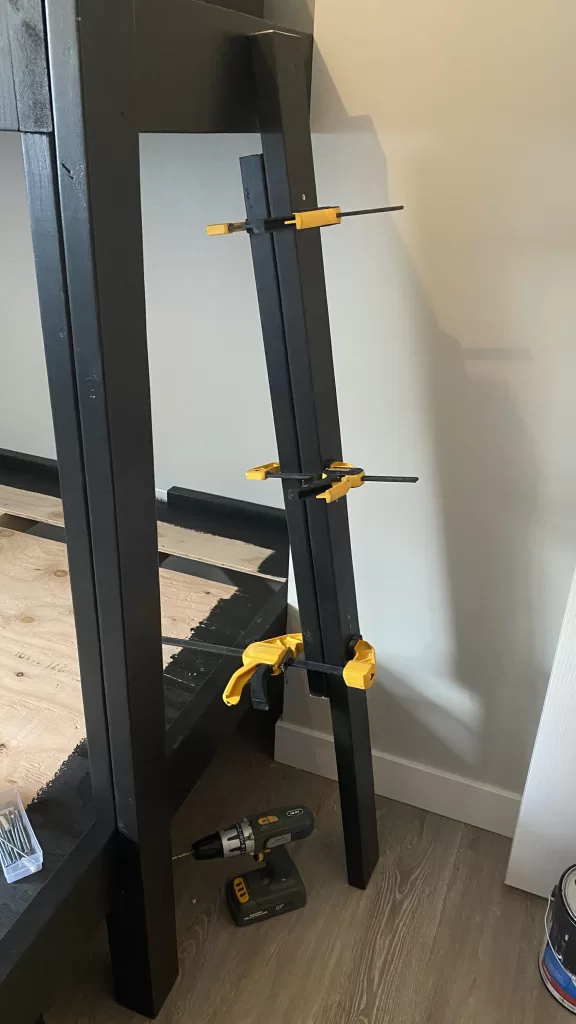
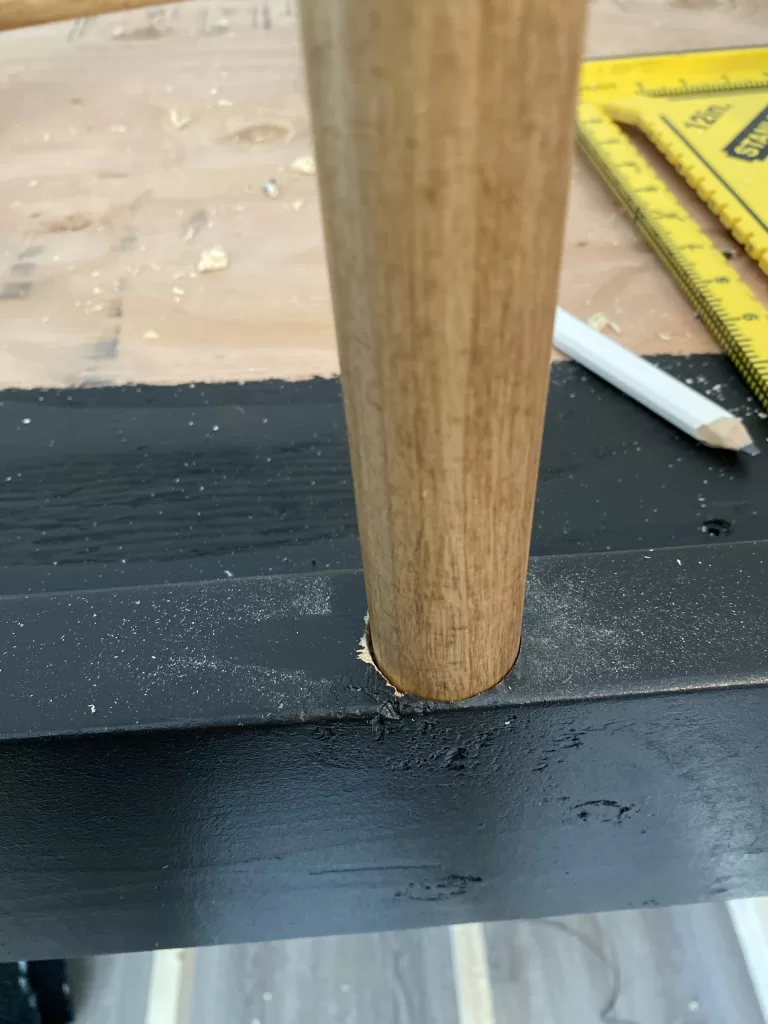
Measure the placement of the ladder rungs, and using the Forstner bit, drill holes to fit the rungs. Install one side of your ladder by screwing it to the outside of the foot boards. Insert glue into the holes, insert the rungs into the holes of the ladder you have attached. Then insert the rungs into the holes of the side of the ladder that you have not yet attached, make snug & and then screw that side of the ladder to the foot boards. Your ladder is complete!! You can start filling holes at this point so you can start on your safety rail while this dries.
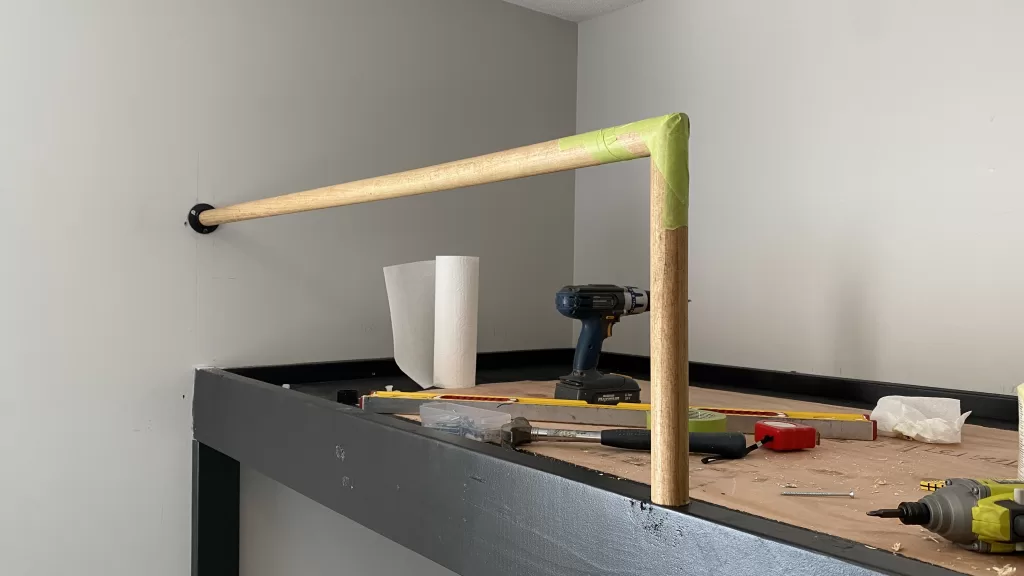
This is where you will need your miter saw. This can be any size you want really, and it will depend on the height of your mattress, so take that into account when measuring.
Make a 45 degree cut using your saw.
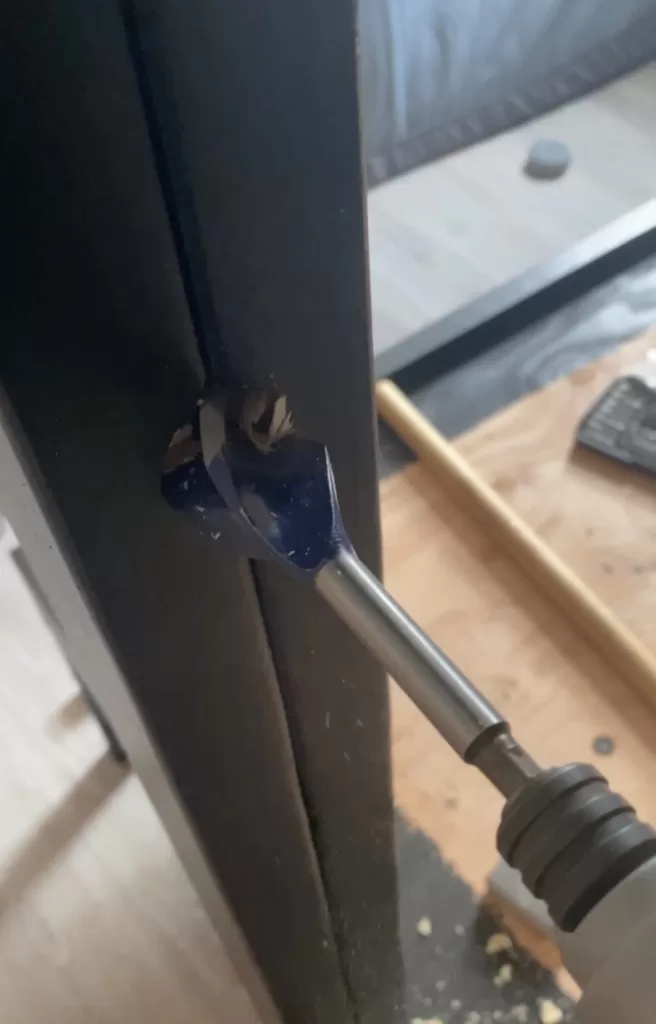
Using your Forstner bit, drill a hole very carefully into the top bunk side rail. You do not have much room for error here!
Place the wall bracket on the wall, and secure into place (you may need drywall supports if you don't hit a stud)
Place glue into the hole on the top rail, install the safety rail and let dry.
While this is drying, fill your holes using wood filler, let dry, sand & paint. The hard part is done, now onto the fun stuff!
I chose this striped bedding from Amazon and added some twinkle lights to the bottom bunks for our daughters.
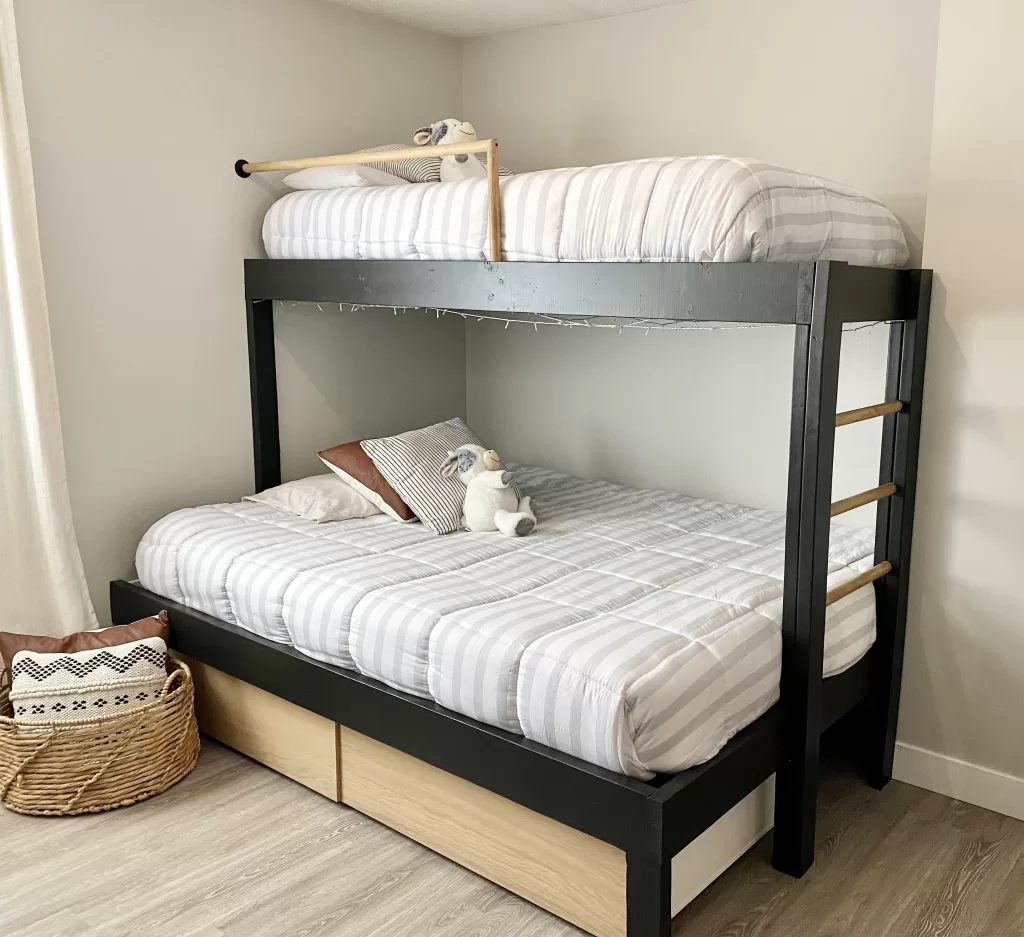
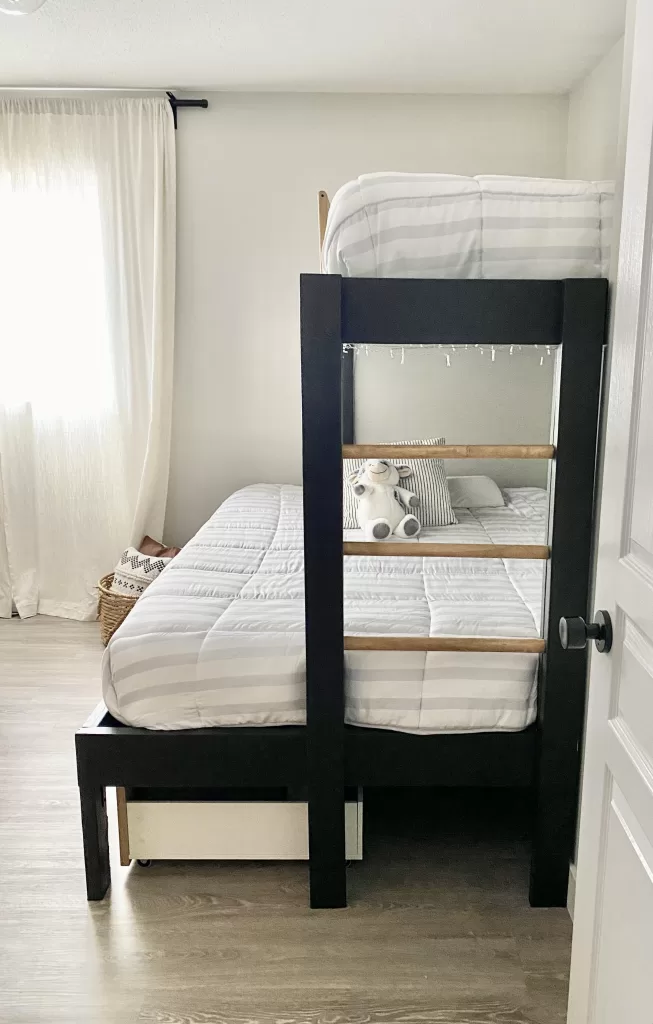
We ensured we had 12" under the bottom bunks for MALM underbed storage boxes from IKEA

If you enjoyed this tutorial on building your own DIY bunkbed's , please subscribe to my blog & newsletter for DIY projects, designer tips and resources. Happy DIY'ing!