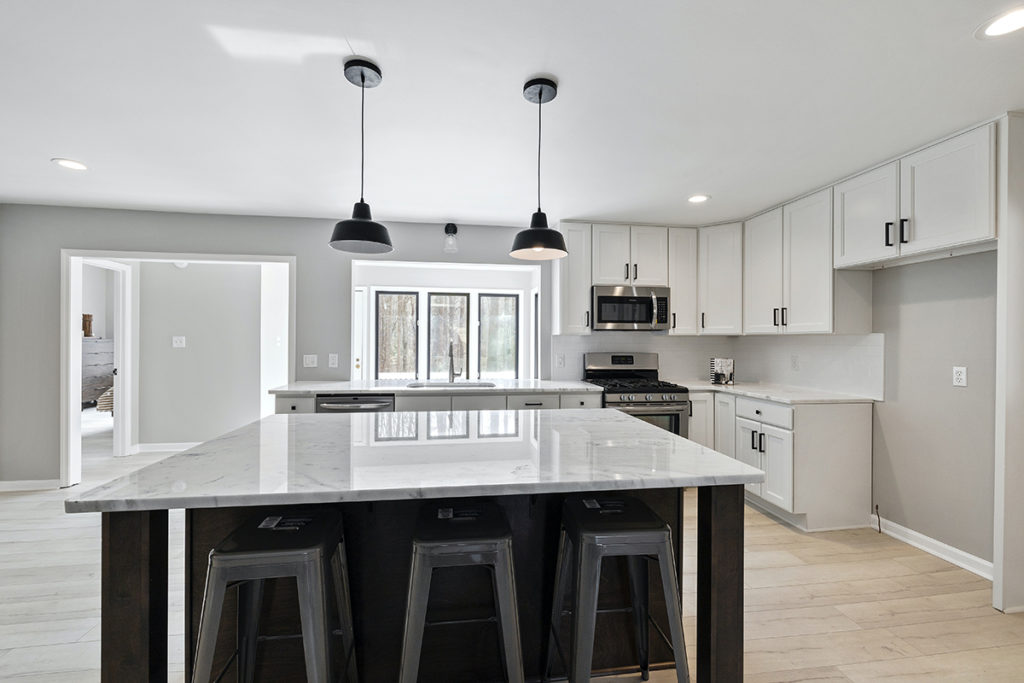
4 types of Interior Design Fee's

Interior design billing methods can vary depending on the complexity of the project and the preferences of the Designer. One common approach is the hourly rate method, where Designers charge clients based on the number of hours spent on the project. This method is suitable for smaller projects or those with a less defined scope. Alternatively, a flat fee or fixed-rate approach involves establishing a predetermined cost for the entire project, which can be advantageous for both the Designer and the client, providing clarity and predictability. Some designers may also use a percentage or square foot method. Regardless of the method chosen, clear communication and transparency in billing are essential to maintain a positive client-designer relationship.

Understanding the different billing methods

1 / FLAT OR FIXED FEE

This is the most common pricing model in Interior Design. The designer charges a predetermined, fixed amount for the entire project or for a specific phase of the project. This fixed fee is agreed upon between the designer and the client before the project begins, there are no surprises. The designer and the client define the scope of the project, outlining the specific services to be provided.

PRO'S

CON'S

2 / HOURLY

Charing clients hourly is another popular method for Designers to charge for their services, however it can leave uncertainty with clients as they may underestimate the time that is involved with designing a home. Setting expectations is crucial when billing your clients hourly, so there are no surprises or unwanted tension when your invoice arrives. Hourly rates vary greatly with Designers, you will want to know how long they have been in the industry, their qualifications, and what their markups are. Transparency is key when using the hourly method. You can expect to be charged anywhere from $150-$500+ per hour, the average being $200-250/hour.

PRO'S:

CON'S

3 / PERCENTAGE

The percentage of project cost method is based on the overall project cost. Percentage billing is a common method used by interior designers to charge for their services. In this billing structure, the designer charges a percentage of the total project cost as their fee. The total project cost includes expenses such as materials, furniture, labor, and any other relevant costs incurred during the design and implementation of the project. The percentage will vary between Designers due to location, market and project specifics, make sure to ask when your are researching designers to work with.

PRO'S

CON'S

4 / SQUARE FOOT

Square foot billing, or per square foot pricing, is another common method used by interior designers to charge for their services. This method of pricing is most commonly used for new build custom homes, large scale and commercial spaces. In this billing structure, the designer charges a fixed rate for each square foot of space they are working on. This method is often used for specific services, such as design consultation, space planning, or drafting. Square foot pricing can range between $5 per square foot, to $17+, depending on the inclusions.

PRO'S

CON'S

With any of the above methods, it is important to measure the value & expertise a Designer brings to your project. A well-drafted contract is essential to outline the terms and conditions of the fixed fee arrangement, helping to prevent misunderstandings and disputes. Designing your home should be exciting and as stress-free as possible. Hiring a Designer that no only designs but has a strong design process, is crucial to a well executed project.

If you need helping planning your next design project, please reach out. I’d love to discuss it with you!
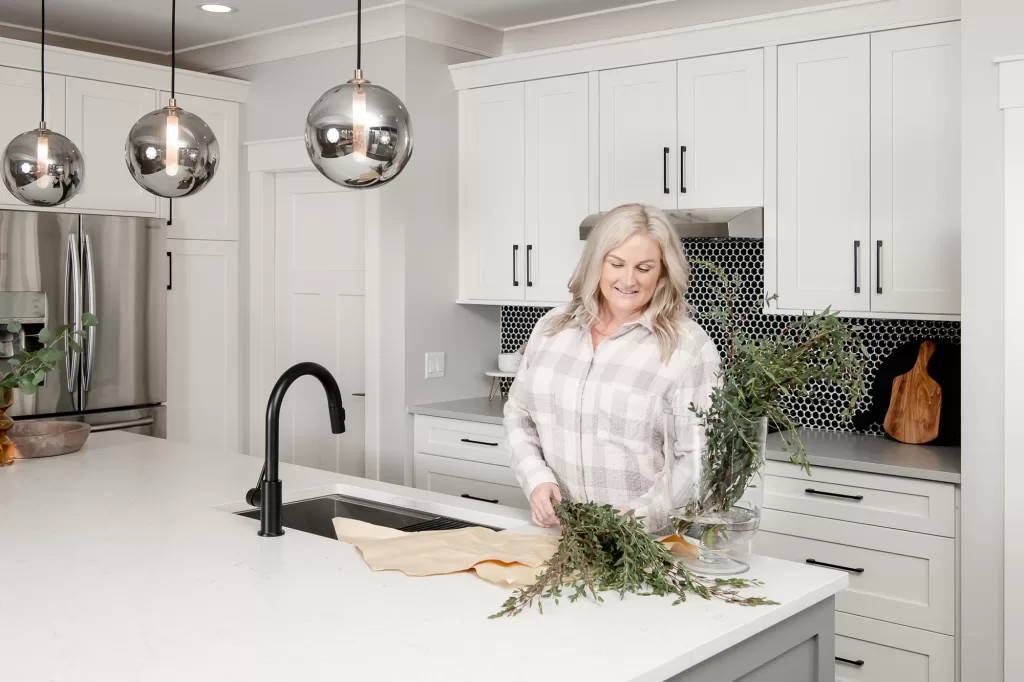
Kitchen Design for beginners

Designing your kitchen for the first time can be both exciting and a bit overwhelming. As a beginner in the world of kitchen design, it's essential to focus on creating a space that not only reflects your personal style but also functions seamlessly to meet your needs.

4 Tips to design the kitchen of your dreams

1 / THE WORKING TRIANGLE

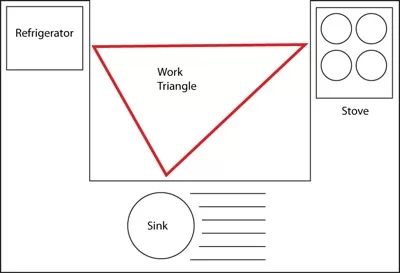
The kitchen working triangle is a design principle used to optimize the efficiency and functionality of a kitchen layout. The concept revolves around the three main work areas in the kitchen: the stove, the refrigerator, and the sink. These areas form a triangular layout, commonly known as the "kitchen work triangle." The goal is to minimize the distance and obstacles between these key elements, allowing for a smooth flow of work during food preparation. There are exceptions to this rule. In single wall kitchens, it's geometrically impossible to achieve a true triangle, but efficiency can still be achieved through the configuration of the three items, and how far apart they are.

Photo: Wikipedia

GUIDELINES FOR AN EFFECTIVE KITCHEN WORK TRIANGLE

  1. Triangle Dimensions:
    • The sum of the three sides of the triangle (distance between stove, refrigerator, and sink) should ideally be between 12 and 26 feet. This provides a balance between efficiency and spaciousness.
  2. Unobstructed Paths:
    • Ensure that there are clear, unobstructed paths between the key work areas. Avoid placing obstacles, such as islands or furniture, within the triangle.
  3. Efficient Layout:
    • Aim for a layout that minimizes unnecessary steps between the stove, refrigerator, and sink. This helps in optimizing the workflow.
  4. Consider Workflow:
    • Take into account the typical workflow in your kitchen. For example, you might want to place the dishwasher near the sink for easy dish transfer.
  5. Adapt to Kitchen Size:
    • The working triangle can be adapted to different kitchen sizes and layouts. In smaller kitchens, the triangle might be more compact, while larger kitchens may have a more spread-out triangle.
  6. Flexibility:
    • While the working triangle is a useful guideline, it's not a strict rule. The needs and preferences of the individuals using the kitchen should also be considered.

Remember that the working triangle is a design principle, and individual preferences, the size of the kitchen, and the overall layout should influence the final kitchen design. It's essential to strike a balance between efficiency and the overall functionality of the space based on the specific needs of the users.

2 / SPACE PLANNING & CIRCULATION

Planning your layout is the first step in designing the perfect kitchen. With proper space planning & design, you will not only achieve a beautiful space to cook meals, it will function well for you aswell.

If you are planning to have an island, you will want to have a minimum of 36"-42" inches between your island and perimeter cabinets and appliances. Ideally, you will have 42"-48" minimum for detached homes and town homes, 36" is the bare minimum usually seen in smaller homes such as condos & apartments. The average person requires at least 2 feet of space, so consider how many you wish to seat at your island, and multiply that by 2-2.5. If you want to seat 4, you need at least an 8 foot island.

Designs by Stephanie Hilton Design

3 / CHOOSING YOUR APPLIANCES

itchen appliances involves considering your cooking habits, lifestyle, budget, and the overall design of your kitchen. Consider integrated or built-in appliances for a seamless and cohesive look. Appliances that blend with the cabinetry contribute to a clean and modern aesthetic. Here are some tips to help you make informed decisions when selecting kitchen appliances:

  1. Define Your Budget:
    • Determine a realistic budget for your kitchen appliances. This will help narrow down your options and guide your choices.
  2. Consider Appliance Finish:
    • Choose an appliance finish that complements your kitchen's design. Stainless steel is a popular and versatile choice, but there are also options like black stainless steel, matte finishes, and classic white or black.
  3. Evaluate Your Cooking Needs:
    • Consider your cooking habits and needs. If you love to bake, you might prioritize a high-quality oven. If you entertain frequently, a spacious refrigerator and a reliable dishwasher may be essential.
  4. Research Appliance Brands:
    • Research different appliance brands, considering factors such as reputation, customer reviews, and warranty offerings. Choose reputable brands known for reliability and customer satisfaction.
  5. Energy Efficiency:
    • Look for appliances with the ENERGY STAR label. Energy-efficient appliances can save you money on utility bills and are environmentally friendly.
  6. Appliance Size and Capacity:
    • Ensure that the appliances you choose fit the available space in your kitchen. Consider the size and capacity of refrigerators, ovens, and dishwashers to meet your household's needs.
  7. Cooking Range:
    • Choose a cooking range that suits your cooking style. Options include gas, electric, and induction ranges. Consider features like convection cooking, multiple oven racks, and precise temperature control.
  8. Refrigerator Features:
    • Look for features such as adjustable shelving, humidity-controlled crisper drawers, water and ice dispensers, and energy-saving modes. Consider the layout of the refrigerator interior for optimal organization.
  9. Dishwasher Features:
    • Consider dishwasher features like adjustable racks, multiple wash cycles, and energy-efficient settings. Some dishwashers offer advanced features like smart technology and quiet operation.
  10. Microwave and Ventilation:
    • Choose a microwave that suits your cooking habits and kitchen layout. Consider built-in or over-the-range options. Ensure that your ventilation system effectively removes cooking odors and smoke.
  11. Smart Technology:
    • Explore appliances with smart technology features. Smart ovens, refrigerators, and dishwashers can offer convenience through remote control, scheduling, and integration with other smart home devices.
  12. Read User Reviews:
    • Check user reviews to gain insights into the performance and reliability of specific appliances. Real-world experiences from other consumers can help inform your decision.
  13. Consider Long-Term Costs:
    • While upfront costs are important, also consider long-term costs such as energy efficiency, maintenance, and potential repairs. Investing in quality appliances can be cost-effective over time.
  14. Coordinate Styles:
    • If you're updating multiple appliances, aim for a cohesive look. Coordinating styles and finishes can contribute to a unified and aesthetically pleasing kitchen design.

Designs by Stephanie Hilton Design

4 / KNOW YOUR FINISHES, FIXTURES & MATERIALS

When it comes to selecting your finishes, fixtures & materials for your kitchen, the options are truly endless and can be overwhelming. If you can familiarize yourself with what is available, the pros & cons of each, and the options to consider, it will help you narrow down what is suitable for your space. We have listed the most common and linked some resources for you:

  1. COUNTERTOPS:
  2. BACKSPLASH:
    • Use the backsplash as an opportunity to make a statement. Choose interesting tiles, patterns, or materials to add personality to the kitchen. A stylish backsplash can be a focal point in the room.
    • mosaic tile
    • subway tile
    • large format tile
    • quartz splash
    • quartz curb
  3. MILLWORK:
    • Consider incorporating open shelving to display attractive dishes, glassware, or cookbooks. This not only adds a decorative element but also provides easy access to frequently used items.
    • If space allows, include a kitchen island. Islands can serve multiple purposes, such as extra counter space, additional storage, or a casual dining area. Ensure there is enough clearance around the island for easy movement.
    • panel style - slab, shaker, raised panel, recessed panel, stained wood, louvered, glass
    • painted wood (not recommended as the rails & stile can separate)
    • painted MDF
    • veneer over MDF
    • HPL (laminate) over MDF
    • hardware or no hardware (pushlatch)
    • pullouts, organizers & interior fittings - Use organizers and dividers in drawers and cabinets to keep utensils, cookware, and pantry items well-organized. Customized storage solutions can maximize space efficiency.
  4. PLUMBING & LIGHTING:
    • finish - back, chrome, stainless, black stainless, nickel etc. (most finishes vary from one supplier to the other, keep this in mind)
    • mixing metals
    • options - touchless, pull down spray faucet etc
    • single bowl or divided bowl sink
    • decorative lighting vs. recessed - Install task lighting in key work areas, such as over the sink, stove, and countertops. This ensures adequate illumination for various kitchen tasks.
    • undercabinet lighting - Illuminate countertops with undercabinet lighting. This not only enhances visibility for food preparation but also adds a warm and inviting ambiance to the kitchen
    • accessible outlets - Install outlets with USB ports in convenient locations for charging electronic devices. This is especially useful for keeping devices accessible while cooking or entertaining.
    • designer outlets on your island or backsplash

Designs by Stephanie Hilton Design

I hope that that these design tips are helpful when planning your kitchen project.

Remember, as a beginner, it's okay to take your time exploring options and experimenting with different elements. The key is to design a kitchen that aligns with your lifestyle, preferences, and, most importantly, inspires you to create delicious meals and lasting memories. Happy designing!!

If you need helping planning your next design project, office or otherwise, reach out. I’d love to discuss it with you.

The Art of Shelf Styling: Elevate Your Home Decor

Shelves are more than just storage spaces; they are opportunities for creativity and self-expression to elevate your home decor. Whether you have a bookshelf, floating shelves, or a built-in unit, shelf styling is an art that can transform an ordinary space into a visually captivating and well-curated display. In this blog, we will explore the art of shelf styling and provide you with tips and inspiration to curate beautiful and personalized vignettes that are both visually appealing and purposeful.

DESIGN: STEPHANIE HILTON DESIGN (view project HERE)

9 TIPS TO STYLE SHELVES LIKE A DESIGNER

1 / DECLUTTER & EDIT

Before embarking on your shelf styling journey, take a moment to declutter and edit your belongings. Clear the shelves of unnecessary items and only keep objects that are meaningful, beautiful, or functional. This step will provide a clean canvas for your styling efforts and ensure that your curated display doesn't appear cluttered or overwhelming. Before diving into the world of shelf styling, begin by clearing out the clutter and creating a blank canvas. Remove all items from the shelves and give them a thorough cleaning. This step allows you to approach the styling process with a fresh perspective.

DESIGN: STEPHANIE HILTON DESIGN (view project HERE)

2 / PLAY WITH BALANCE & SYMMETRY

Creating a visually appealing display involves finding balance and symmetry. Start by dividing your shelves into imaginary vertical or horizontal sections, and aim for an equal distribution of visual weight. For example, if you place a large vase on one side, balance it with a stack of books or a group of smaller objects on the opposite side. Symmetry can be achieved by mirroring objects or creating a visually pleasing rhythm with repeated elements.   Place taller or larger items towards the edges of the shelves and gradually decrease the height as you move towards the center. Balance out different shapes, textures, and colors to maintain a harmonious composition.

DESIGN: STEPHANIE HILTON DESIGN (view project HERE)

3 / LAYERING, VARYING HEIGHTS & GROUPING

To add depth and visual interest, experiment with layering objects on your shelves. Place larger items at the back and smaller items in front to create depth and dimension. Varying the heights of objects will prevent a monotonous arrangement and keep the eye engaged. Use risers or books to elevate shorter objects and create a dynamic composition. Layering objects adds depth and dimension to your shelves. Play with different heights, textures, and sizes to create visual intrigue. Group similar items together, such as books or vases, to create a cohesive look. Experiment with varying angles and orientations to add movement and a dynamic feel to the arrangement.

DESIGN: STEPHANIE HILTON DESIGN (view project HERE)

4 / MIX TEXTURES, COLOURS & MATERIALS

One of the key elements of successful shelf styling is the thoughtful selection and arrangement of objects with different textures, colors, and materials. Combining various textures, such as rough ceramics, smooth glass, or woven baskets, adds tactile interest. Consider incorporating different materials, like wood, metal, or stone, to introduce visual diversity. Inject pops of color through books, vases, greenery or decorative objects that complement or contrast with the overall color scheme of the room.

DESIGN: STEPHANIE HILTON DESIGN (view project HERE)

5 / INCORPORATE GREENERY & NATURAL ELEMENTS

Bringing nature indoors can breathe life into your shelf styling. Add potted plants or fresh flowers to introduce a vibrant touch of greenery. Natural elements such as shells, coral, or driftwood can add an organic and beachy feel. These elements not only infuse freshness and vitality but also create a sense of harmony between the natural world and your home environment.

DESIGN: STEPHANIE HILTON DESIGN (view project HERE)

6 / MAKE IT PERSONAL

Shelf styling is an opportunity to showcase your personality and display personal mementos or collections. Incorporate items that hold sentimental value or reflect your hobbies and interests. Vintage cameras, travel souvenirs, pottery, family photographs, or treasured heirlooms can all become focal points of your shelf display, sparking conversations and adding a personal touch.

DESIGN: STEPHANIE HILTON DESIGN (view project HERE)

7 / CURATE WITH INTENTION

Avoid the temptation to overcrowd your shelves with too many items. Embrace the concept of minimalism and curate your display with intention. Negative space is just as important as the objects themselves, allowing the eye to rest and appreciate each item. Be selective and change the arrangement periodically to keep the display fresh and engaging.

8 / PAY ATTENTION TO NEGATIVE SPACE

Don't overcrowd your shelves. Negative space plays an important role in creating a visually pleasing arrangement. Allow some breathing room between items to highlight the objects and prevent the shelves from feeling cluttered. Embrace simplicity and let the empty spaces enhance the overall composition.

DESIGN: STEPHANIE HILTON DESIGN (view project HERE)

9 / EDIT & REASSES

Styling shelves is an ongoing process. Take a step back and evaluate your arrangement periodically. Edit and remove items that no longer fit the desired aesthetic or purpose. Embrace the freedom to experiment and evolve your shelf styling as your tastes and preferences change over time.

Shelf styling is an art form that allows you to showcase your creativity and personality. By following these tips and incorporating your unique style, you can transform your shelves into captivating displays that not only elevate the aesthetics of your space but also reflect your individuality. Remember, there are no hard and fast rules, so have fun, embrace your creativity, and let your shelves tell your story.

If you are still stuck and styling is just not your thing,  contact me and we can discuss how I can help you with furnishing & styling your home.

Coffee Table Styling Tips & Tricks

It may sound silly that there are tricks to styling a coffee table, you just put some stuff on it that you like and voila !  Right? Sure you can do that, but if you want to style your coffee table like a pro and enjoy looking at it rather than thinking “what is it missing?”, follow these 3 simple tips for a perfectly styled coffee table that you will love and your guests will envy.

3 TIPS FOR STYLING YOUR COFFEE TABLE LIKE A PRO

1 / THE RULE OF 3

The rule of 3 in design refers to the principle that items grouped in odd numbers are more visually appealing to the eye, and interesting to the human brain as odd numbers tend to challenge us. When styling your coffee table, arrange your items in odd numbers, typically three, as coffee tables don't offer a ton of space for more. If you do happen to have a large coffee table, do two or three groupings of three, or a grouping of three and one large accessory such as a vase, bowl or sculpture. This "rule"isn't set in stone, rather a guideline, sometimes one single statement piece is all a table needs. Play around with your groupings and accessories until it looks just right.

Design by Stephanie Hilton Design

2 / USE TEXTURE, PATTERN AND SCALED OBJECTS

Incorporating objects with various textures, shapes, pattens and sizes creates visual interest.  Try to avoid being “matchy matchy” and use items that are different heights, widths, and shapes such as vases, sculptural pieces, books (which can be used to create height variations on coffee tables as well as shelving displays).

Design by Stephanie Hilton Design

3 / BEAUTY & FUNCTION

Coffee tables are meant to be functional, but they should also be beautiful.  Don’t overcrowd your table with clutter, keep it simple and leave space for your coffee, beverage and to kick your feet up.  Scale is important when styling your coffee table, if your table is small, don’t use oversized pieces that take over your table.  And vice versa, if your table is large, use appropriately sized accessories, rather than many small pieces.   If you prefer a minimalist aesthetic, use a single  vase filled with greens or branches, or a large decorative bowl.

Design by Stephanie Hilton Design

These simple tricks should help you with your coffee table styling, and remember, these also apply to shelf styling, nightstands, console and entry tables aswell. There is something to be said about blank or white space, that in itself is interesting. Try not to space objects evenly and in a row, rather group your accessories leaving some blank space to separate your pairings and place objects at varying depths on your shelves, tables etc. Below are some inspirational images of some of our shelf and other tables styling work. Have fun and happy decorating!

If you need helping planning your next design project, office or otherwise, reach out. I’d love to discuss it with you.

Design by Stephanie Hilton Design

How to Create a Home Office Even if You Don’t Have a Spare Room

Covid changed the way so many of us work. For the first time in our lives we started working from home full-time. People started scrambling to big box retailers to find a way to create a home office. Corporate offices are still cautiously opening their doors and some of them have abandoned their office space altogether. 

What happens if you’ve been hanging on but see no end in sight? Suddenly you feel forced to start looking around your homes for a place to call your new 9-5 home. Yes, the dining room or sofa may have performed well as our makeshift office space but what happens when the temporary work-from-order still hasn’t been lifted? We need to eat at the dining table and rather than replace the sofa sooner than planned it might be better to carve out a space that’s a more permanent option. 

For most of us a home office doesn’t need to include bulky filing cabinets or executive desks that take up entire rooms in our house. We can get by with a laptop, a comfortable chair and a small desk. That means we can essentially be anywhere that we can create a few feet of space. Here are some easy ways to create a home office if you don’t have a spare room.

5 EASY WAYS TO CREATE A HOME OFFICE WITHOUT A SPARE ROOM

CREATE A HOME OFFICE IN THE KITCHEN

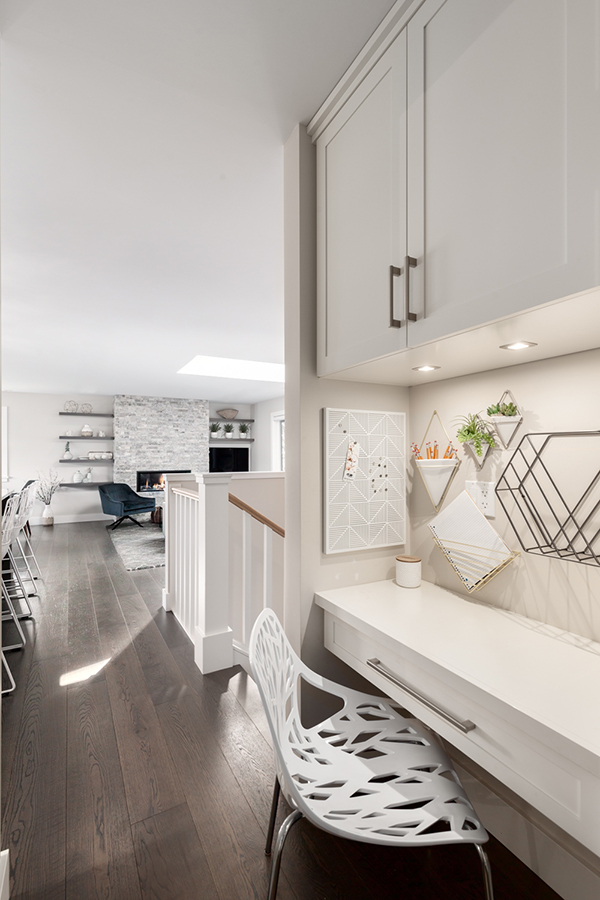
You don’t have to be renovating to build a small office in your kitchen. Look around and see if there are any walls that haven’t been fully maximized. With just 30”-36” of unused wall space you can add a sleek desk. If you need more, install some shelving above the desk to hold baskets for messy office supplies. Now you’ve turned a weekend project into a home office.

If you are planning a renovation then you’re really in luck and you can plan for everything you need. Closed shelving above, an electrical outlet on the desk, extra lighting. Whatever you need, add it to the list. And in spite of the custom look, it doesn’t cost much to add this to your renovation budget. It’s more labour than materials but it can be done quickly if it’s designed ahead of time. 

In this recent renovation my clients requested that I design a homework station/office. It integrates so beautifully into the space and doesn’t scream office. The beauty of planning a design like this into your kitchen reno is that it looks like a completely intentional part of the kitchen. If you’re adding a small office design to your renovation don’t forget to include lighting into the overhead cabinet and keep it on its own switch. That way, you can work at night without having your entire kitchen lit up.

Designs by Stephanie Hilton Design

TURN A CLOSET INTO AN OFFICE

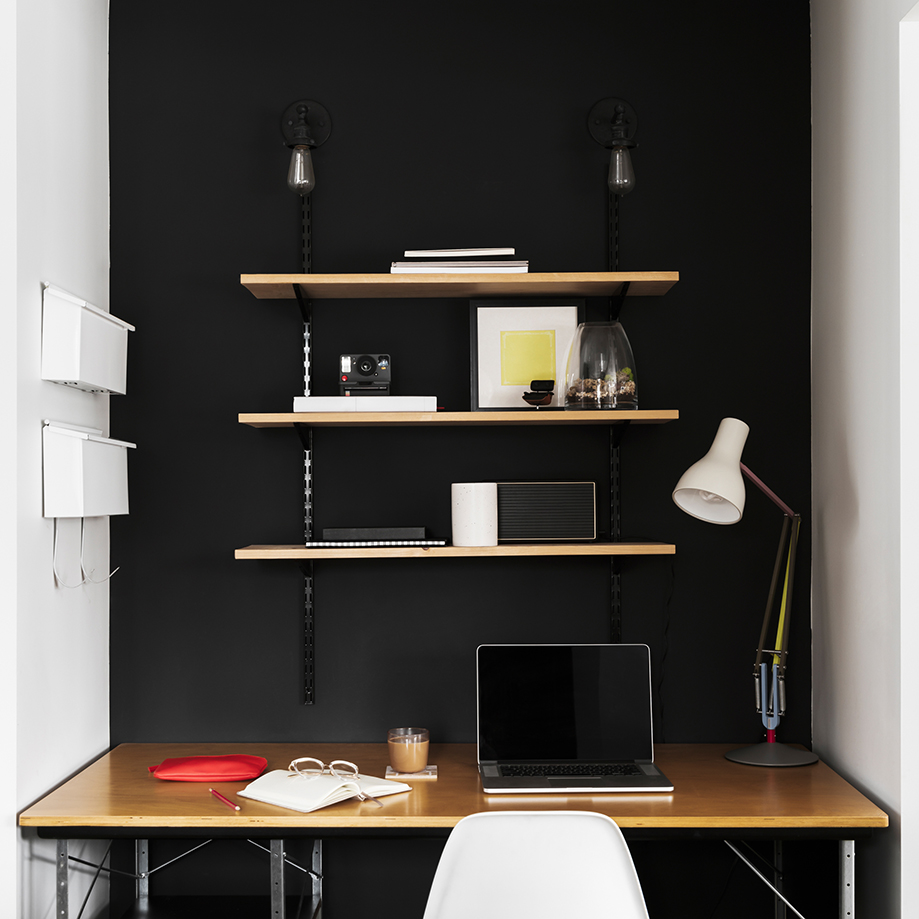
If you have a guest room or a tv room that is being occupied can you claim the closet? If so, that’s usually enough room to create a small home office. You may not always fit a desk inside but you (or someone handy) can create a stretch of desk space by installing some lumber and creating a makeshift desk. 

The chair can be positioned in the room when it’s not in use. You can also use baskets to hold any office supplies up on the higher shelves. Make sure to add some decorative objects on the shelves so if you leave the doors open when not in use it feels like part of the room.

CREATE A HOME OFFICE IN YOUR LIVING ROOM OR HALLWAY USING A CONSOLE TABLE

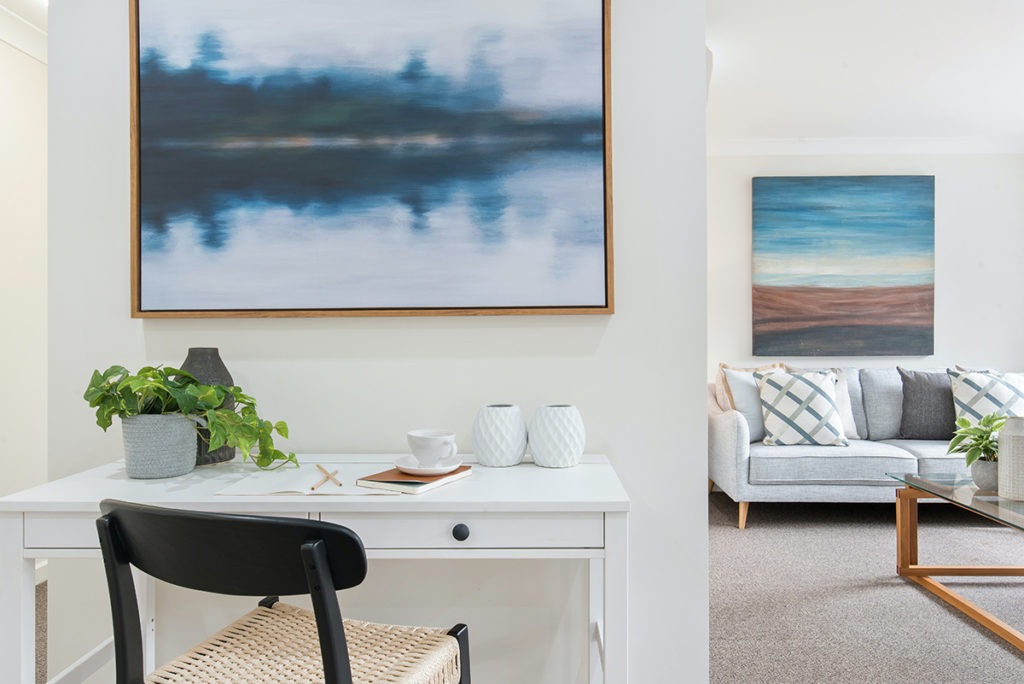
If you don’t want to add a desk to your living room you can opt for a console table which tends to be less deep than a desk. Look for ones that come with sleek drawers for hiding some of  your smaller office supplies. At the end of your work day you can just close up shop and your console goes back to its primary purpose.

The beauty of this option is that you don’t need to invest in a piece of furniture that you may end up not using in the future (assuming we ever go back to “normal”). 

UTILIZE SPACE IN YOUR BEDROOM

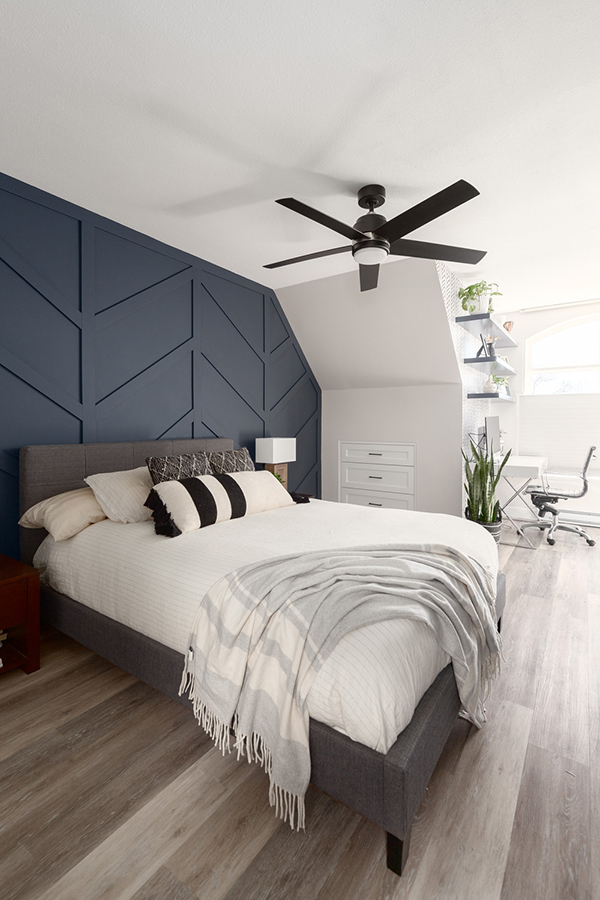
If you have enough space beside your bed you can switch out your traditional nightstand and instead use a desk. It’s still a functional nightstand in the evening but during the day you pull out your laptop and get to work. The added bonus is that it usually comes with a lamp and electrical outlet close by which means you have built in office necessities. 

Even better is if you have a small or awkward space that’s not being used. Some of my clients struggle with how to use those little nooks in a bedroom but this is a gold mine if you need an office space.

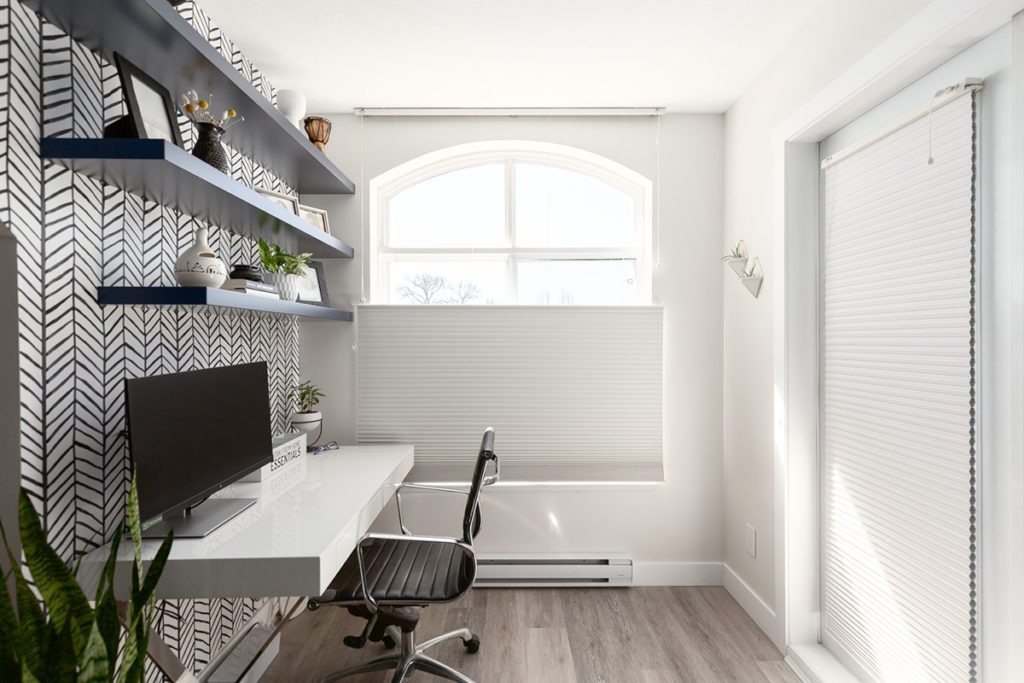
With just a bit of creativity you can turn that unused space into a comfortable office that looks like it was designed for just that purpose. These clients had a small, unused space in their bedroom combined with a need for a small office. Look at how amazing this turned out. By treating it like part of the room, it’s not just functional but it actually enhances the aesthetics of the entire room.

Designs by Stephanie Hilton Design

CREATE A HOME OFFICE USING A WALL SHELF

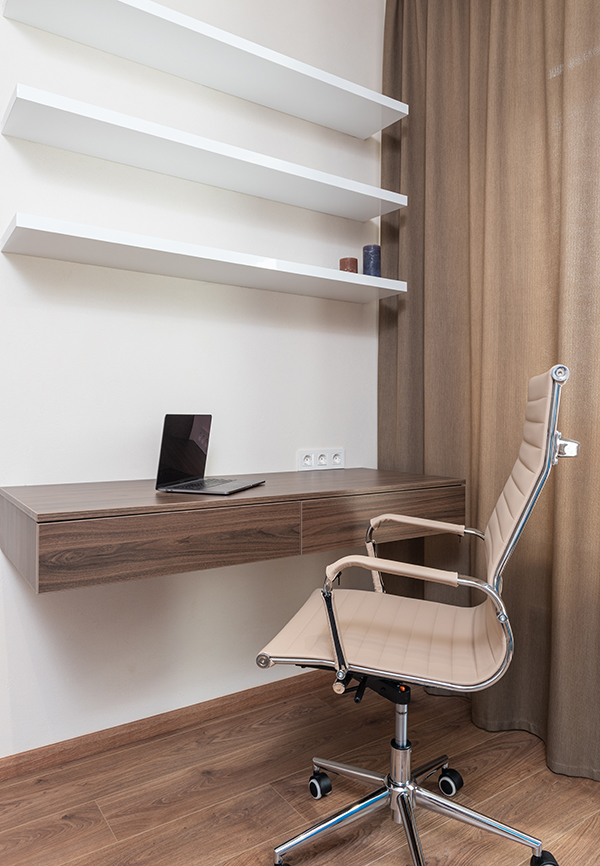
If you’re really tight on space you can install a floating shelf and you have an instant home office. It’s just enough space for a laptop. If you know you’re committed to working here for a while, invest in these floating desks that are designed for small spaces. They’ll give you the extra drawer space for cords and chargers you need without taking up any extra floor space.

If you need more than just the basics you can add another shelf (or a couple) higher up and use baskets with lids to hold your laptop and office supplies when you’re not working. Nobody will ever know this is  your home office. And again, don’t forget the decor.

If you’re doing this in your bedroom you can skip the shelves and add a mirror above the desk. Now you’re really making it work double duty by turning it into a daytime makeup station.

I hope this gives you some inspiration to move off your sofa and give yourself a proper home office.

If you need helping planning your next design project, office or otherwise, reach out. I’d love to discuss it with you.

The 5 Stages of a Successful Renovation

If you’re not in the design or construction industries, you might be confused by this title. 5 stages of renovation? Well you’re not alone if you thought that a renovation consisted of a beginning, a middle, an end and nothing more. Most of my clients don’t know this either until I spend the time and break it down for them. There are 5 stages of a renovation and they flow from one to the next but only when each one is completed thoroughly. Any change or deviation can cause delays or even work disruptions. So let’s get into it and I’ll give you a complete breakdown of these stages.

LET’S BREAK DOWN THE 5 STAGES OF A RENOVATION

STAGE 1 – THE PLANNING STAGE

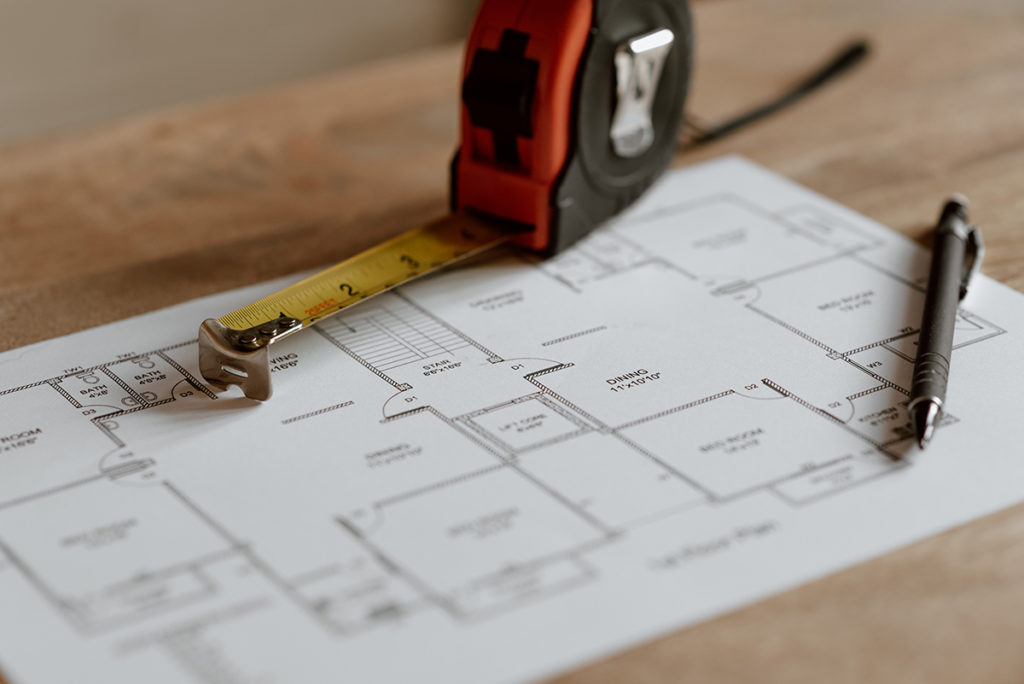
From the design perspective this is probably the most important stage. During this time we brainstorm what’s possible and what your dreams and goals are. Your primary team is called in at this stage. A renovation is always more successful when you’ve gathered the designer, the general contractor and the trades at this early stage. This is where you’ll get the most teamwork because everyone has a chance to collaborate. Need more help understanding how to plan for a renovation? Read this post.

During this period we not only look at the footprint of the space but we start to dream up the way the space will function. It may take a while if there are revisions being made but it’ll be worth it to take your time. Since so many decisions later are dependent on this phase, take the time and get your budget and plans perfected before you move on.

floor plans with tape measure

STAGE 2 - DEMOLITION STAGE

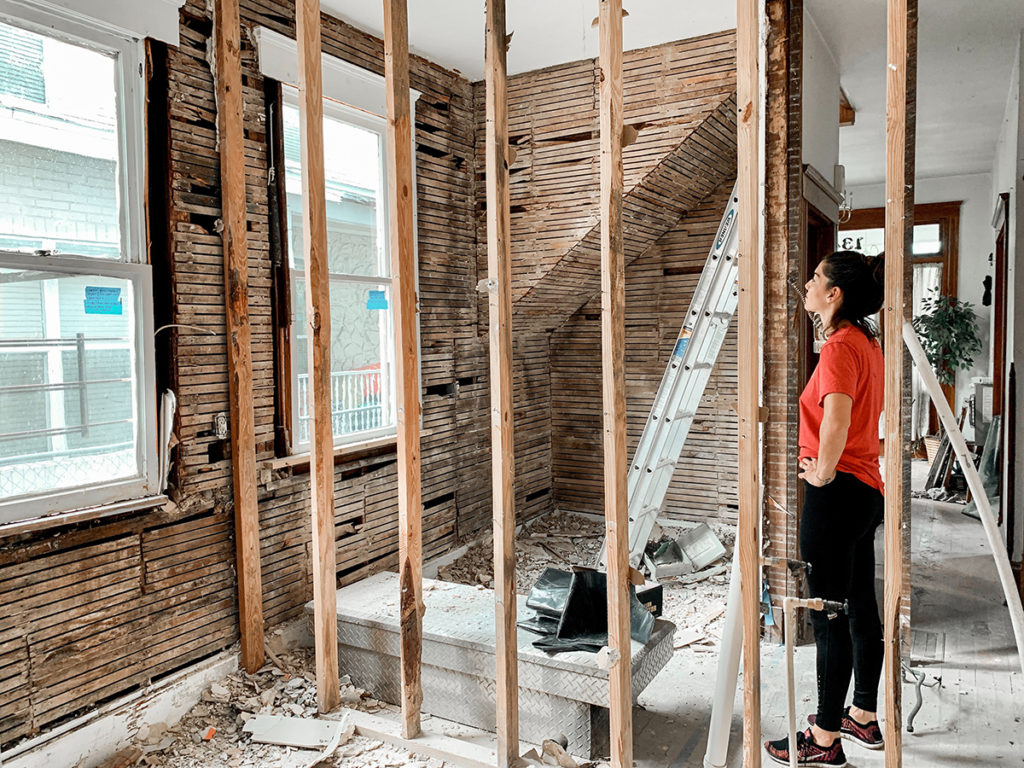
It’s going to get dirty at this point! This is where the general contractor manages the trades and your old space is removed. More than likely, you’re going to end up with a not-so-attractive dumpster living at the front of your home for a while. 

If walls are coming down you’ll also likely be removing wiring. Depending on the scope of the project you may be removing flooring, cabinetry, windows and even doors. This is exciting for most homeowners because it signals the beginning of the real work. It’s also exhausting if you’re planning to live in your home during this phase. You need to be prepared for major disruptions, early morning visits from trades and a makeshift arrangement for any of the rooms that are being demolished. 

It can quickly become a stressful situation so prepare yourself as best you can for what this will look and feel like.

woman inspecting demolition

STAGE 3 - CONSTRUCTION STAGE 

Once you’ve survived the demolition phase it’s time to get the bones of the project into place. This is the “rough in” stage and these are the elements that are contained under the floors and behind the walls. All of your HVAC, electrical and plumbing systems are installed now and you’ll likely see an inspector coming by during this period as well. 

If you’re hesitant about anything you’ve previously committed to this is the time to bring it up and resolve it. Once everything is installed and approved it will be very costly and very messy to change things. Even a small change like where your shower head is installed needs to be finalized at this time. Changes like that, although it seems insignificant, will cause a ripple effect of setbacks and delays.

man with saw cutting wood

STAGE 4 - FINISHING STAGE 

In my experience as a designer, I’d say this is where homeowners start to get past the fatigue of the renovation and actually start to enjoy it again. Now the new space is starting to materialize and it’s possible to imagine the end result.

At this point everything new is installed. Floors, cabinetry, countertops, millwork, light fixtures and on and on. Your house will be buzzing with activity during this phase because you can have multiple trades working at the same time. Cabinets can be installed in the kitchen while flooring is installed in the bedrooms for example. 

Your designer will be present during this stage to ensure that all of the installations go according to plan. Everything needs to be examined, from the countertop profile to confirming that the materials arriving on site are correct. 

Every day during this phase you’ll see something new and your updated home will start to slowly unfold before your eyes. You’re still a way from the finish line but there’s hope now.

white kitchen with black island and pendant lights

STAGE 5 - CLEANUP AND WRAP UP STAGE

At this point, most of the major work has been completed. There will be some trim and finish work but most of the trades will have finished up. During this phase you could possibly even start using some of the spaces. It’s possible to stop making those daily Starbucks trips and start brewing your own coffee at home. 

Your space should be working as intended and you’re close to the finish line.

The last part of this phase is the punch list meeting. This is where the homeowners, the designer and the general contractor meet at the space to discuss what needs to be completed and/or remedied. It’s essentially a list of things that may have been overlooked or in need of some attention. This meeting typically takes place a week or two before completion and that gives everyone a chance to get the final pieces in place.

After that you have yourself a brand new space. You may be vacuuming and sweeping thin layers of dust for a while but you have a beautiful, completed home.

dusting mirror

Did you find this breakdown helpful? Was there anything about it that surprised you? If you want to discuss how I can help you with your upcoming renovation, reach out below and book a free consultation with me. I’d love to help you create the home you’re dreaming of.

And be sure to download a copy of my free Renovation Planner. This will help you take the stress out of your upcoming project.